The Best Way to Render Frosted Glass in KeyShot
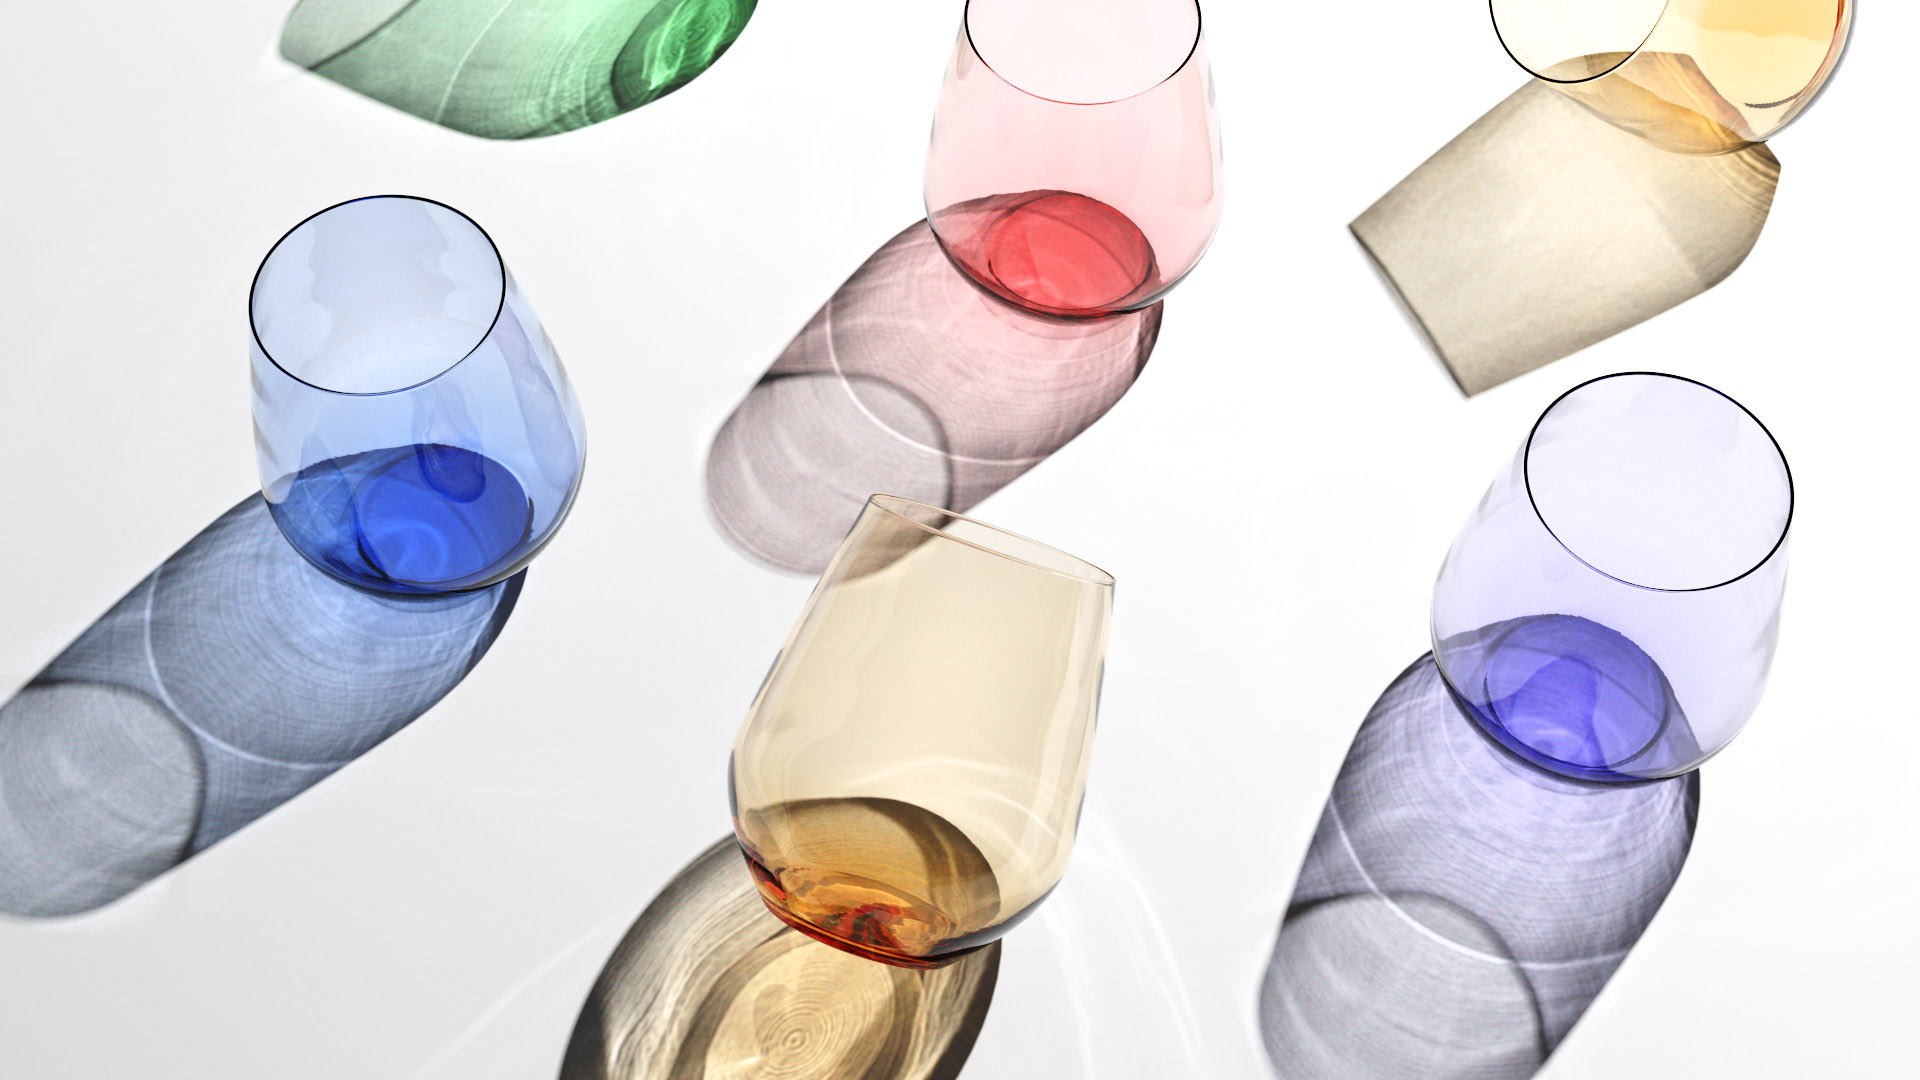
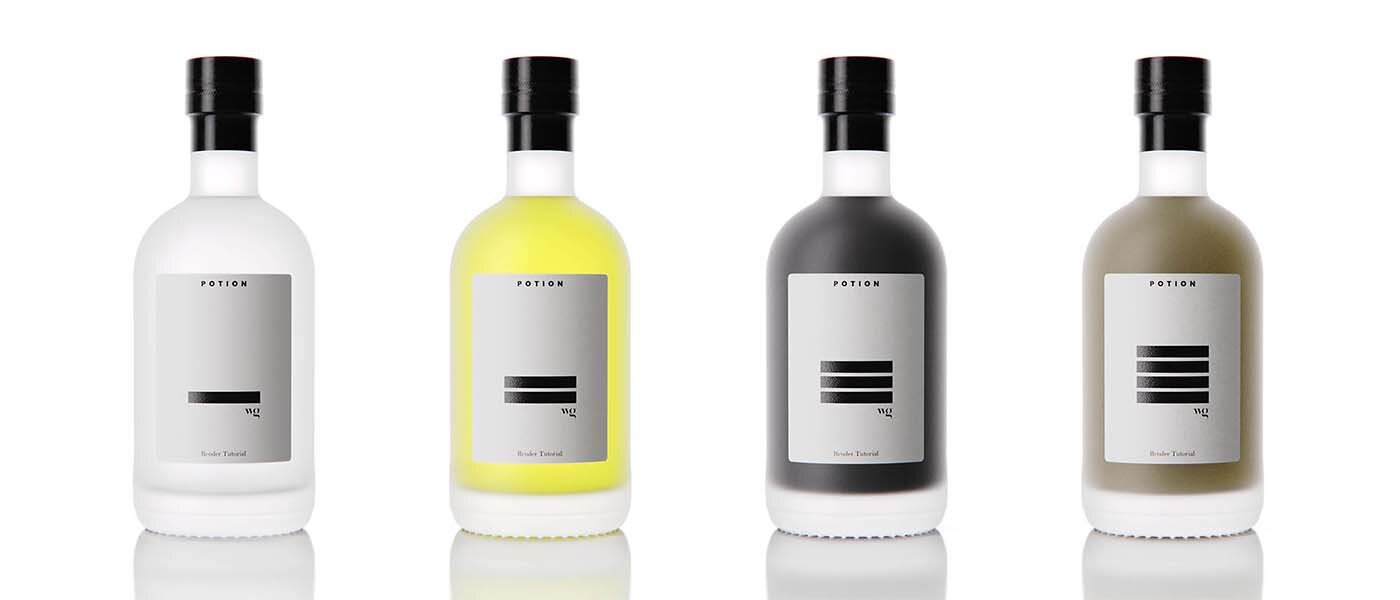
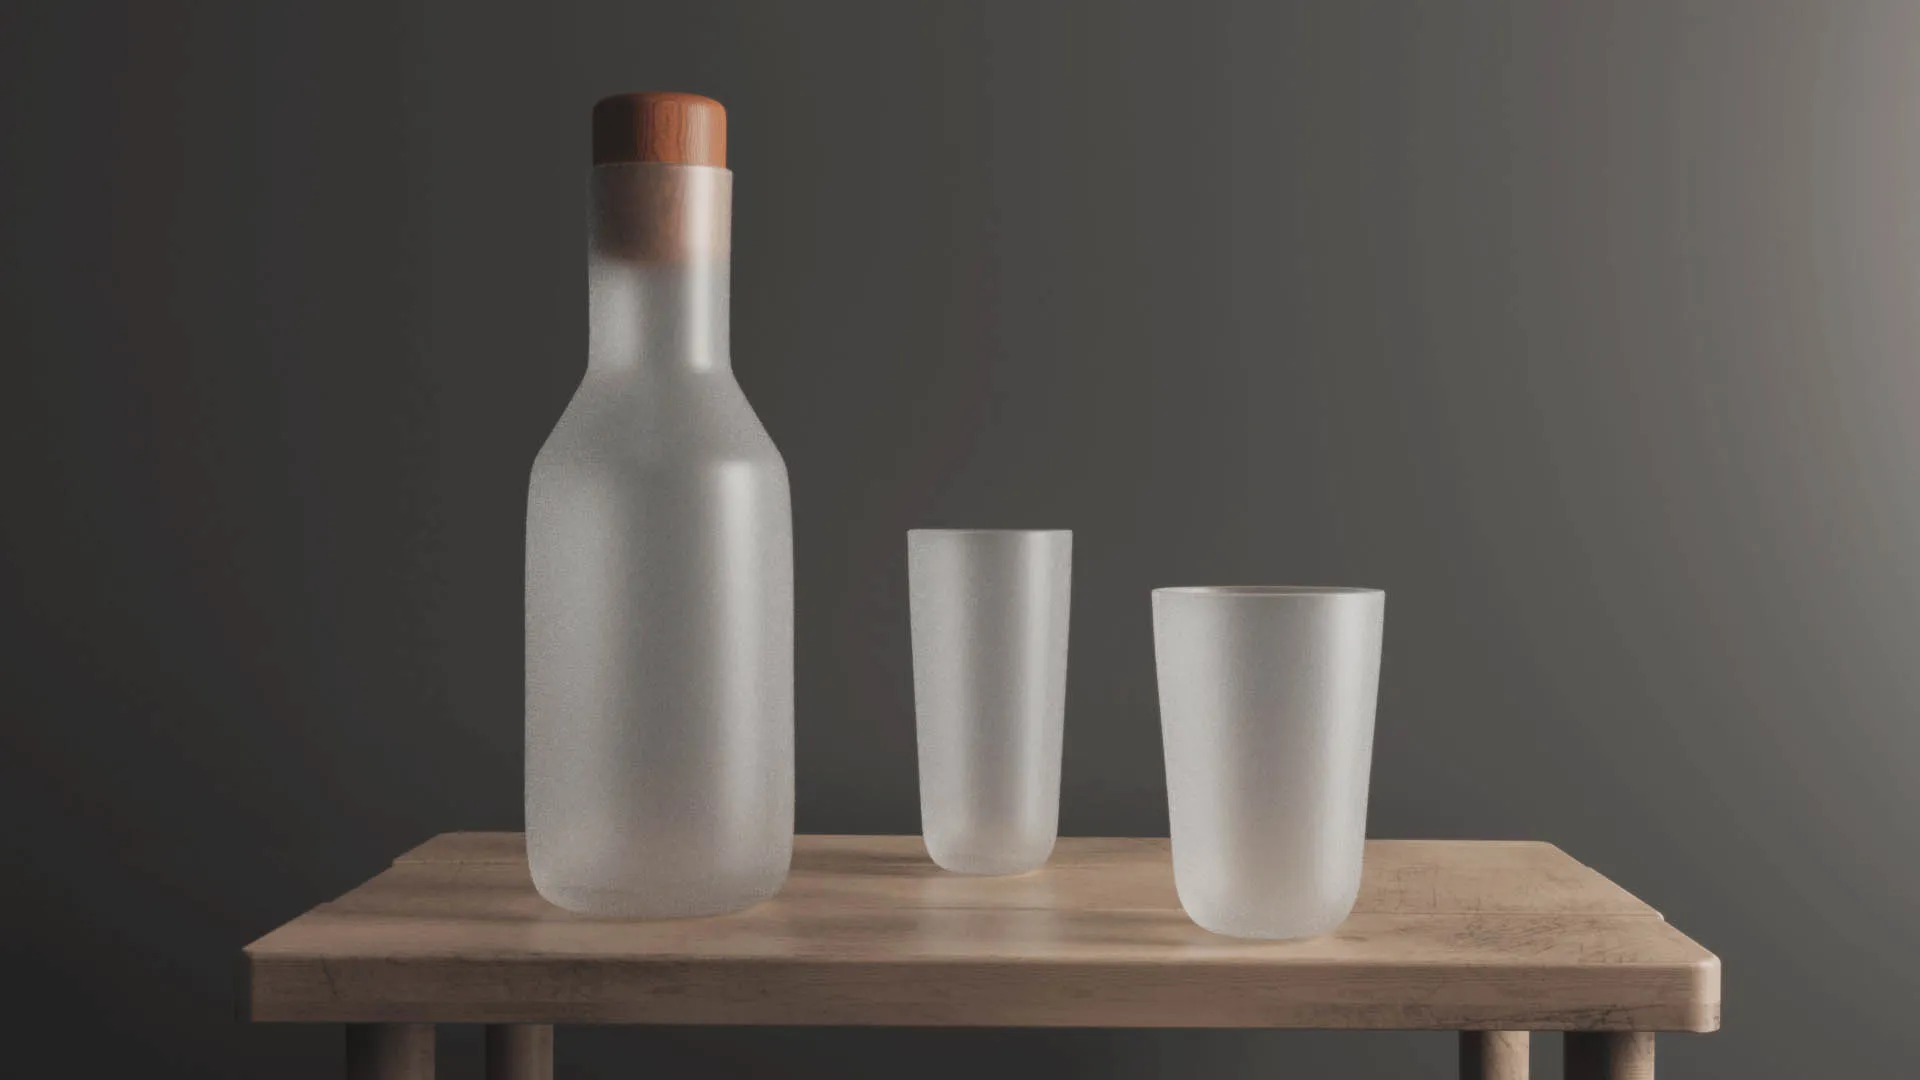
So, you want to render beautiful, bright frosted glass like you see in the image below?
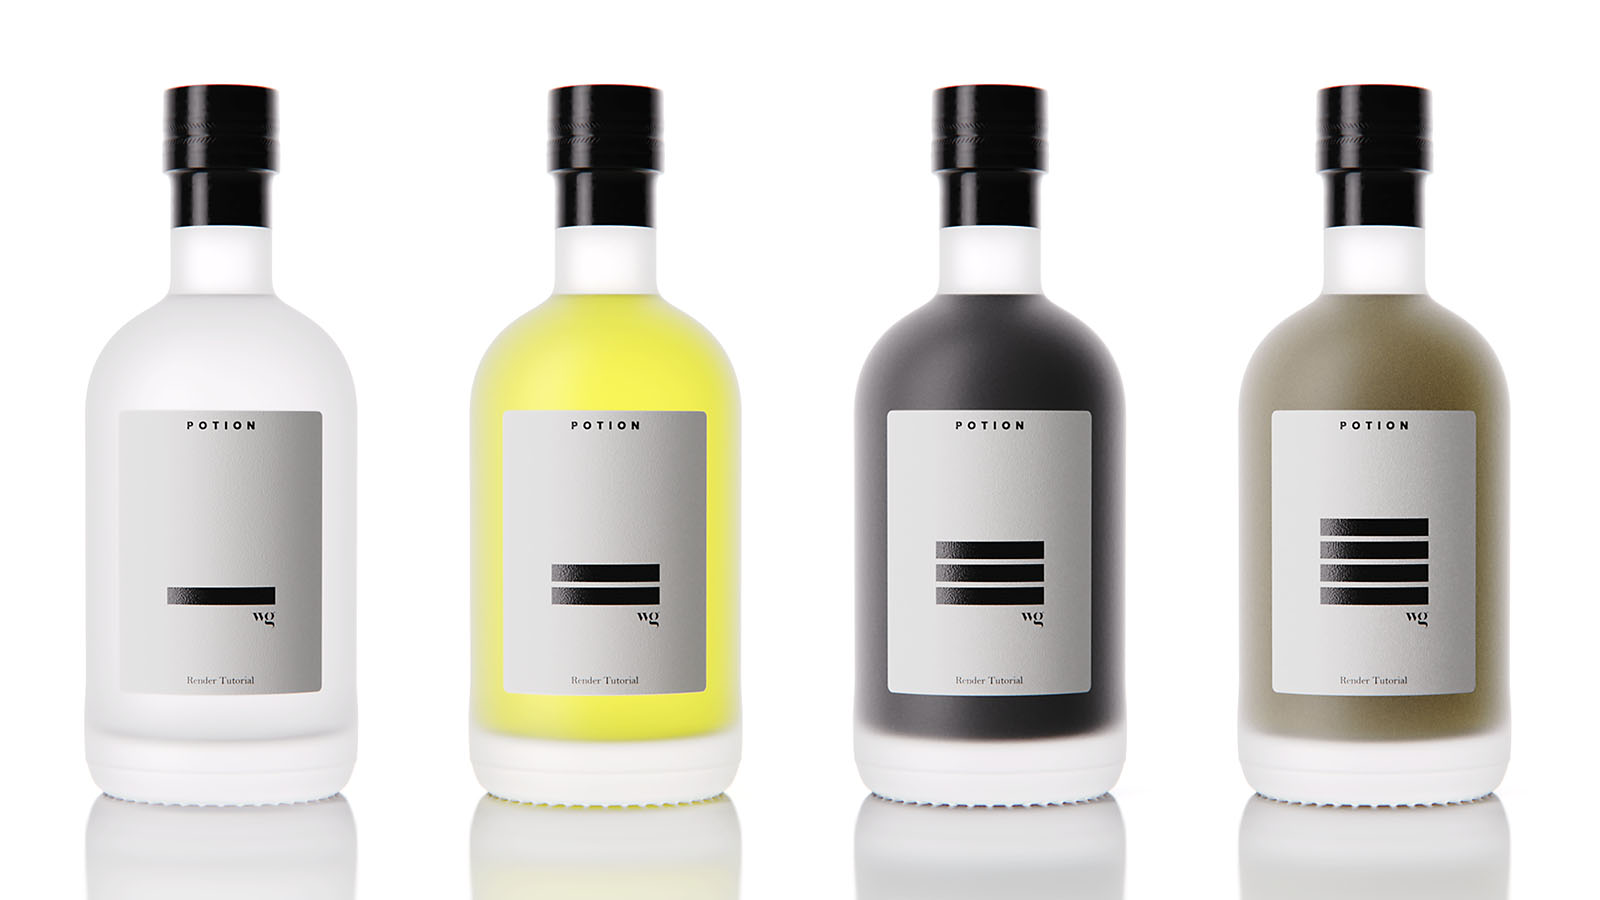
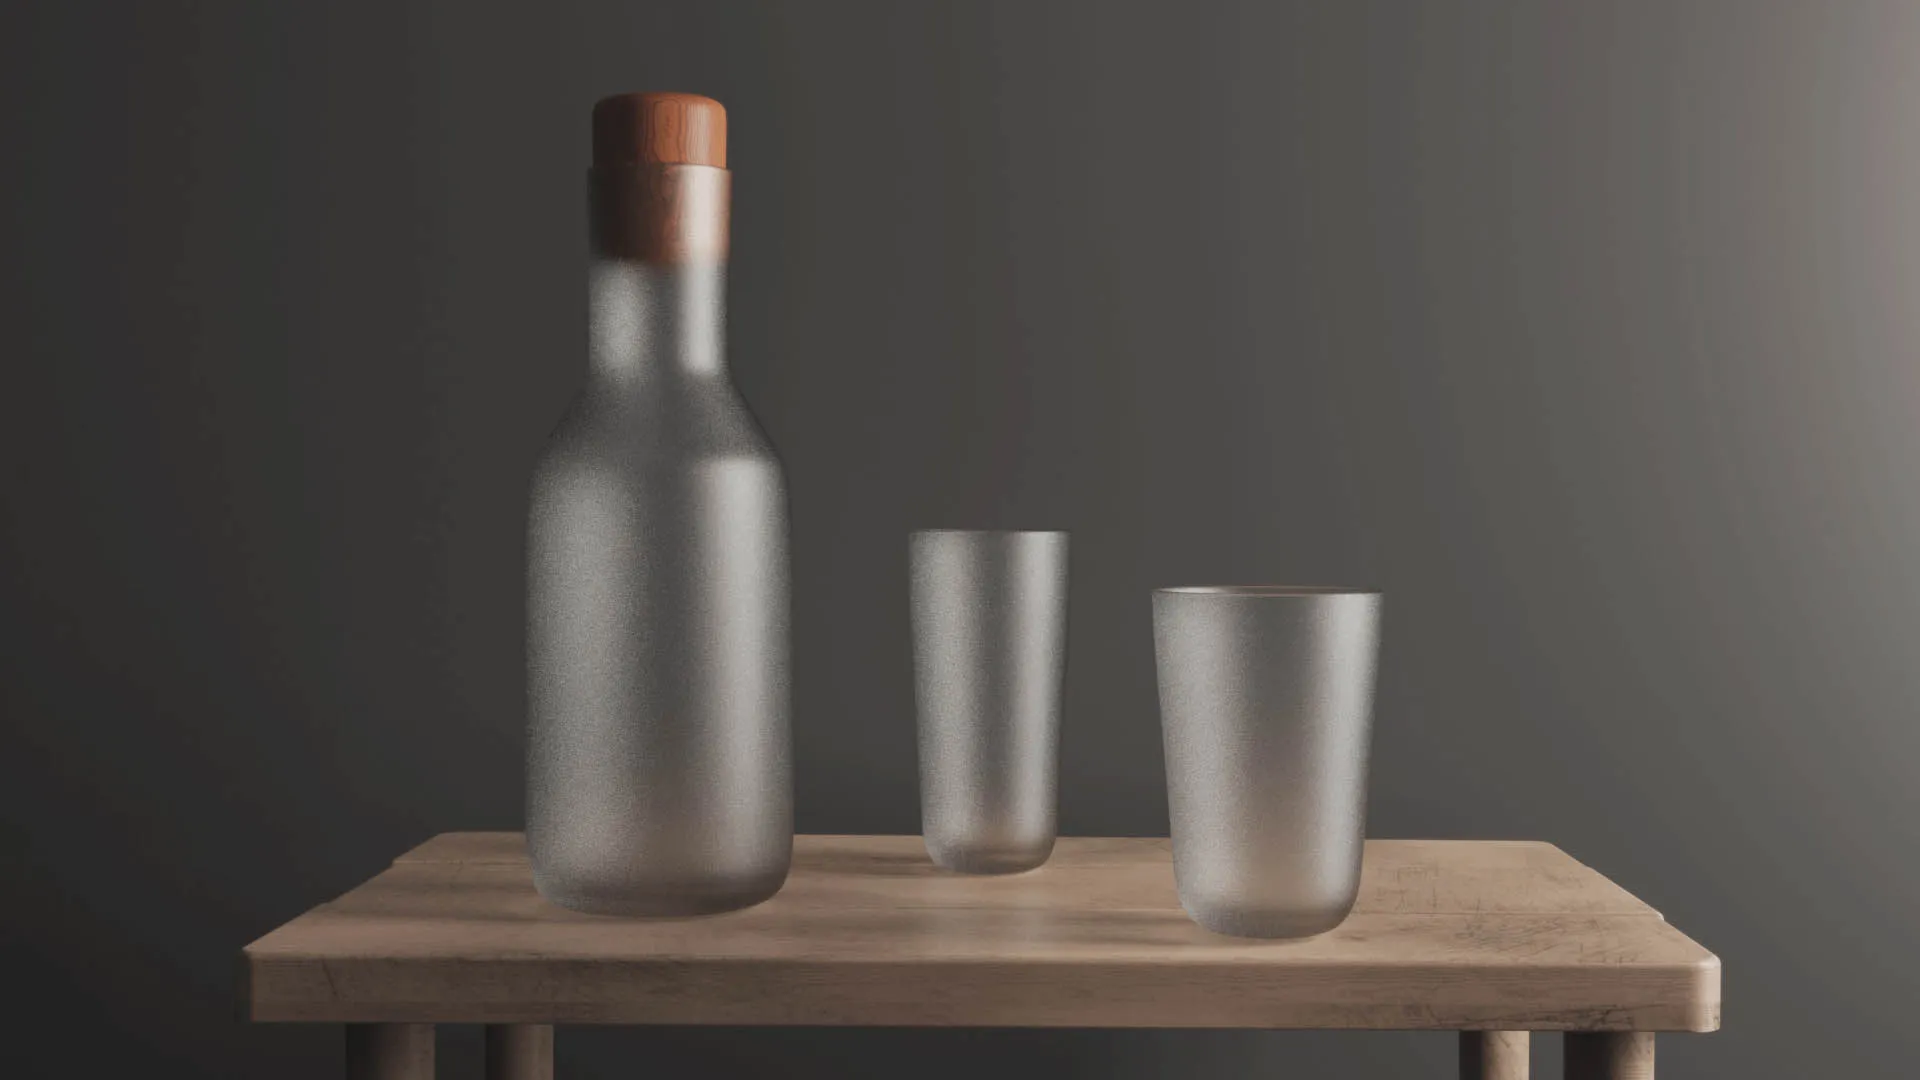
Let me guess, despite your best efforts, they end up looking something like this. It's too dark and doesn't look realistic.
Video Tutorial
Today I'm going to show you how I rendered those bright bottles up top using KeyShot. If you’re not really into reading, then watch the video below for the tutorial version of this post. If you like words and pictures, scroll on!
Physical properties of frosted glass
First off, let's explore why frosted glass looks the way it does. In real life, frosted glass is made by sand blasting or acid etching. This produces a pitted surface on the microscopic level. On smooth glass, some light is reflected off the surface while some transmits through the glass, making it look transparent.
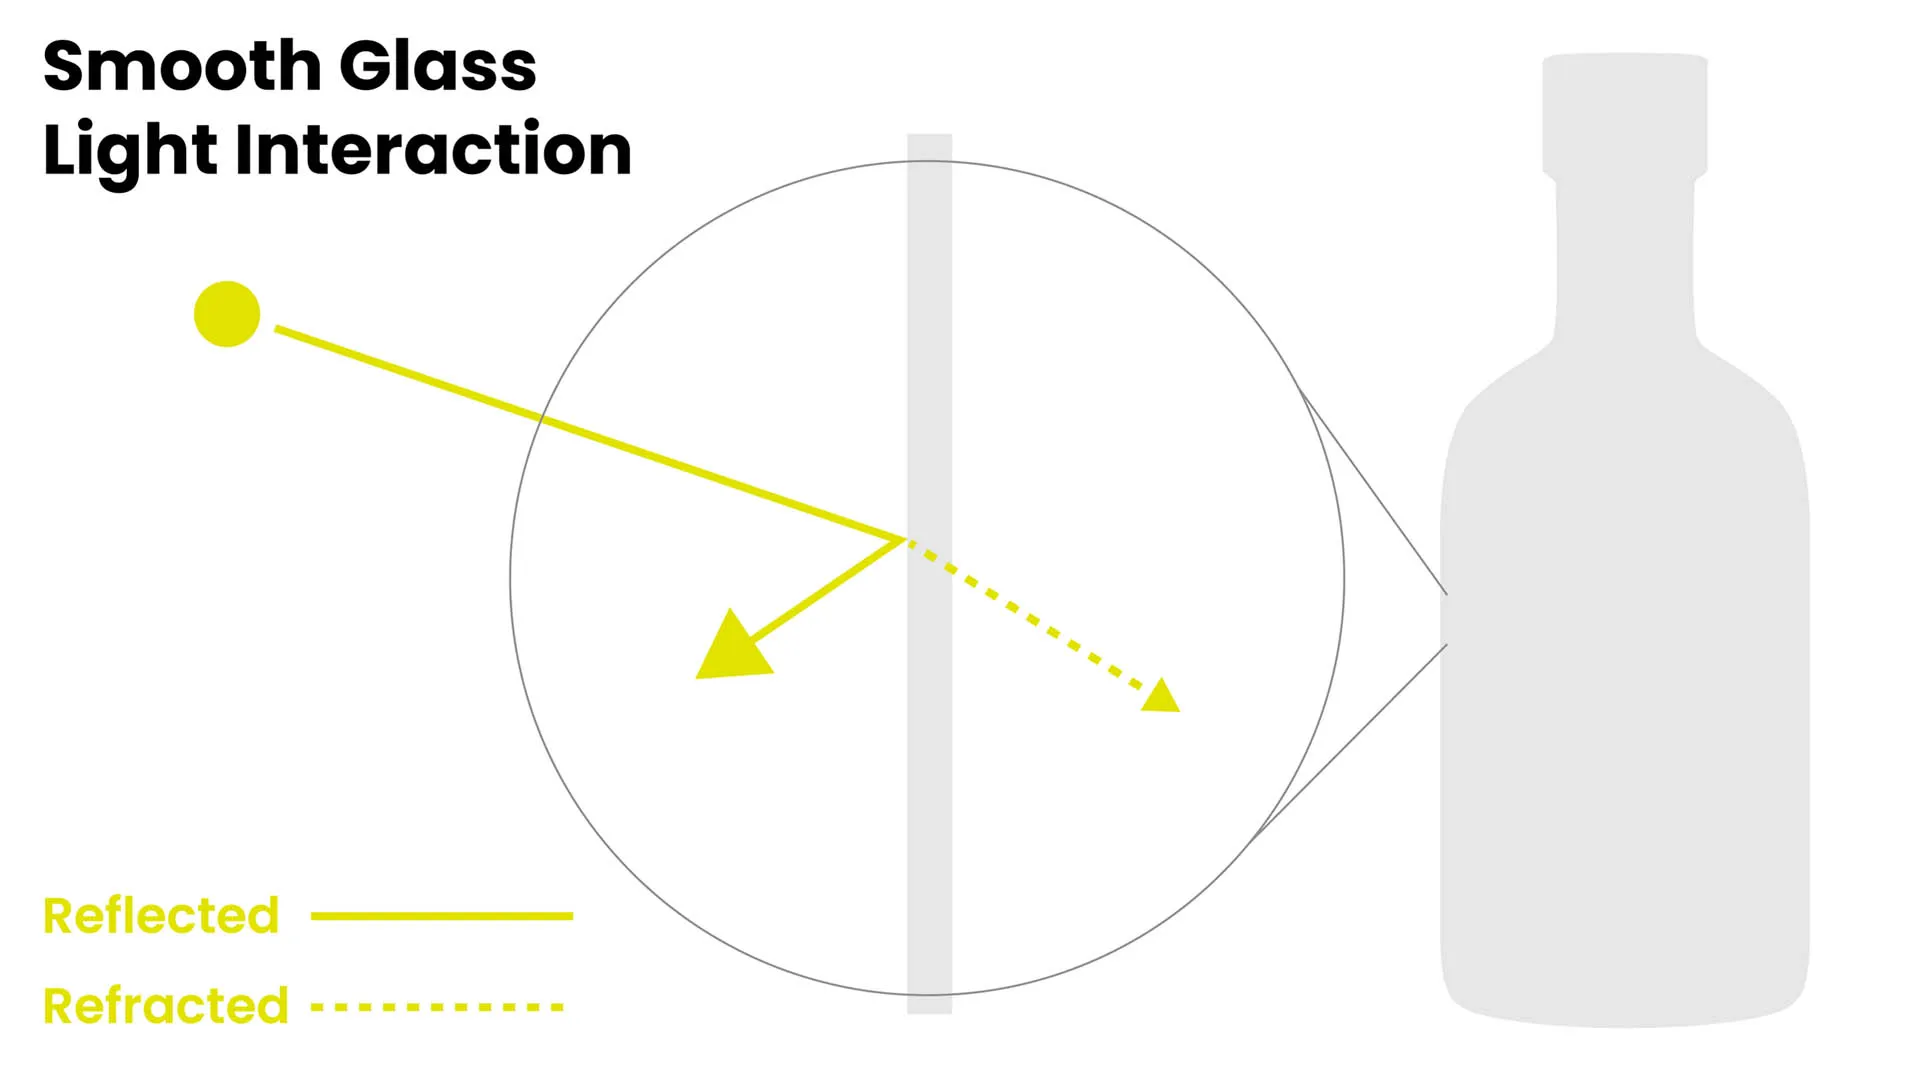
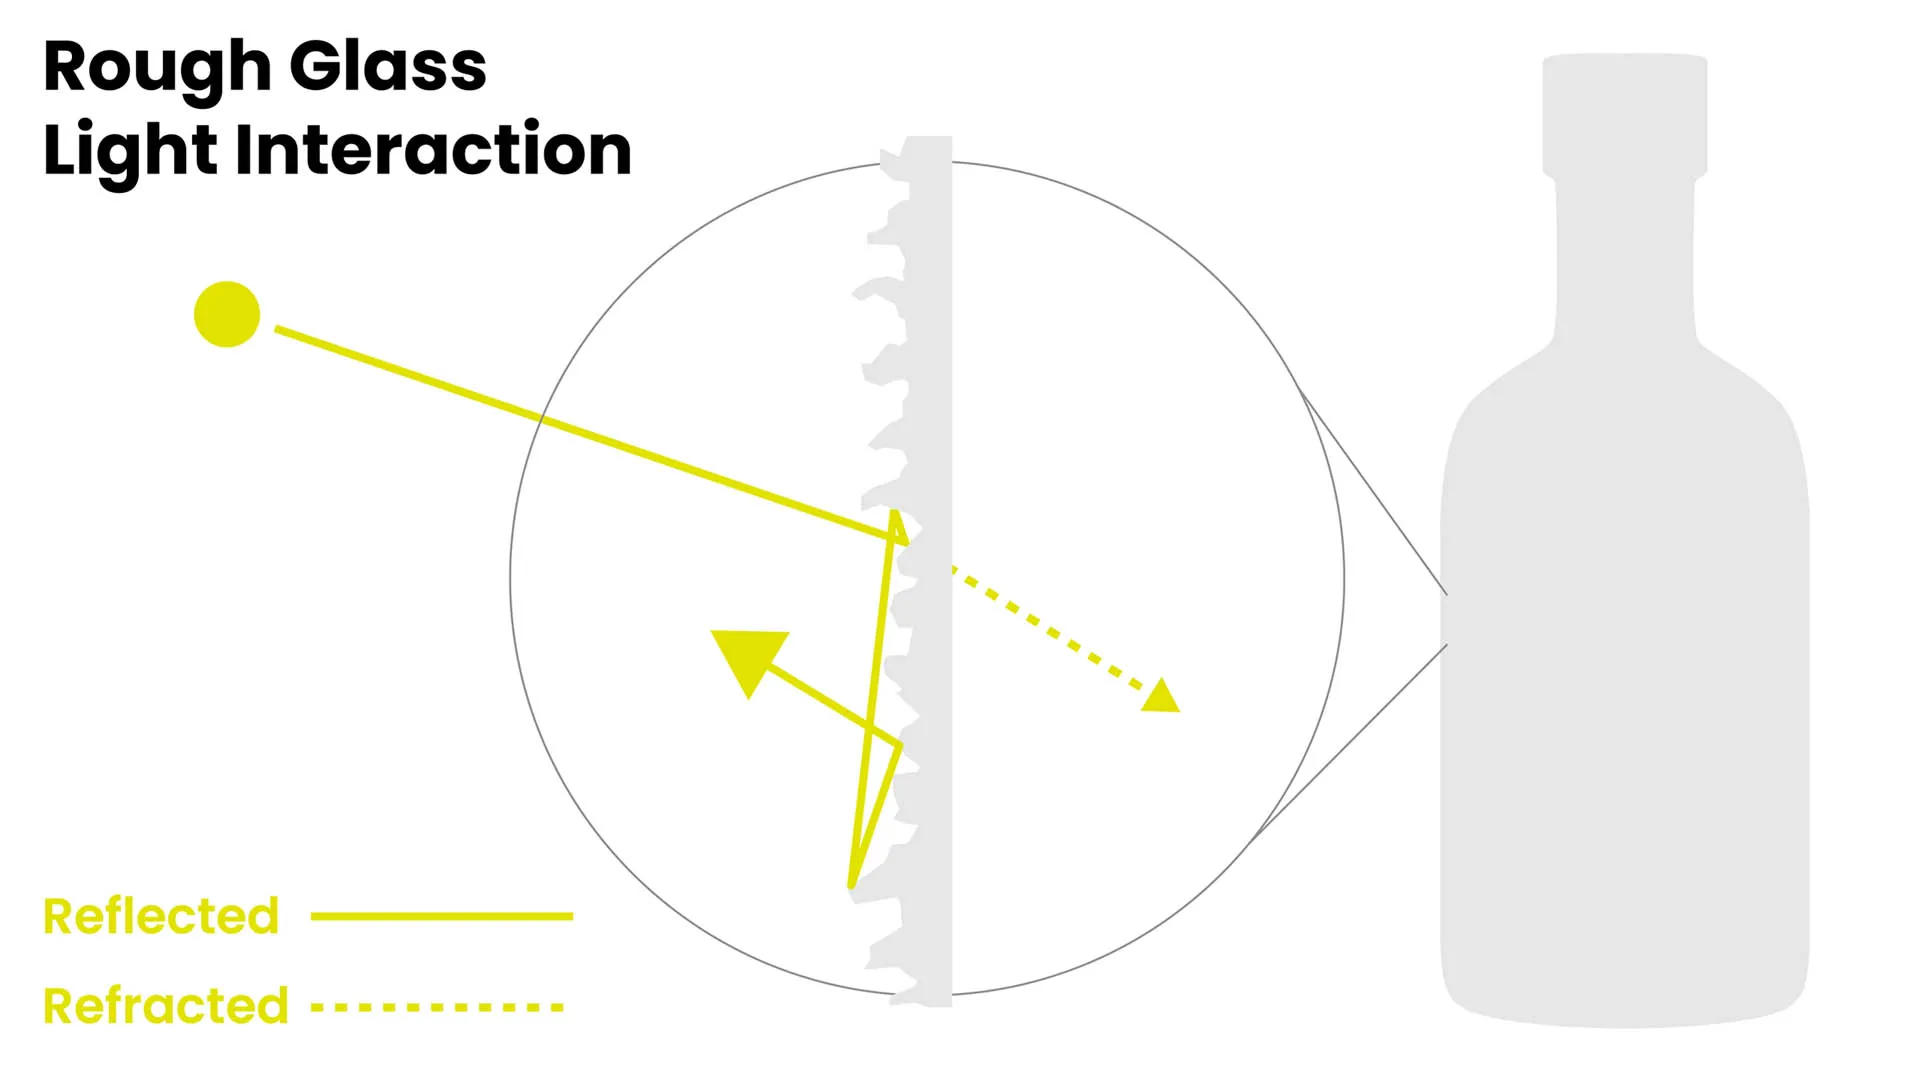
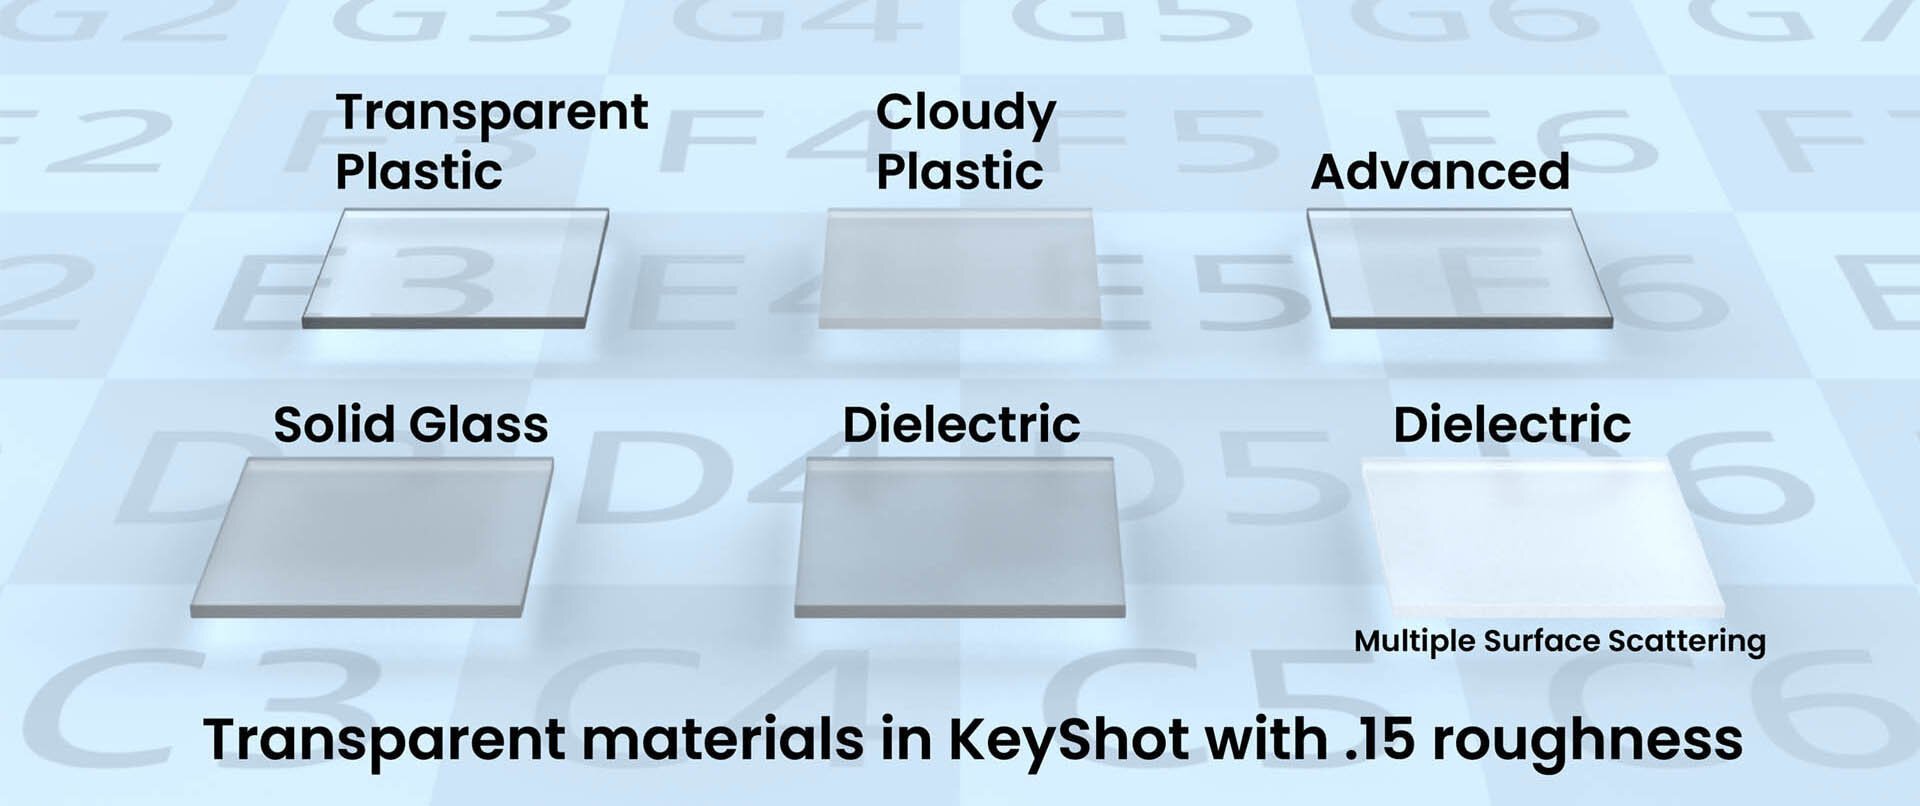
With a frosted glass, light is reflected in many different angles and often bounces off multiple crates before it's reflected away from the surface of the glass. This creates a reflection that looks matte and not glossy. So, this explains why frosted or rough glass looks the way it does. But why does your rough glass in KeyShot still appear too dark?
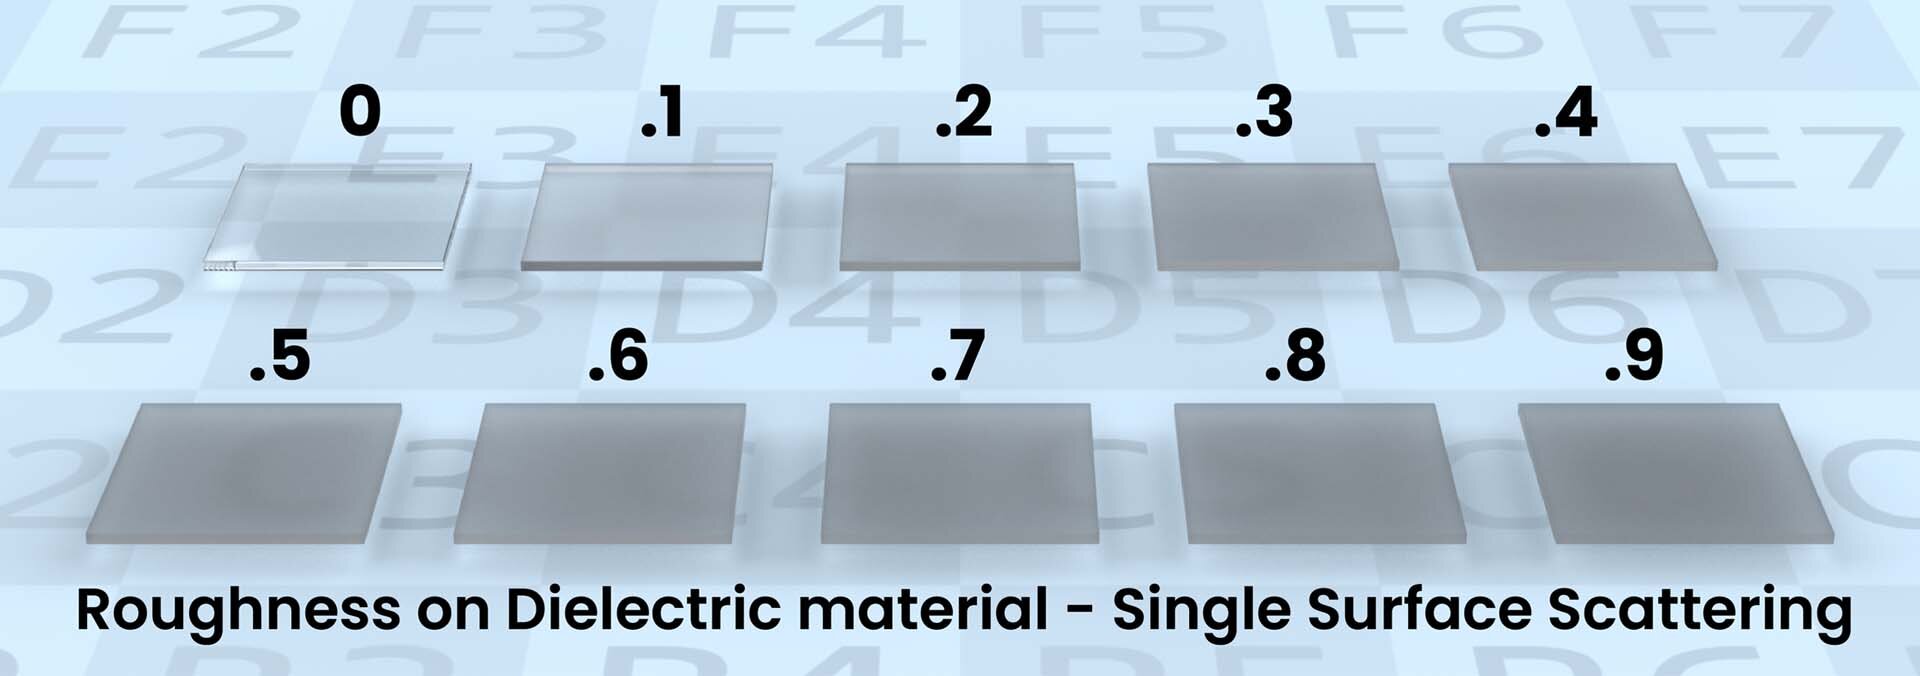
This has to do with energy conservation, or rather, lack thereof within KeyShot. By default, ray (light) tracing stops after it bounces off the surface it hits. This assumes a perfectly smooth surface. This makes sense for many smooth materials and helps keep render times down, though it's not always the most accurate. KeyShot is calculating single surface scattering.
Level up your KeyShot Rendering skills
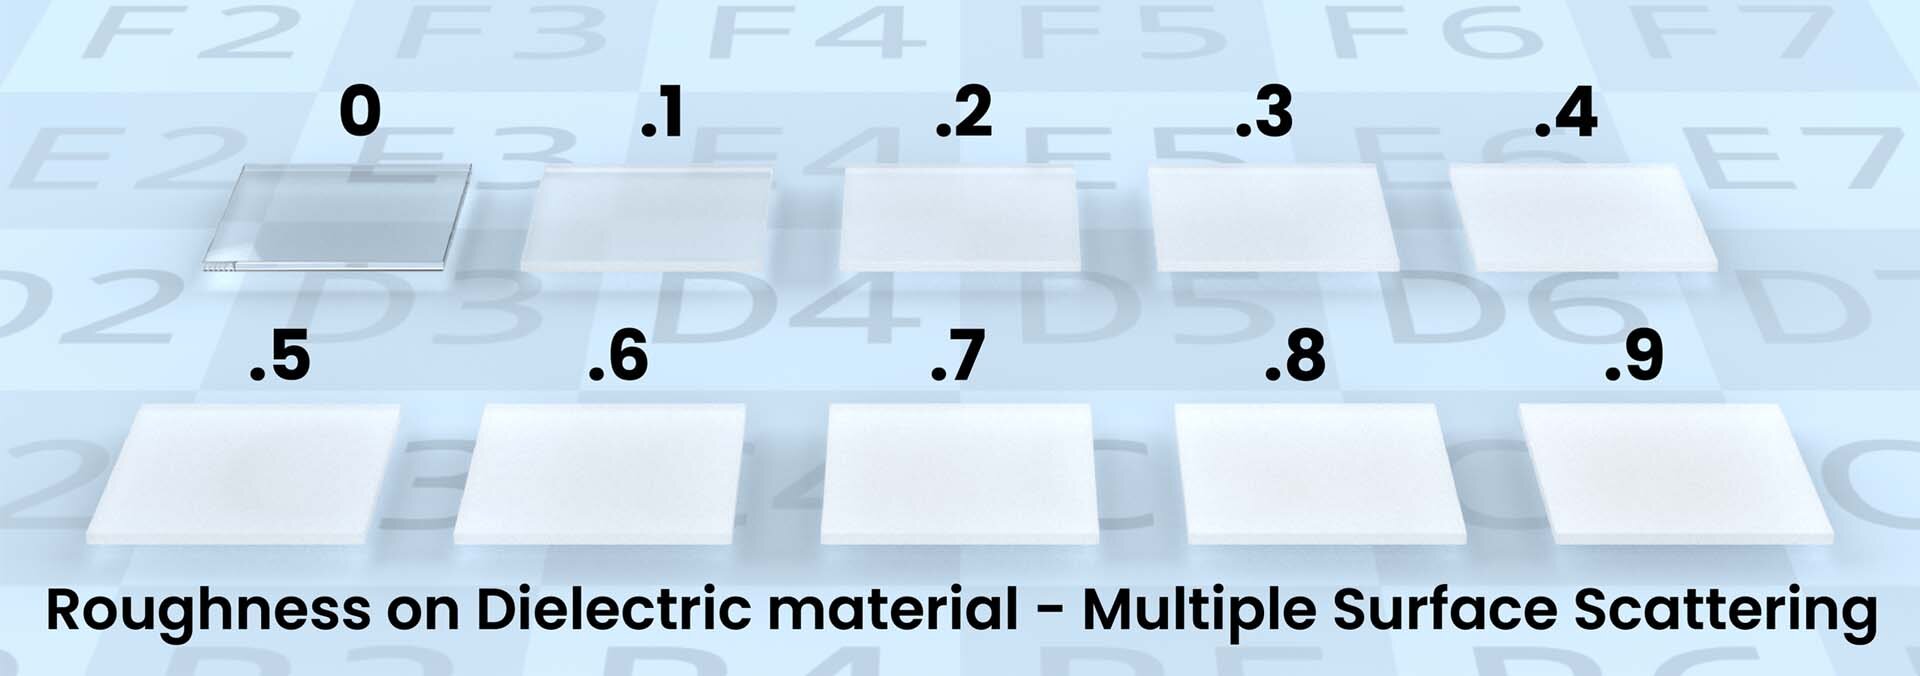
When light hits a frosted glass, it's likely to be bounced off of multiple pits or craters on the surface before it is reflected away from the surface. These multiple light bounces is account for the brighter, milky appearance seen in frosted glass. This is because energy, in the form of light is being preserved, rather than discarded after a single scatter.
As we pursue realism in rendering, we need to account for roughness in a way that calculates the light interacting with all these micro facets on a given surface. This is called 'Multiple Surface Scattering'. If we don't calculate the light as it scatters across multiple surfaces or micro-facets, the surface won't appear as bright as it should.
Do it yourself!
If you’d like to give this a shot, watch the embedded tutorial above. Be sure to download the free project files so you can follow along on your own computer by visiting the File Vault.