CAD data vs. Mesh data for Rendering
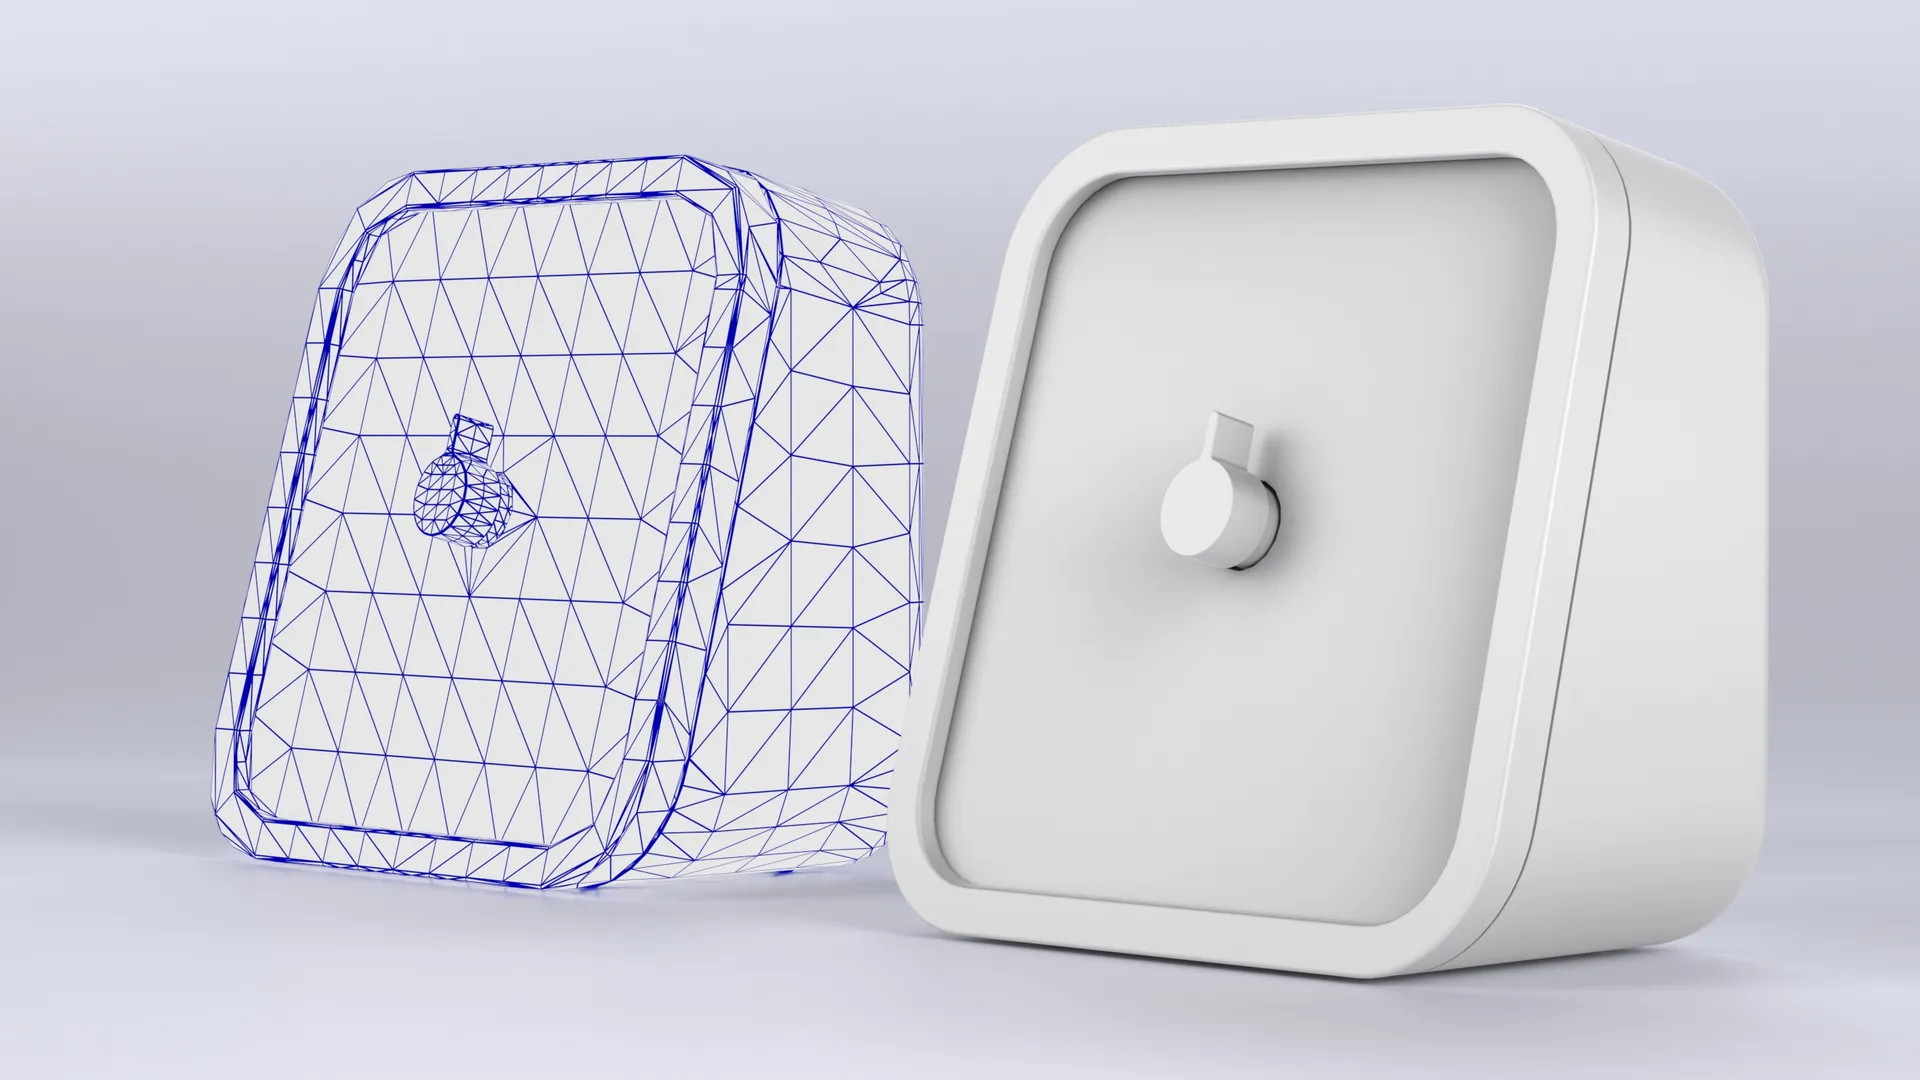
KeyShot can open more than 30 different 3D file types, but they're not all created equal. The one you choose quietly decides how much control you'll have later: whether you can pull in an animation, how heavy your files get, even whether a curved glass object renders perfectly smooth or slightly faceted. Almost all of that traces back to one decision made before the file ever reached KeyShot: was it CAD, or was it mesh?
The easiest way to understand the difference
If you've used Adobe Illustrator or Photoshop, you already understand this distinction. You just haven't applied it to 3D yet.
In Illustrator, a vector line stays perfectly smooth no matter how far you zoom in, because it's built from math (points and curves), not from a grid of colored squares. In Photoshop, a raster image is the opposite: it's made of pixels, and zoom in far enough and you'll eventually see individual little squares of solid color.
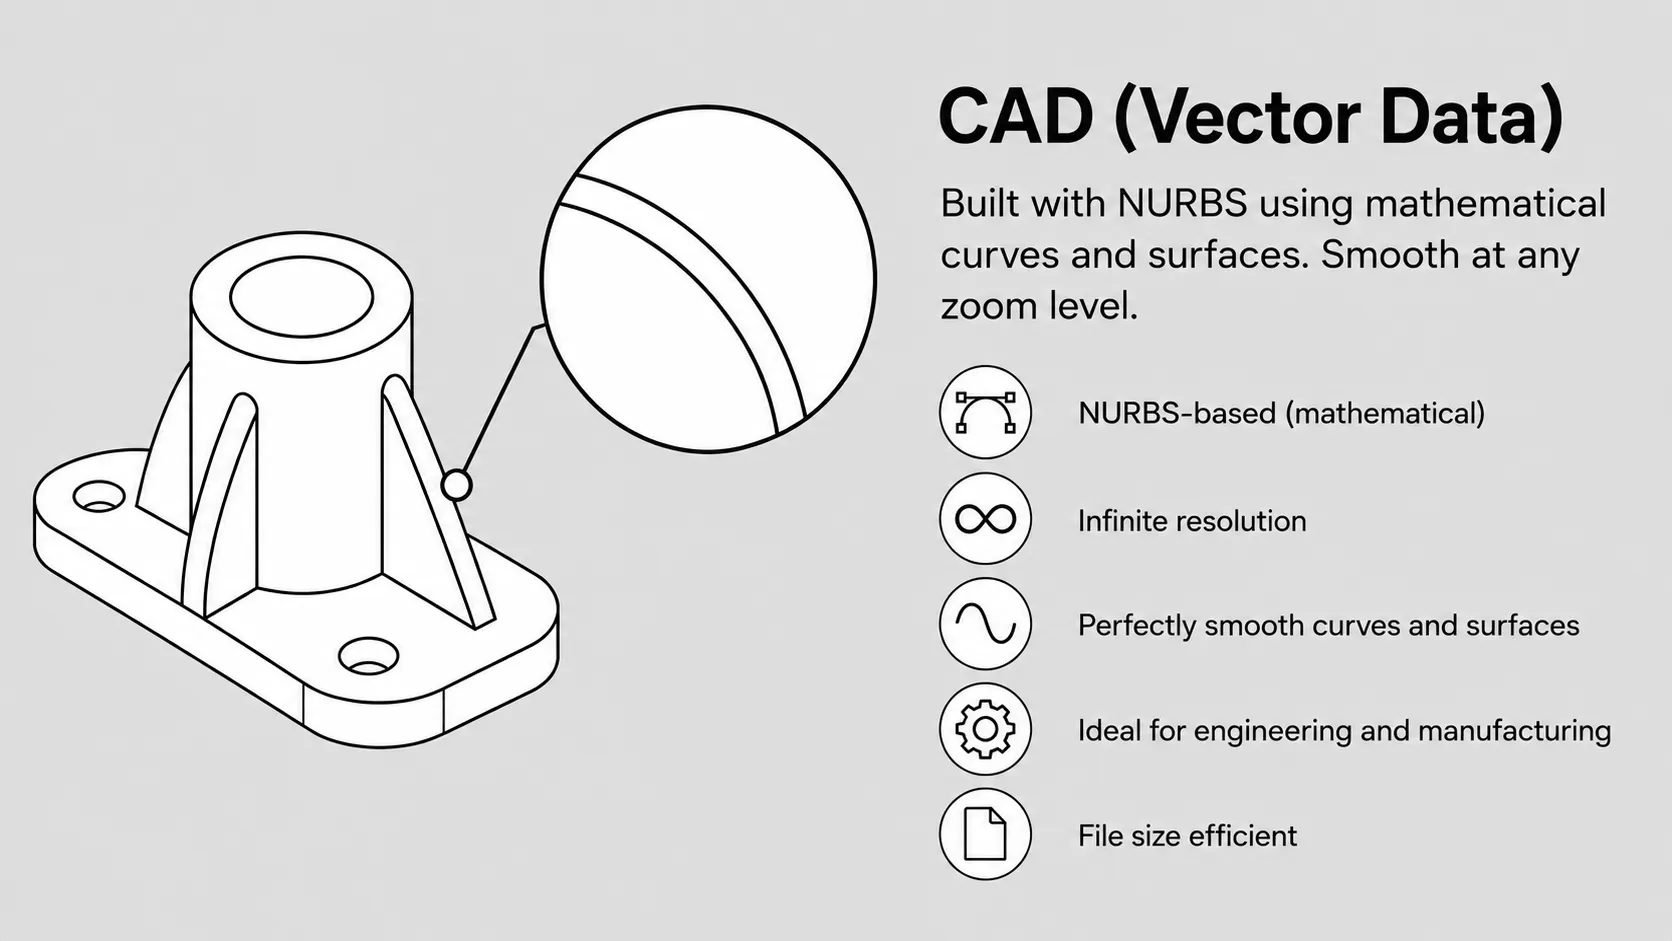
CAD models work like vector data.
They're built using a method called NURBS (short for Non-Uniform Rational B-Spline, a mathematical way of drawing perfectly smooth curves and surfaces using points connected by math instead of pixels). A CAD surface has no fixed resolution. It stays smooth at any zoom level, which is exactly why CAD is used for manufacturing, automotive surfacing, medical instruments, and anything where precision actually matters.
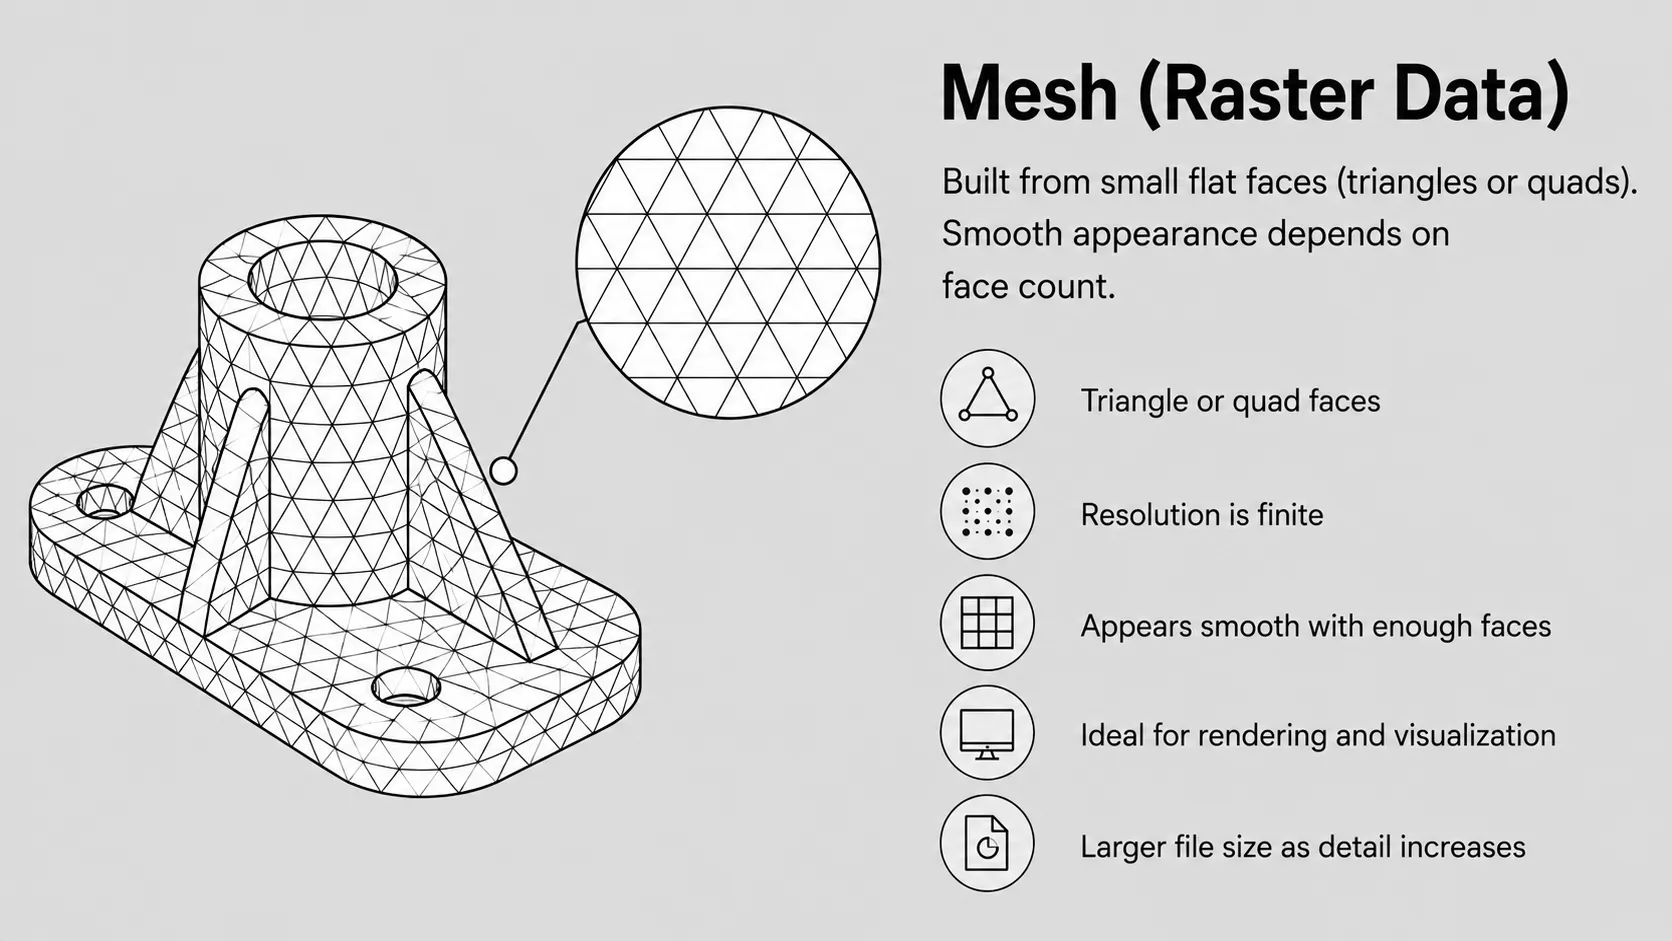
Mesh models work like raster data.
Instead of pixels, a mesh surface is built from small flat shapes called faces, usually four-sided quads or three-sided triangles. Triangles render the fastest, so KeyShot (like most render engines) automatically converts CAD models into triangle-based mesh before rendering. With enough triangles, a mesh looks perfectly smooth, the same way enough pixels make a photo look smooth instead of blocky.
Where you'll actually notice the difference: the silhouette. Look at a rendered object against a plain white background. A CAD-based render will show a perfectly smooth outline. A mesh model without enough triangles will show a subtly jagged, faceted edge, especially on curves. That's the mesh's underlying triangles peeking through.
Native CAD files: your best option, when available
"Native CAD" just means the file format that's proprietary to whatever program built it: an SLDPRT or SLDASM file from SolidWorks, a 3DM file from Rhino, and so on. These files carry more of the original design data with them into KeyShot than an exported or converted file would.
That extra data can unlock real functionality. For example: build a motion study in SolidWorks, or a mechanism in Creo, and you can import it straight into KeyShot, where it becomes a working animation on KeyShot's timeline automatically.
CAD programs support far more advanced motion than KeyShot can build on its own, including inverse kinematics (the math that lets connected parts, like hinges or pivot points, move together the way they would in real life).
Level up your KeyShot Rendering skills
Tessellation: how a smooth CAD model becomes a mesh
Every time you import a CAD file into KeyShot, it automatically gets converted into a mesh made of triangles. That conversion process is called tessellation, and you'll see a slider for it defaulting to 0.2.
It's tempting to assume higher is always better and push that number way up. Don't. More triangles means more RAM used, more disk space, and longer render times, often without any visible improvement. Leave it at the default. If you imported a native CAD file, there's a checkbox that lets you re-tessellate later (on the whole model or individual parts), so you don't have to get the number right on the first try.
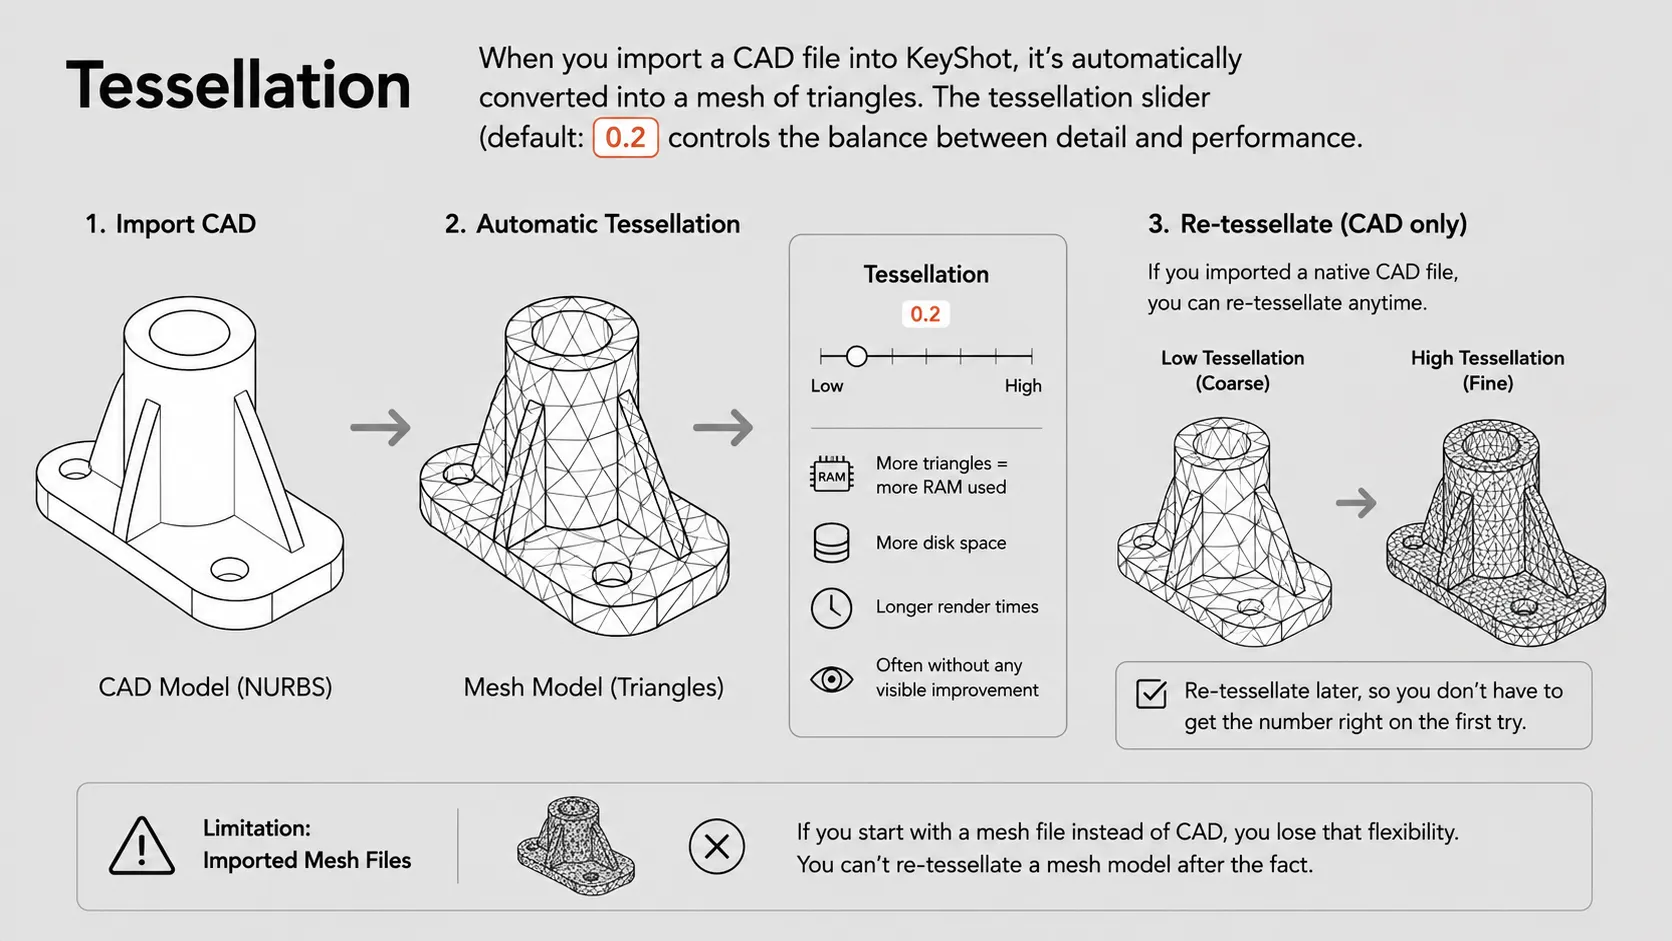
One limitation worth knowing: if you start with a mesh file instead of CAD, you lose that flexibility. You can't re-tessellate a mesh model after the fact, only a CAD model that hasn't been converted yet.
A CPU-only trick for tricky transparent objects
Normally, KeyShot converts everything to mesh before rendering. But if you're rendering on the CPU (not the GPU), KeyShot can render the original smooth NURBS surface directly, skipping the mesh conversion entirely. This only works on CPU, not GPU, at least for now.
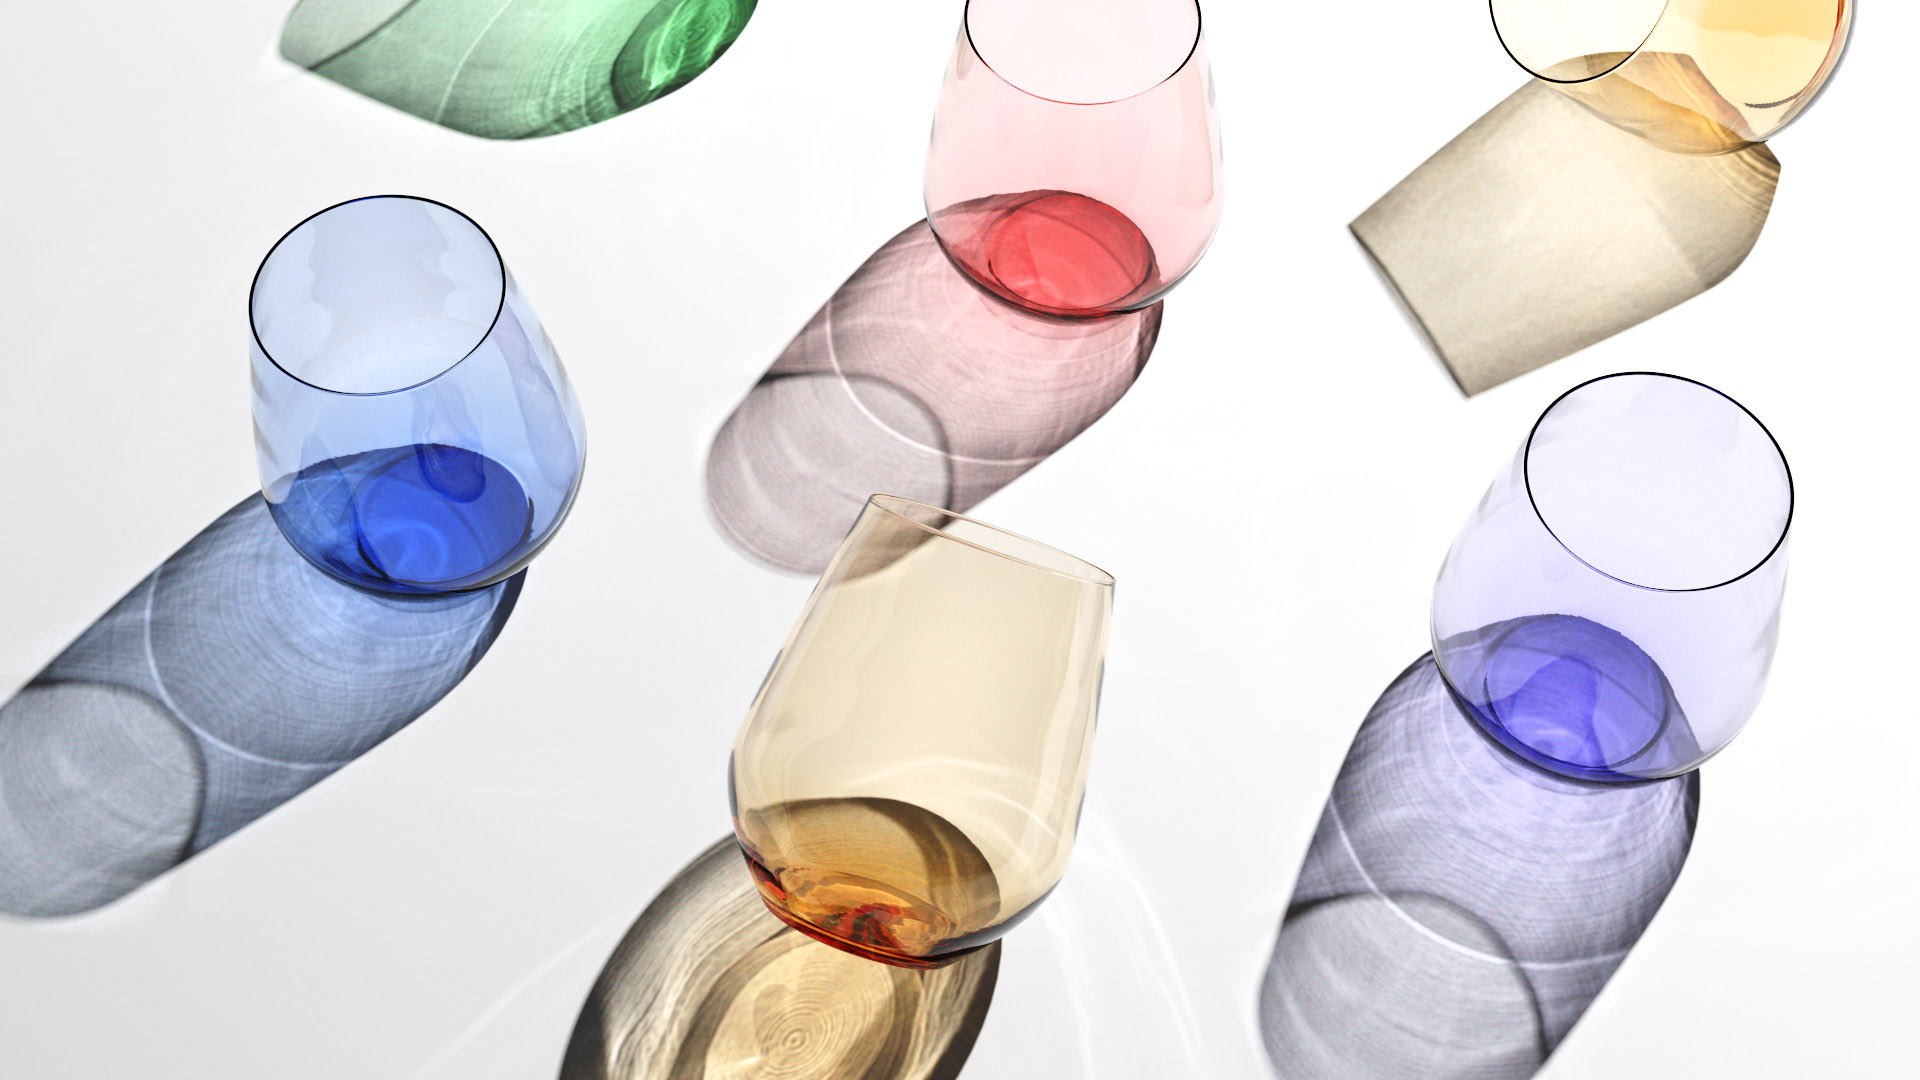
This matters most with round, transparent objects, like glass. I've had cases where even extremely high tessellation still left slightly imperfect refractions inside a glass object. Switching to NURBS rendering on the CPU fixed it completely. Worth remembering if you do glasswork or any high-curvature transparent material that the camera gets close to.
Choosing a format when native CAD isn't available
If you don't have the native CAD file, here's a simple breakdown of what to reach for:
The bottom line
Native CAD gives you the most data and the most flexibility in KeyShot. When that's not available, STEP is a safe, reliable fallback. Mesh formats, especially STL, are the option to reach for last, only when nothing CAD-based is available to you.
If this kind of file and workflow knowledge is useful to you, it's exactly the kind of thing I go much deeper on inside the KeyShot Masterclass.
Cut to the chase and become a KeyShot master!