How to design the perfect home office & the gear I use
Over the past decade, I've moved nine times. Every time, my home office changes based on how much room I have. I've rented single bedrooms, the upper floor of a house, one and two-bedroom apartments a two-bedroom townhome and now I rent a three bedroom house. Each time I move, I enjoy re-designing my workspace. In this video, I want to share what I've learned and the current state of my home office.
Whether you're looking to build your first home office, or make some upgrades to your current setup, it's worth making a plan. I'm going to share with you the three pillars of a successful workspace. The best part? They can be incorporated into any budget. Let's take a look at my own studio to see how I've incorporated these 3 pillars.
If you're the lazy type that doesn't want to read... I made a video tour of my home office. It contains a lot of the info in this article, but not all of it. That said, it'll summarize it pretty well.
Disclosure: As an Amazon Associate I earn from qualifying purchases.
Pillar #1 - Function
While we all want our home offices to look good, the first pillar of designing the best home office is function over form. Begin by identifying the things you need to do every day and every week for your work. Then, consider ways to streamline these processes. Let these solutions play key roles in the design of your space.
For my work, I teach designers how to render with KeyShot. Before that, I was a freelance render artist. Now, my time is spent making tutorials for my YouTube channel, paid courses and content for my website. I designed my studio to help streamline this process.
The Tech Tower
Computers
I use two high-performance PCs. The older one, is a PC I built myself in late 2017. It's got a 32-core Gen 2 AMD Threadripper CPU, two 1080Ti GPUs and 64 Gb of RAM. This was the first and will probably be the last PC I will ever build myself. Learn more about my experience in building and buying pre-configured computers here.
The newer one was provided by Puget Systems. It's got a 3rd Gen 32-core AMD Threadripper CPU, an RTX 2080Ti GPU and 128 Gb of RAM. Having both computers, I'm able to work on one if the other is occupied rendering a project, or for larger or more time-sensitive projects, I can use them together to speed up the process. Also, if one fails, I have a backup in an emergency.
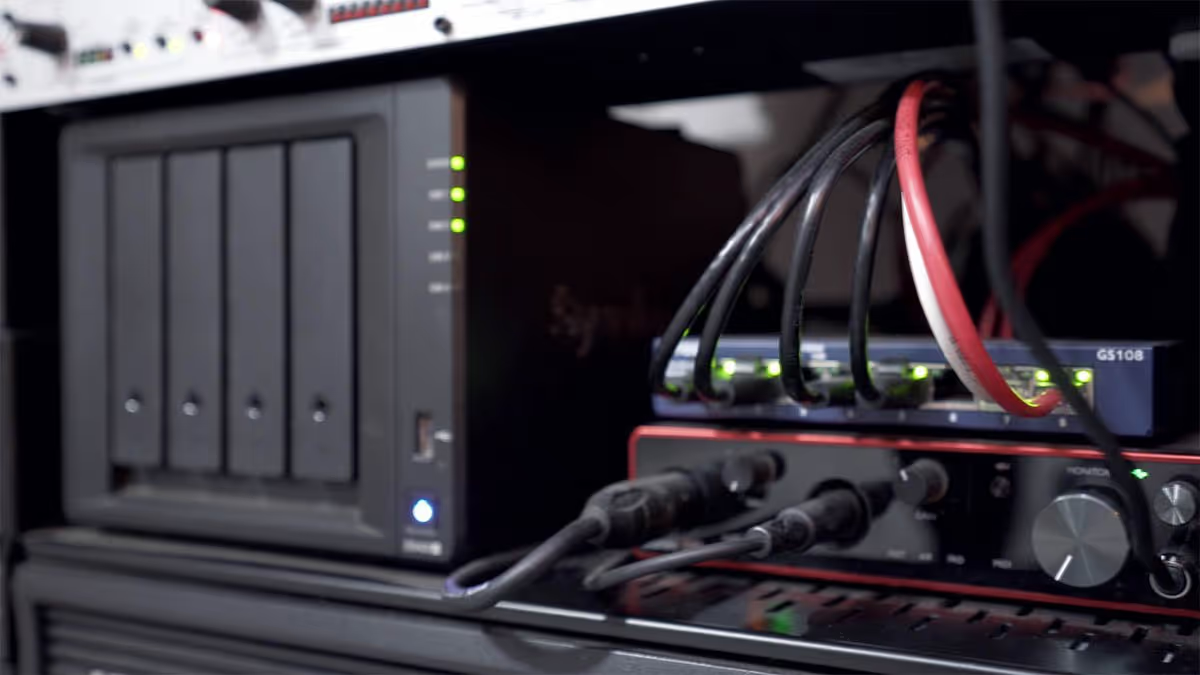
The two computers have identical internal storage configurations. I use a 1 TB SSD, 2TB SSD scratch disk and 8TB HDD for archiving projects. I use a DS420+ Synology NAS, a network-attached storage device to keep files synced across these two machines. The NAS serves as redundant backup but also provides syncing functionality through the Synology Disk Station software.
Each piece of equipment in my tech tower plays a critical role in keeping me productive by reducing down time, offering backups and safety nets in the event of data loss or power failure. I also use a cloud-based backup service called Backblaze to keep a copy of all my data safe in the event of a disaster.
Smart UPS
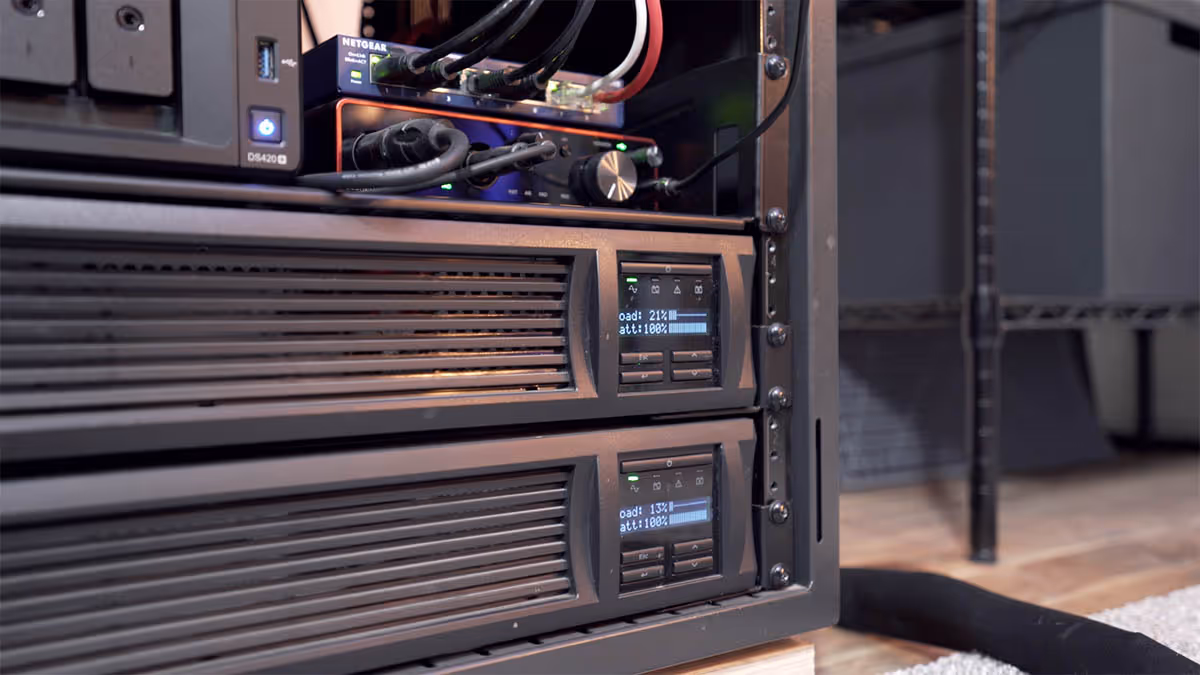
They are each powered by APC Smart uninterruptable power supplies which provide clean, consistent power and protect against surges. In the event of a power outage, they have large batteries that continue to power my computers giving me enough time to safely power everything down. While I opted to get the rack-mounted version, you can save money and go with the floor-standing models.
Audio Equipment
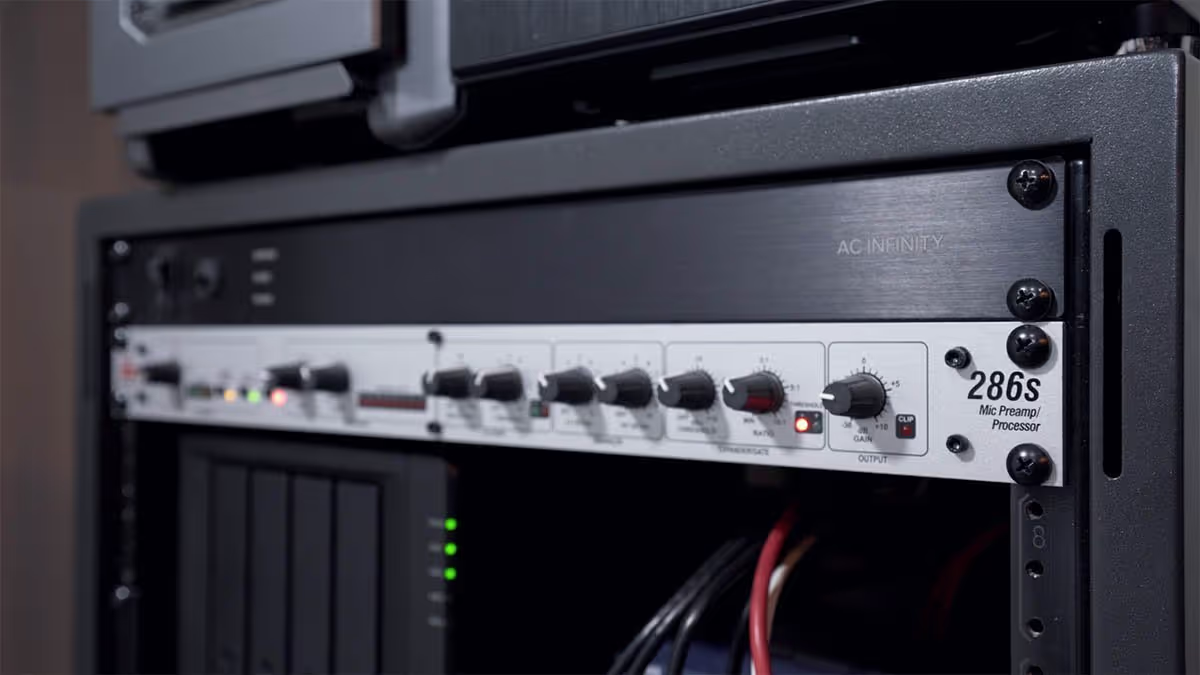
I have a Focusrite Scarlett 4i4 audio interface. It's how I connect my microphone and speakers to my computers. It's a great piece of gear that offers more than I need honestly, but the preamps are quiet and powerful and it does the job well. Above my network switch is a DBX 286s mic pre amp and processor which helps me cut out background noise and record cleaner vocals.
Power Distribution Unit
On top of that is an AC Infinity power distribution unit. This gives me a master switch to turn power on or off to everything except for the router and modem which are always on. These are also a great way to protect your electronics and have an array of plugs in the back.
Desktop Server Rack
All of this equipment is housed in a 12U Middle Atlantic desktop rack. As you would expect, there are tons of cables that need to be connected to make all this work. I made a simple Lazy Susan out of plywood and a heavy duty bearing, which allows me to rotate the entire stack of equipment which weighs over 300 pounds. This gives me easy access to all the ports for wiring and cable management. When the computers are rendering, I rotate the stack to allow for better cooling.
Networking Gear
Above the interface is an 8-port Netgear ethernet switch which allows me to connect the two computers, NAS, router and Philips hue bridge. With so many port and wires needed, the ethernet switch is required to get everything connected.
Above the tech tower, I have a shelf that holds an Asus ROG AC5300 Wifi router and a standard modem from Spectrum. The wireless router honestly offers way more features than I could ever need. Still, it's been nice being able to use the included software to customize it to my needs, especially with the NAS.
Room Considerations
Key Lights
Continuing with the theme of function, I've designed this room to improve audio and visual quality of my videos. Most studio lights take up a lot of floor space and use large diffusers to create soft lighting. To save space, I use a couple of compact LED panels mounted to a large tension rod called a Varipole.
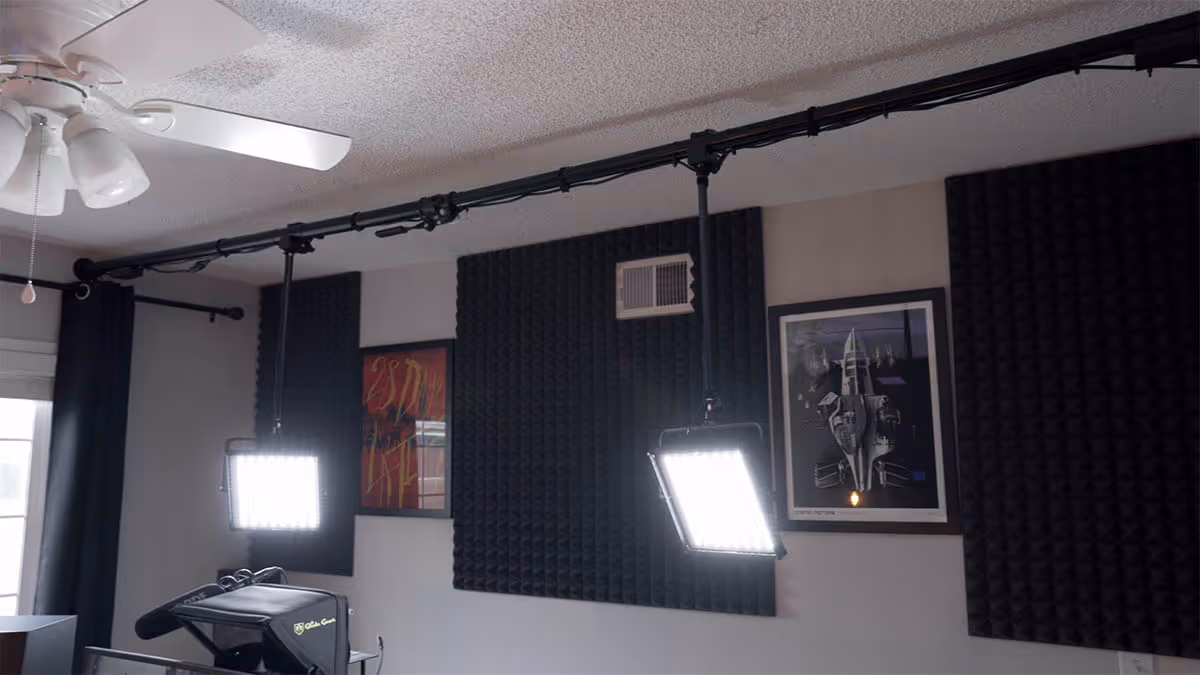
To create soft lighting, I have an large piece of diffusion fabric that I added grommets to. When I'm ready to film, I hang this from two eye-hooks in the ceiling. It's not pretty but it works. I take a similar approach to audio by hanging a cheap moving blanket from the tension rod behind my lights. I added grommets to the blanket and made hooks from Velcro and bent push-pins.
The moving blanket cuts down on the reverb in the room when recording vocals. I have another LED for a hair light mounted behind my backdrop and another backdrop light mounted on a tension rod between my bookshelves.
Acoustic Foam
If you've ever tried recording audio in a small, boxy room, you know it can be hard to get a clear, professional sound. To help with this, I've mounted foam on the walls. This can be tricky to do without ruining walls. I found the best approach is to buy large pieces, like 2x4 foot acoustic foam and use 4 small nails to attach it to the wall. The holes are easy to patch and the foam is re-usable. I've used my foam in 3 different offices.
Blackout Curtains
Large blackout curtains let me block daylight from the window and cut down on reverb in the room for controlling both light and audio when recording. I used the same approach for my backdrop, which is a thick, fleece-like material that absorbs both sound and light.
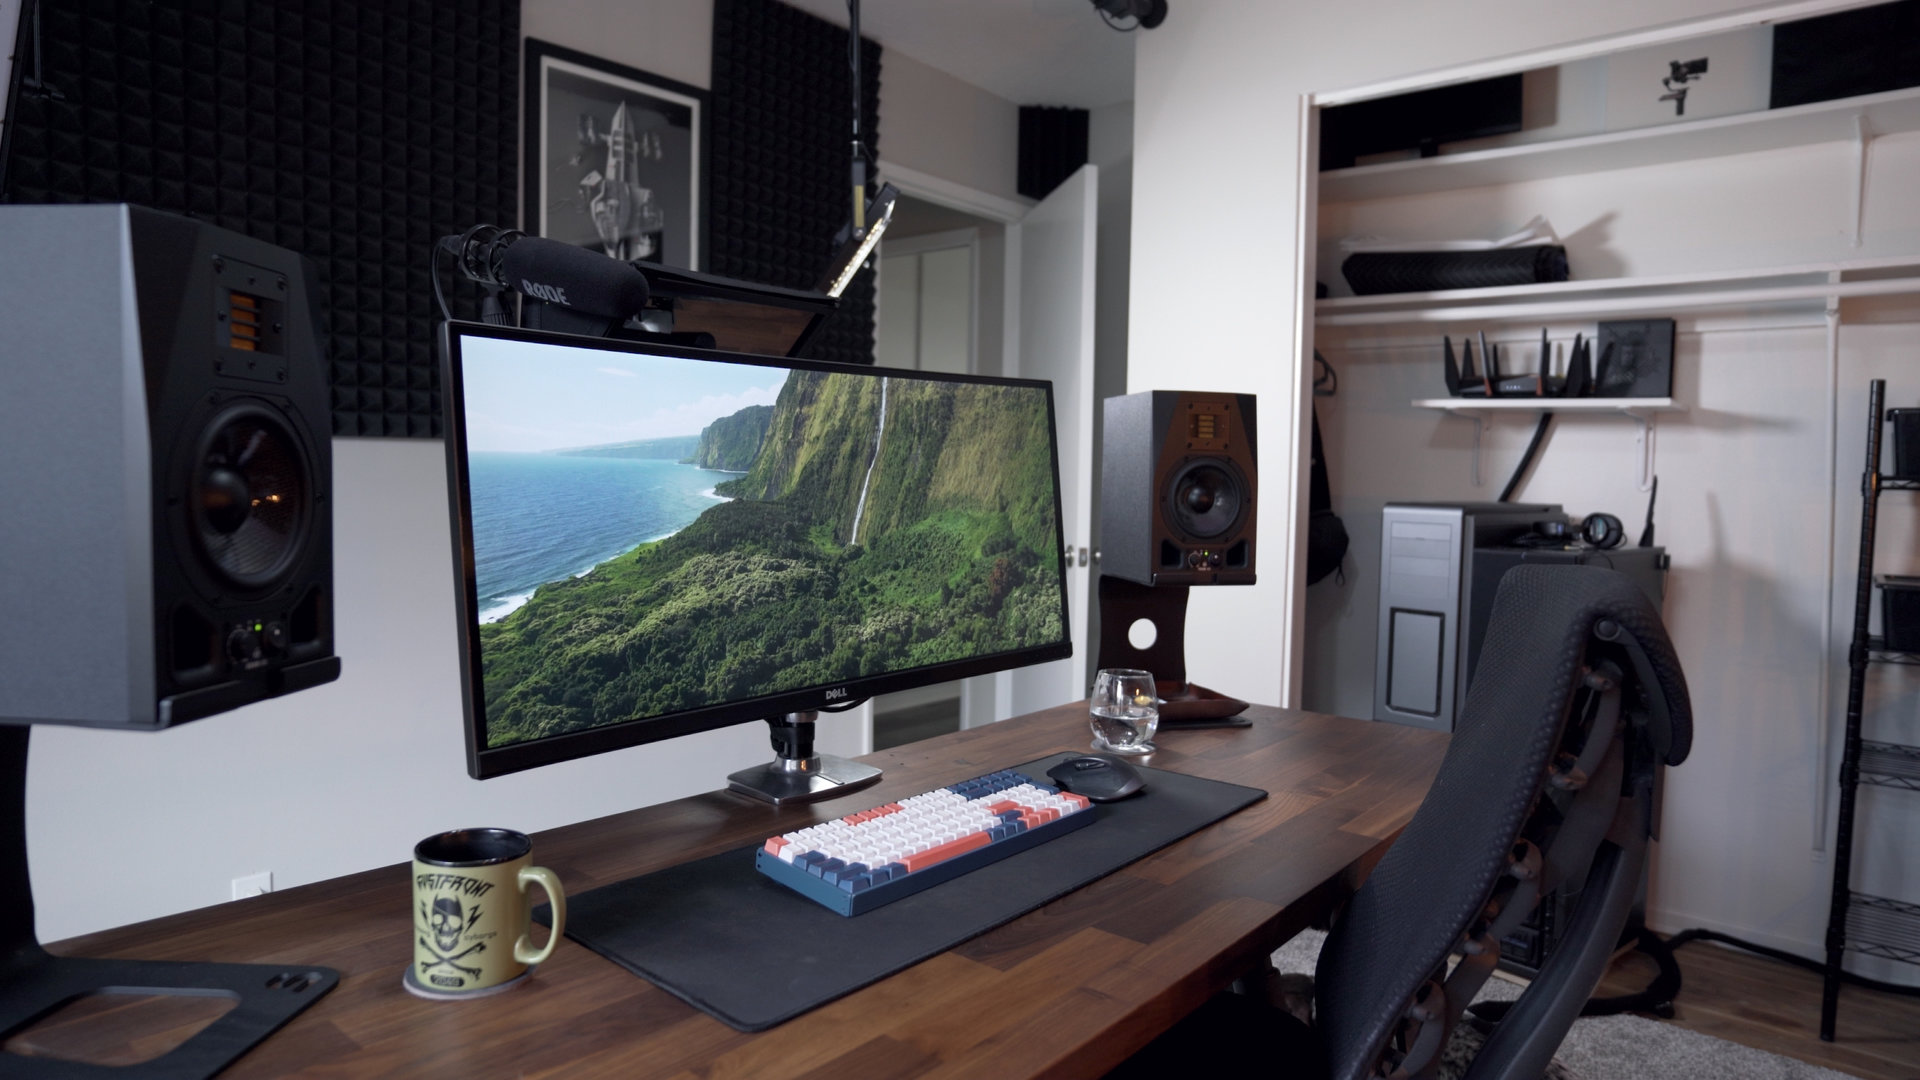
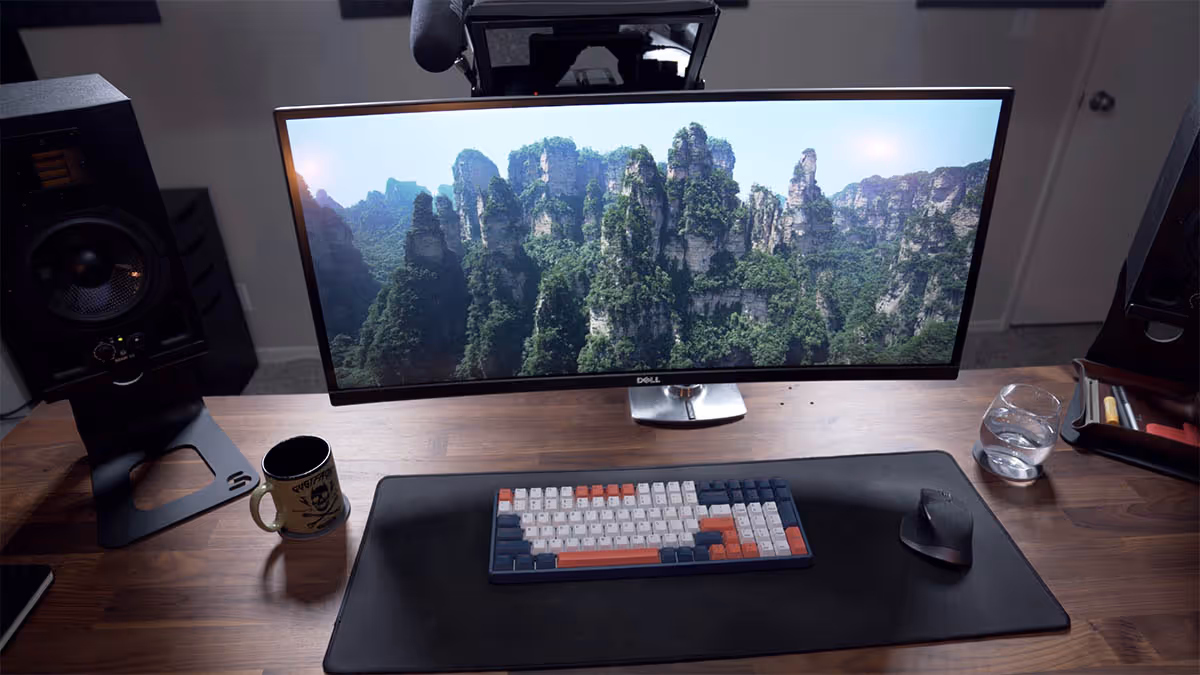
Desk Features
Monitor
On my desk, I have a simple, clean setup. I use a 34" Dell Ultrawide monitor from 2016. It allows me to record 16:9 videos in 1440p and gives me a bit of extra real estate to the right of the recording region. I appreciate the extra width for editing my videos and working on multiple documents. And because it's not too tall, I can still record myself by moving it out of the way.
Camera & Microphone
When I sit down to record a video, the camera and mic are already in place and ready to go. I just move my monitor down, launch OBS which I use to record, look into the teleprompter and start speaking. The teleprompter makes it easy for me to read from a script which helps me speak accurately and concisely.
I use a 5.5 inch FeelWorld field monitor as a second computer display. This allows me to drag a window, application or zoom chat onto that monitor. I can see the information on the screen without breaking eye-contact from my camera which is recording from behind the glass.
Now, I use a Sony A7iii for my camera with a Tamron 28-75mm lens to record and a Rode NTG3B shotgun mic for my audio. I use a DC adapter for my camera that supplies continuous power. The teleprompter is by Glide Gear and all this is supported by some cheap monitor arms I modified to meet my needs. This arm is attached to my monitor stand, a heavy duty desk-mount monitor arm by Ergotron.
Cable Management
As you might expect, it requires quite a bit of cable management to keep all this tidy. I do my best to group cables where I can, use cable sleeves and a wire rack and power strip underneath my desk to keep the mess out of sight. I use a large neoprene sleeve to bundle all the cables running between my tech tower and the desk. You can see this in the video embedded at the top of this article. Without running wires through the floor this is the best I could do to keep things tidy.
I'll point out that I use a KVM switch to use the same keyboard, mouse and monitor with both computers. I've mounted a button to the side of one of my computers and when I press it, the mouse, keyboard and monitor switch to the other computer. In past setups, I had this button mounted underneath my desk, but this time I kept it near the tech tower to reduce the amount of cables I'd need to run to the desk.
Saving time when recording
I've put lots of time, thought and energy into designing a home office that helps support my professional goals. It took me a long time to get this all dialed in, but I love the result and it's been well-worth the effort. I'm able to record my videos much faster and maintain consistency in both audio and video quality. Most importantly, it takes away any effort associated with setup and teardown of recording.
Level up your KeyShot Rendering skills
Pillar #2 - Comfort
The second pillar of a great home office is comfort. The goal isn't to fall asleep, rather if you're comfortable in your workspace, you'll tolerate being in there longer. I've found that being able to adjust my workspace keeps me both comfortable and healthy and reduces the likelihood of repetitive strain injury.
Office Chair
About 4 years ago, I bought a Herman Miller Embody chair. With how much time I spend sitting, I wanted a chair that would support my body, be comfortable and would last for at least 10 years. After testing many chairs, this is the one I felt most comfortable in and could be adjusted to meet my needs.
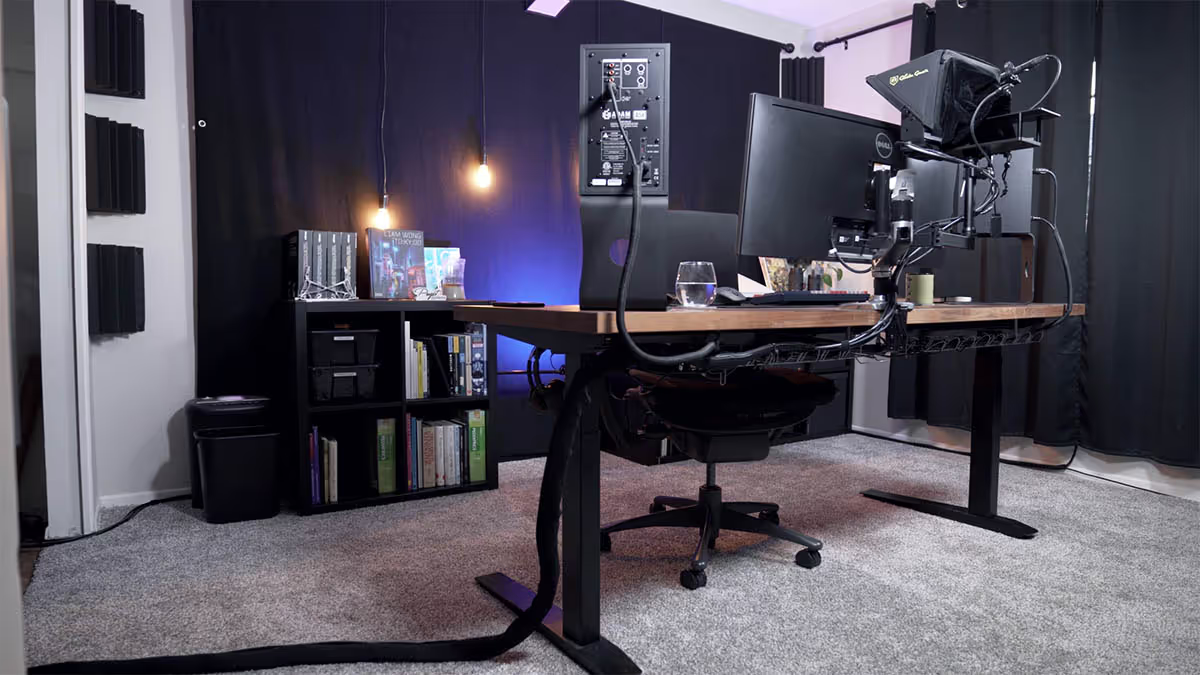
Standing Desk
Having suffered a back injury in 2015, I try to limit the time I spend seated. My desk is a sit-stand desk that I made by attaching an Ikea Karlby counter top to a set of motorized Jarvis desk legs. This allows me to work while standing, which I do for about 3 hours a day. The tricky thing about using a standing desk is cable management and placement of equipment. By choosing to place my speakers, camera and microphone to the desk, everything moves together as a single unit.
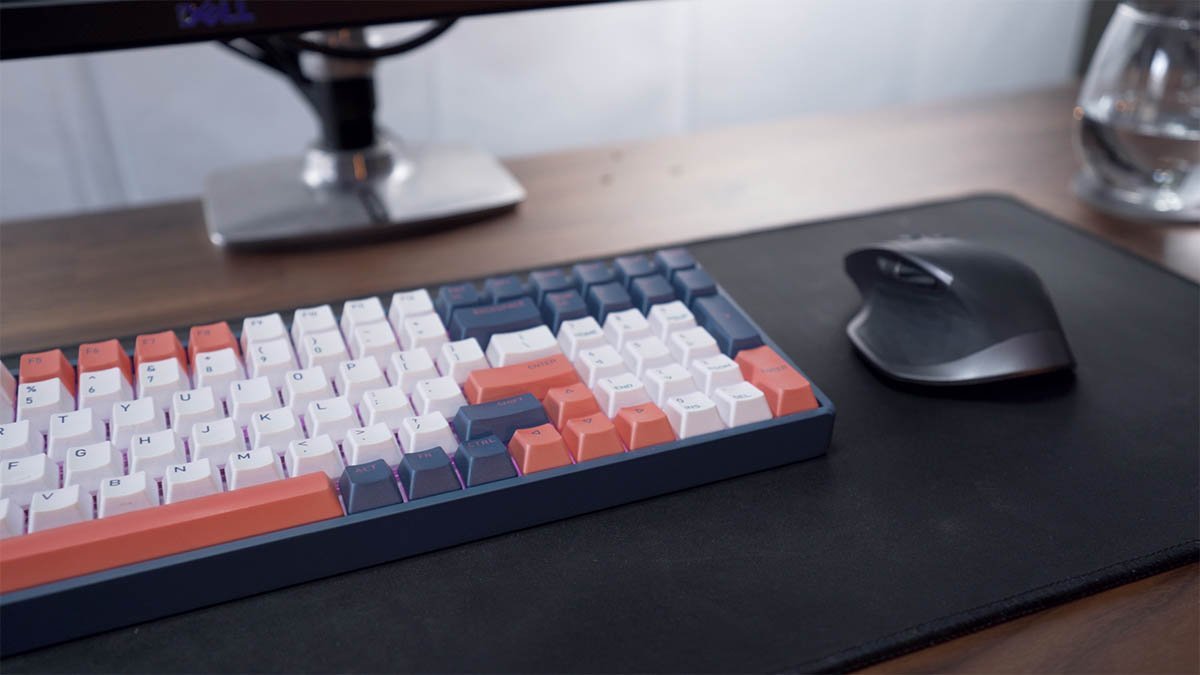
Keyboard & Mouse
I use an F96 wireless mechanical keyboard by IQunix. The quality and typing experience is great. It took some getting used to the compact layout, but I use the keypad so much that I wasn't willing to give it up. The mouse I use is a Logitech MX Master 2S. I love the clutch scroll wheel, and the programmable thumb buttons as well.
Speakers
The speakers I use are A5Xs by Adam Audio and they are incredible. For the price, I don't think they can be beat. They're sitting on Soundrise Pro-9 monitor stands. I love how little room they take up on the desk. Depending on my mood and what I'm working on, I listen to a wide range of film scores, audio books, podcasts and music. Lately I've been enjoying those long playlists that mix relaxing music and ambient sounds. Great speakers only make the experience even better.
Lighting
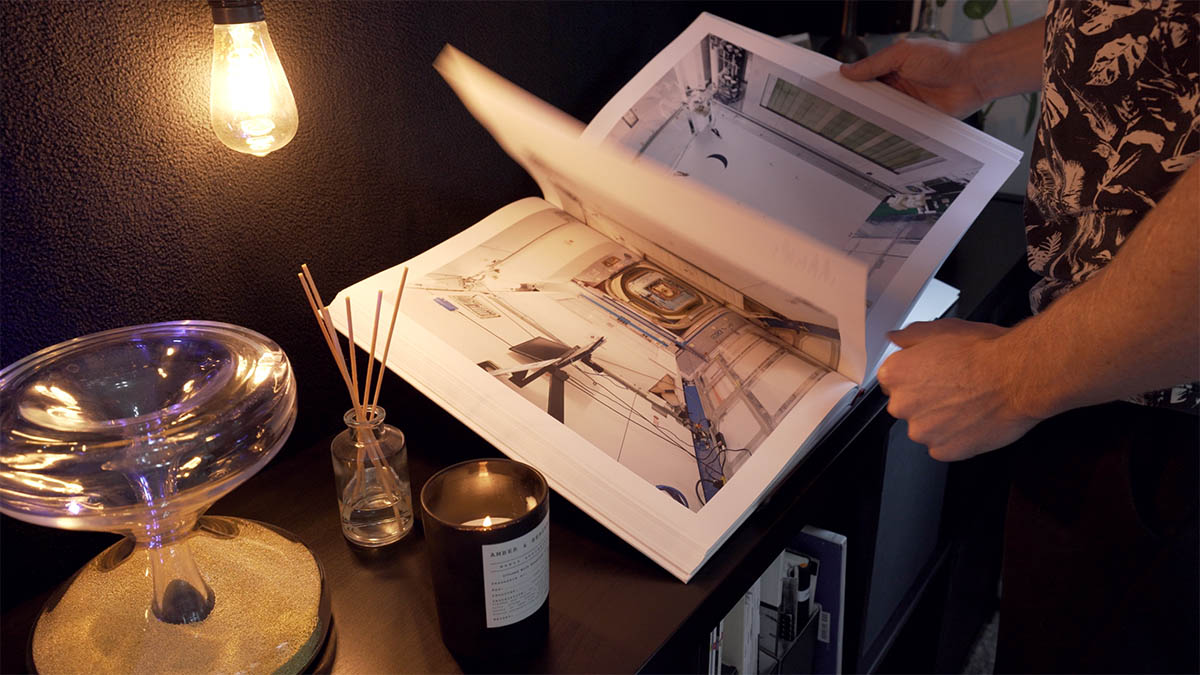
I replaced the lights in the ceiling fan with Philips hue bulbs, the lights on my backdrop are also hue bulbs. Between controlling the brightness and color of the lights and lighting candles, I often change up the light in the room to stay comfortable. The addition of oil diffusers and scented candles also helps me create a calm and comfortable vibe. And as much as I love plants, I really don't get enough sunlight in this room to keep them healthy, so I don't keep any of them in here long-term.
The more comfortable I make my space, the more time I want to spend in it. Be sure to make your space comfortable to you and your particular sense of taste.
Pillar #3 - Focus
The third and final pillar of a great home office is focus. While this may seem obvious, it's something I've paid more attention to lately. With social media and technology eroding our ability to focus on a single task it's important to remove distractions that divide your attention.
Suggested Reading
If you want to learn more about focus, I highly recommend the books Deep Work and Digital Minimalism by Cal Newport. I've found that when I stopped multitasking and learned to focus without distractions, my work has gotten far better and I get it done much faster.
Declutter
One of the best tools for increasing focus is to clear your space of clutter. Usually, the only things I keep on my desk is a coffee or tea, water and my notebook. Since 2014, I've used the Large Moleskine Taskmaster Pro. They have the best combination of blank and daily planning pages that I've come across. I use them to plan my days, monthly goals, as a scratch pad and to sketch out ideas. Also on my desk is a leather tray I got as a gift years ago. Anything I want at an arm's reach, I keep in here.
Organization
Continuing with the theme of organization, I can't focus if my office is a mess. By having a place for everything, I'm able to quickly find whatever I'm looking for. However, the benefits go beyond organization. A tidy home office looks professional and when working in a professional space, sub-consciously, I am motivated to remain focused. This is done by using basic plastic bins and boxes and using a label maker to ensure everything has its place.
Quiet
If you aren't fortunate enough to have a quiet place to work, then I can recommend some noise-cancelling earphones. The Gen 2 Bose QC 35s were a life saver when I travelled a lot for work and when I lived in Brooklyn, New York. Now, I mostly use them when I need an extra level of focus. While they're a bit on the expensive side, they're worth every cent.
Inspiration
Finally, I like to surround myself with things that I find inspiring. For me, that's mostly artwork and books. I've avoided collecting too much though due to moving many times. On the wall behind my computer, I have a prized limited edition Charlie Adlard poster from one of my favorite films, 28 days later as well as an iconic design by Concept Vehicle designer, Daniel Simon.
On top of my bookshelves, you'll find some of my favorite things. There's the Walking Dead compendium, a vintage Syd Mead calendar, an photo book of NASA products and other relics that I enjoy. Within the bookshelves are old sketch books, design and art books, books about rendering and business. My book collection is pretty modest since I usually listen to books on Audible or Libby.
Having an environment that's inspiring helps me sustain my focus as well as to find my focus when I'm feeling lost.
Home Office Summary
To recap, the three pillars of a great home office are Function, Comfort and Focus. I believe if you let these guide your design process, you'll be able to create an amazing space that supports your work and your goals.
Most of us begin with a modest setup and over time, it grows to accommodate our needs. Since I run my own business out of my office, almost all of my equipment is considered a business asset or expense. Understand that my home studio has been something I've built slowly and it's a collection of tools that allows me to earn a living, and enjoy myself along the way.