How to Add, Edit, Move and Control Lights in KeyShot
Introduction
Lights in KeyShot are pretty straightforward. However, to really make the best use of them, you should understand at least the basics. With a solid understanding of what kinds of light you have access to, how to create, move, adjust them and when to use each type, you’ll be creating nicer images in no time. I walk through all that and more in this article. Be sure not to miss the video tutorial as well.
The Different Types of Lighting in KeyShot
So, whether you’ve thought about it or not, there are actually two different ‘kinds’ of light in KeyShot. We have light from images, called HDRIs. And we have lights from materials, called Physical Lights. Here’s a summary of what differentiates these light sources.
Image-based Lighting
HDRIs, or High Dynamic Range Images, contain not only colors, but brightness information. This information allows us to illuminate a rendering. It’s usually easier and faster for most to produce realistic lighting using quality HDRIs. This is partly because they are captured with a camera and contain various details from the location the photo was taken. These reflections contribute to the appearance of the materials in your rendering.
Physical Lights
Light materials or in KeyShot’s case, Physical lights are something you apply to an object. This turns the object into a light source. Light rays cast from the source and illuminate the scene. The light behaves much closer to a real-life light source than an HDRI does. Usually, using physical lights more closely emulates a photographer’s lighting setup.
KeyShot 11 Physical Lights Tutorial
If you want to jump right using physical lights in KeyShot, then this beginner-friendly tutorial will cover everything you need to know and a few other goodies. Be sure to watch until the end where I’ll show you how to add a light to your scene with a single keystroke.
Pros and Cons of Physical Lights in KeyShot
While it’s impossible to make the claim that one kind of light in KeyShot is objectively better, we can compare the pros and cons of each. As mentioned above, HDRIs usually make it easier for a beginner to achieve nice results quickly. Conversely, physical lights often allow experts to achieve a greater degree of realism.
Placement of Physical lights in KeyShot
You can position physical lights anywhere in your scene you want. The precise location of a light source largely impacts the look of the scene. With HDRIs you don’t get to control the distance each ‘light source’ of an HDRI is from the object. That’s because they’re all contained in a single image. This image wraps around the scene like a beachball. Therefore, all light sources are equidistant from the center of the scene.
Having control over physical light location is ideal for not limiting creative direction. Being able to place lights is very important to achieve the overall look of an image.
Physical Lights Can Look Boring
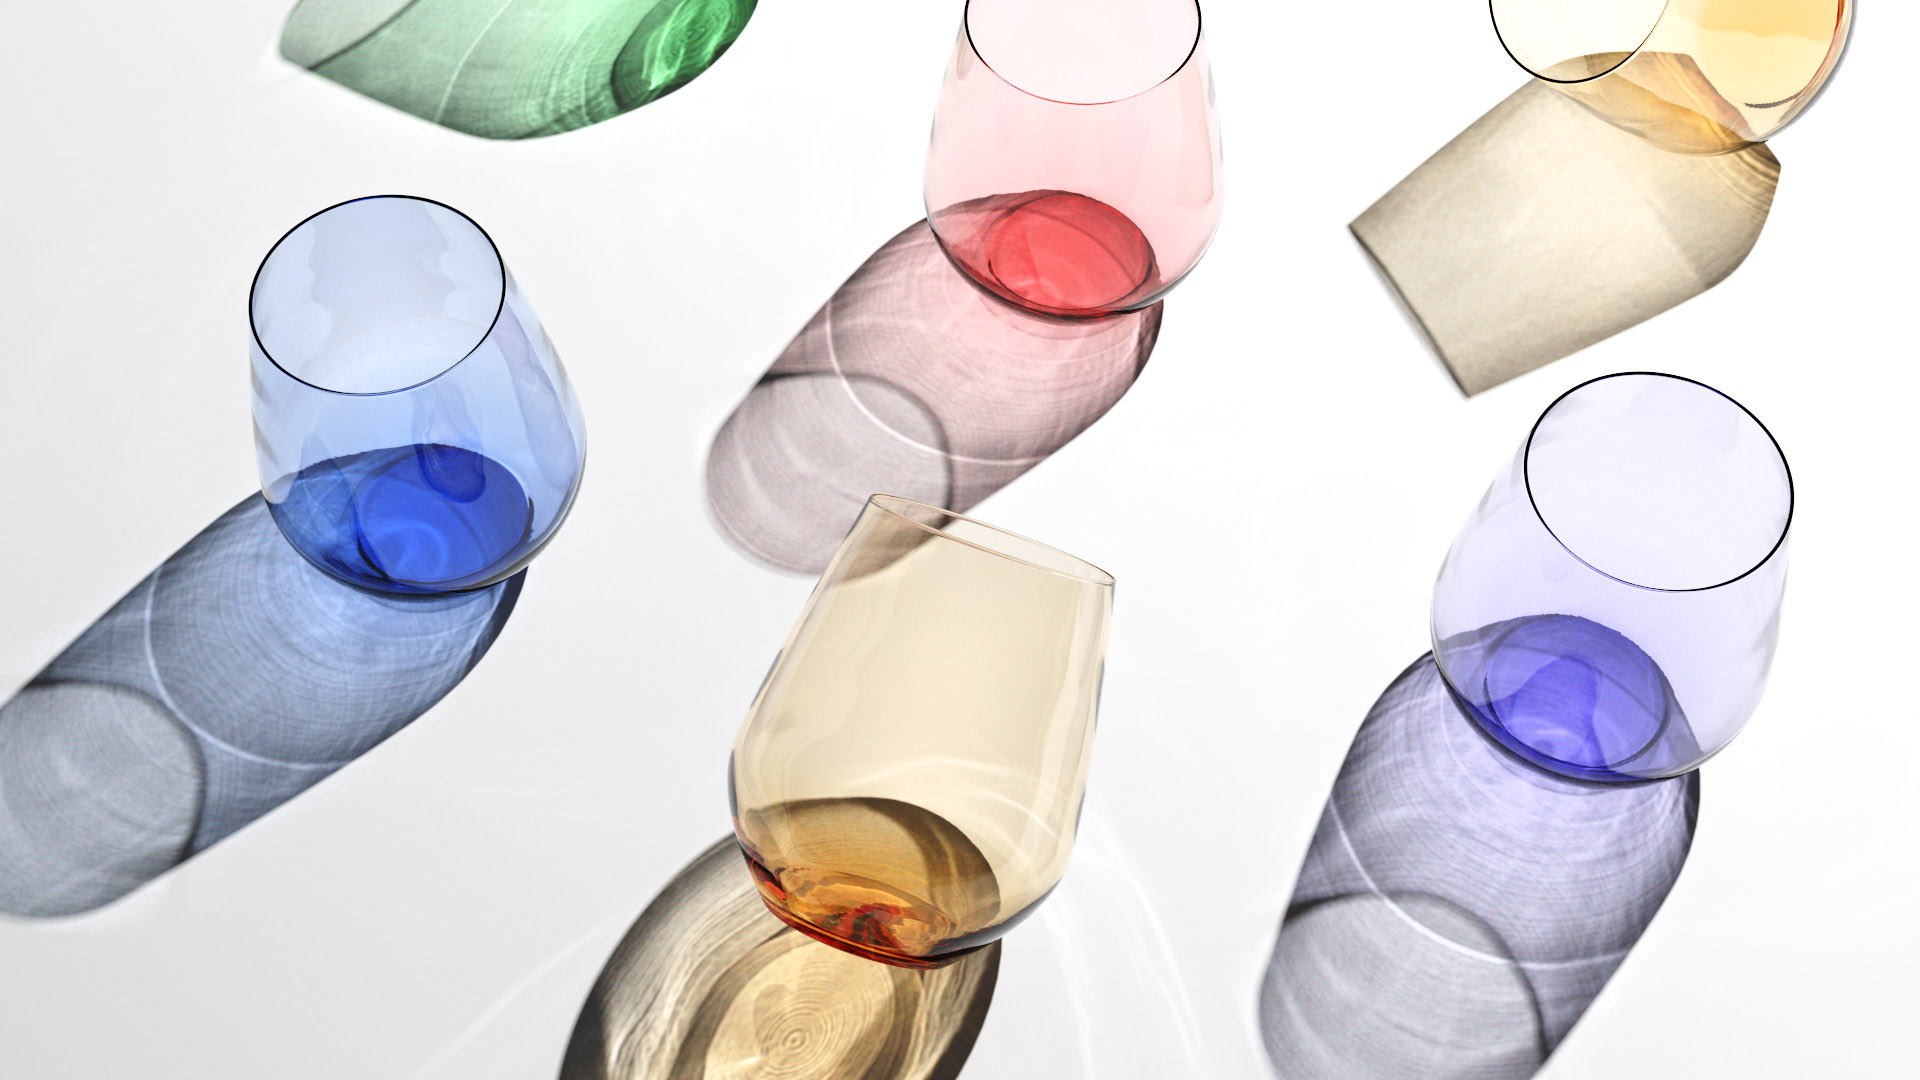
One potential downside of using physical lights in KeyShot is the lack of detail. Without using special 32-bit image textures, most lights in KeyShot will just be a simple shape like a plane or a sphere. When these light sources reflect off of a shiny material like a glass, metal or glossy plastic, the viewer can see the light source. If it lacks detail, then it can come across as artificial.
A benefit of HDRIs however, is the detail within the image. For example, an HDRI might show a window as a light source. This window will contain a window frame, mullion, window sill, curtains and whatever is outside of the window. All this detail adds depth, realism and recognizable reflections in shiny materials.
One way to combat this issue with physical lights is to use texture maps, as outlined in this tutorial.
Using texture maps with area lights in KeyShot
Physical Lights in KeyShot Can Add to Render Time
Unfortunately, with higher degrees of complexity and realism comes greater render time. This holds true for physical lights. While HDRIs simplify this process, in exchange for realism, physical lights enable greater realism for efficiency and render time.
Using physical light sources requires more precise ray (light) tracing. This takes more time. In most cases, introducing physical lights will slow down a scene in KeyShot. Having physical lights in a scene will also increase the likelihood of fireflies. Increasing material samples on the light source can help reduce this effect.
Physical Lights and Shadow Control
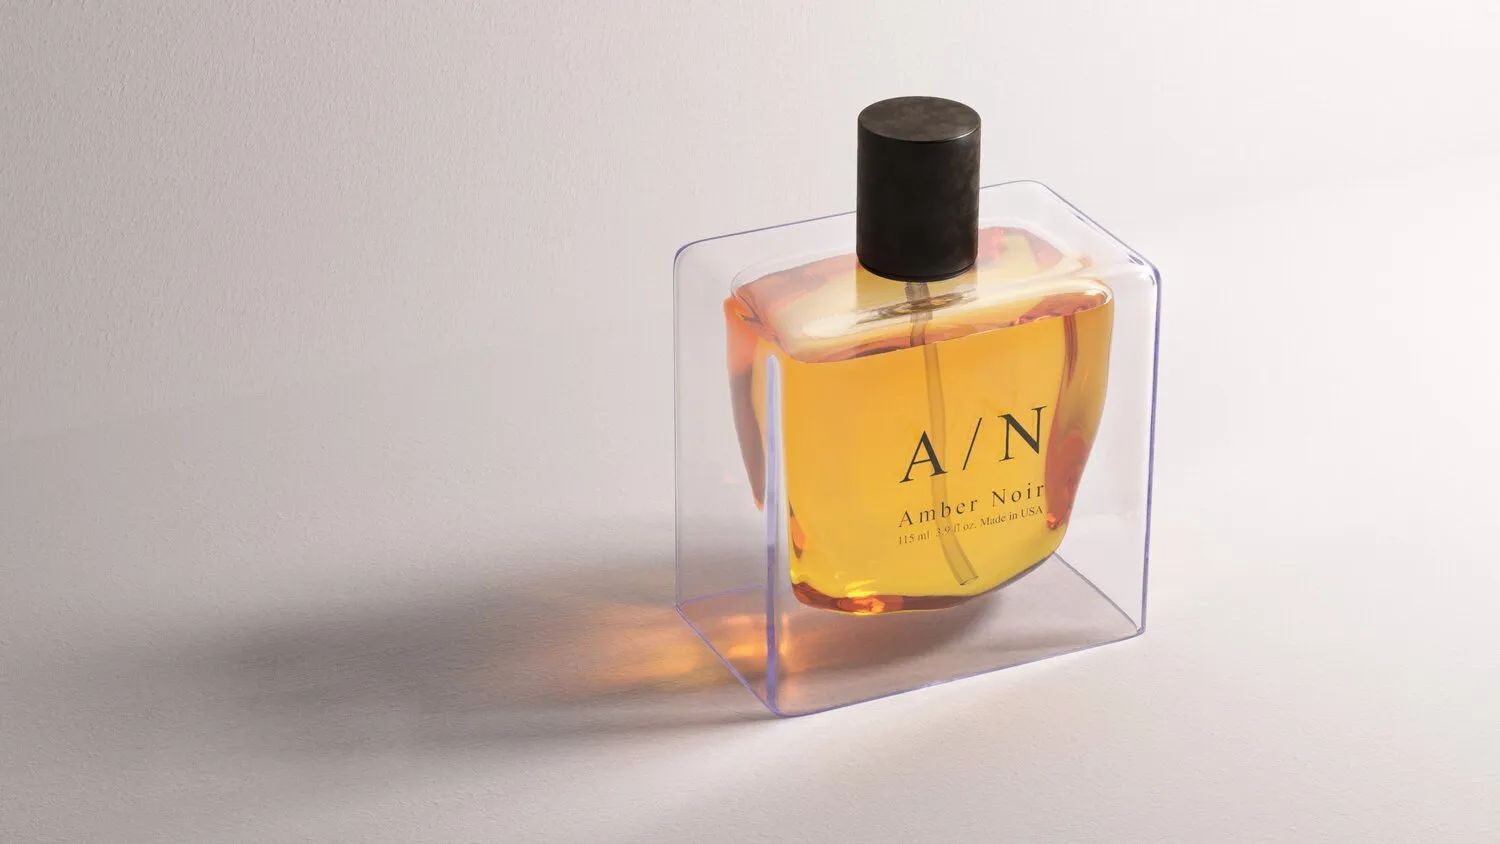
One of the biggest benefits of Physical lights in my opinion is that it can help you control shadows more easily. Shadows play a huge role in an image’s realism and effectiveness. By scaling a light source down, you create sharper shadows. By increasing it, you soften the shadows in your scene.
Physical lights give you control over both scale and color, which can help bring your scenes to life. You get to decide how well-defined the shadows are and what color they appear.
Level up your KeyShot Rendering skills
Every Physical Light in KeyShot Explained
To create a physical light in KeyShot, you must apply a light material to a physical object in the scene, hence the name. So, let’s take a look at each of these different light material types and what attributes they each have.
Point Light
The simplest of the physical lights, a point light acts like a microscopic sun. It’s omnidirectional, meaning the light goes away from the origin point in every direction. There is no surface area, so it casts hard shadows by default. Color and brightness can be controlled. Radius simulates surface area and softens the shadows. Use Point lights are to add ambient light to a scene.
IES Light
The Illuminating Engineering Society (IES) has defined a standard file format that describes light distribution. IES lights mimic manufactured lights in the real-world with measured data. With color, shape and falloff information, IES lights are ideal when mimicking architectural light sources. Rotate the parent object to point the direction of the light . To control the shadows, there’s a radius slider for IES files as well.
Spotlight
The spotlight material is like a procedural IES light. Procedural, meaning that it can be fully customized by the user. Think of a Spotlight like the stage light pointed at an actor on stage. There are controls for color, stencils (which mimic GOBOs in the real world), power, beam angle, falloff and radius. All of these controls help you shape the light to meet your requirements.
The spotlight also has no surface area. However, a unique feature of the spotlight is being able to shine a texture or pattern on the floor by using a texture for the color.
Area Light
Area lights are commonly used when trying to emulate photography set lights. Whether a soft box, strobe or fill light, area lights will typically produce the most realistic effect. As the name would imply, area lights look the way they do because of the surface area and shape of the parent object. Area lights can also receive textures that can be reflected into an object’s surface. Area lights are more likely to cause fireflies than some of the other physical light types.
Emissive
While technically not a physical light source type in KeyShot, I’ll make time to comment on this here. Emissive was once-upon-a-time, the material that ‘emitted light’. But as KeyShot matured and newer and more efficient light materials were introduced, the Emissive material fell out of favor for scene illumination. There’s still a time and place for emissive material types. They have some unique properties including textures and alpha support. They can also be used as labels, whereas other light materials can not be.
Physical Light Units
To control the brightness of our physical lights in KeyShot, we use various units depending on the scenario. Below are a list of some of the controls and units you’ll see when adjusting the brightness of lights in KeyShot.
Watt
Rather than measuring brightness, Watts measure radiant flux. Growing up, we often used 60-Watt incandescent light bulbs in my parent’s house. 60 Watts is how much electricity the light bulb consumed in an hour. The brightness was a byproduct of how much energy this bulb consumed. The brightness of a 60-watt incandescent bulb is about 1,600 lumen.
Lumen
When describing the measure of emitted light, we use Lumen. To carry on with our previous example, an LED light bulb emitting 1,600 lumen consumes about 18 Watts per hour. This is because LEDs are far more efficient than incandescent. In KeyShot, using the same Lumen value across different-sized objects will result in varying brightness appearance.
Lux
The abbreviation, Lux stands for Lumen per square meter and as the name suggests, has something to do with surface area. Lux ensures a consistent amount of light emitting from every square meter of surface area. While in KeyShot, if you have two objects of varying sizes and the same Lux on each, then they will appear identical in brightness.
Multiplier
Intensity is used to control the brightness of IES lights. Because IES lights contain brightness information, KeyShot provides an intensity slider. This lets you control the brightness of the light relative to the original, measured brightness.
How to Create Physical Lights in KeyShot 11
So, now that you know all about light types, pros and cons and units of brightness, let’s make some physical lights in KeyShot.
First, add a primitive to your scene. You can do this from the Edit>Add Geometry menu or just press ctrl+1-0 on the keyboard. A primitive shape will be added to the center of the KeyShot scene. If you already have a large object at the center of your scene, there’s a chance the new primitive will be hidden by the existing model.
How to Move Physical Lights in KeyShot
If it’s not already, select the primitive or light from the scene tree and press ctrl+d on the keyboard or activate the move tool from within the position sub-tab. With the move tool active, drag the primitive above your model and position as desired. Finally, double-click the primitive to enter the material properties panel. Using the material type drop-down menu, select your light material of choice.
Depending on the material type you add, you’ll have a variety of adjustable properties. Most physical lights can be pointed in a specific direction as well. This is done by activating the move tool on the primitive emitting the light.
Which Kind of Light to Use When
While this is fairly subjective, there are a few rules of thumb to consider when choosing what type of light to use. Lights with no surface area such as point, spot and IES won’t reflect or be visible in reflections of specular materials such as metal and glass.
IES lights are typically best for emulating architectural lighting. Area lights and emissive lights support textures if that’s important to your project. Finally, all physical lights can be animated and moved about your scene.
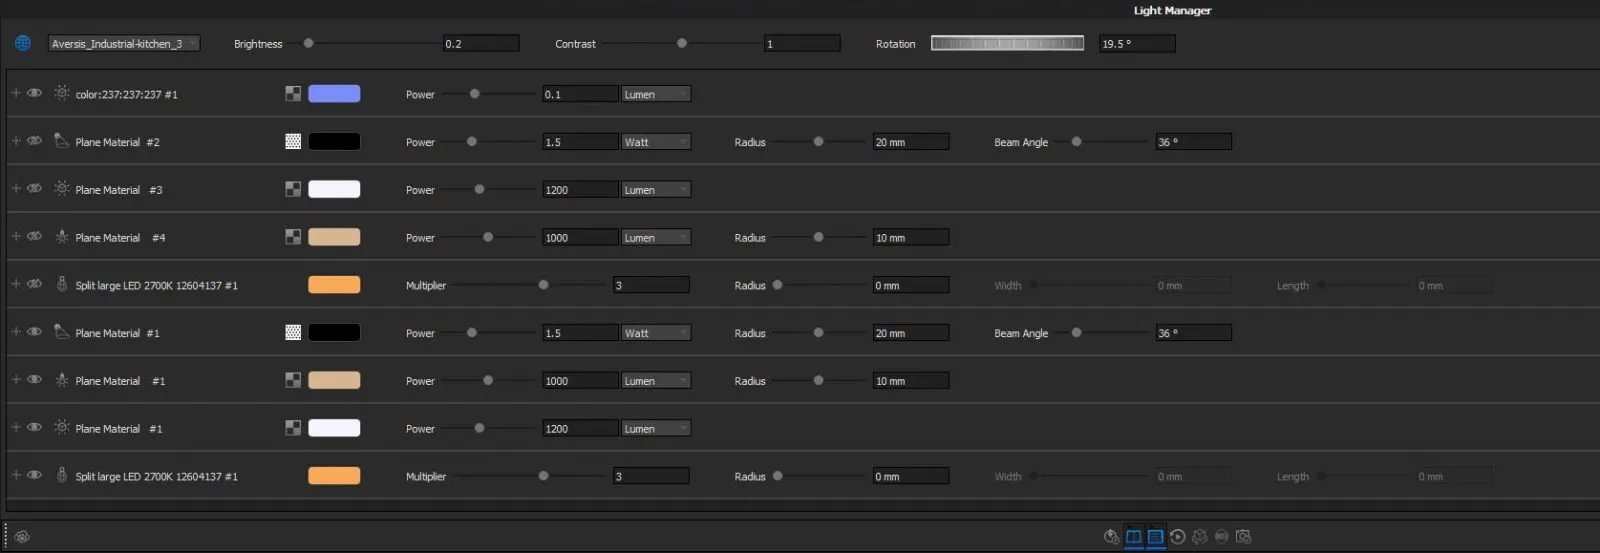
How to Use the KeyShot Light Manager
Once you’ve added some physical lights in your scene, you may want to have a sort of control panel where you can dial in the settings of each light in the scene. This is exactly what the Light Manager is for. Introduced in KeyShot 10, the light manager gives you control over color, visibility, units, power and other settings depending on the light type.
This prevents you from having to constantly double-click lights from within the scene tree to make lighting adjustments throughout the scene. Shift+L on the keyboard will bring up the light manager in KeyShot.
How to Add Glow or Bloom to Lights in KeyShot
When you see a blurry haze around a bright light source, or a glow, that’s added with the Bloom tool in KeyShot. In the real world, this is caused by lens aberrations and atmospheric haze. It can even be caused by the lens that is our eye.
To add bloom in KeyShot, navigate to the image styles tab. There, you’ll see a section called Bloom Intensity. I recommend increasing the Bloom value to 1. Then, increase the Bloom Radius to the desired amount. The Bloom Threshold will selectively ensure only the brightest areas receive the bloom effect. Higher Threshold = fewer areas affected by bloom.
How to Make Realistic Lights in KeyShot
If you’re hoping to create more realistic lighting in KeyShot there’s a few things I’d recommend paying attention to.
Scale
Scale refers to both the size of the object emitting light as well as the scene. It’s important to make sure that everything in the scene is built to-scale. Because we rely on physics and mathematical calculations to light our scene, changes in scale will affect the results.
Color
While white light contains every wavelength of electromagnetic radiation, most light sources emit a slightly colored light. Because KeyShot gives you control over the color of the light, try to match the color with the light source. Study what color each light source emits.
Texture
As previously stated, every object in the world reflects light and thus should be visible in reflections. If you have a shiny material in a kitchen, then every item within that kitchen should be visible in the reflections of this object. This is most easily achieved by using HDRIs or fully-decorated 3D scenes or a combination of both.
The more you can study how the real world works the better. Try to incorporate these rules into your scene. For more reading on realism in rendering, I recommend this article.
How to Make Dramatic Lights in KeyShot
If you’re looking for drama, watch this short tutorial. I show you how to use a single physical light source in KeyShot to accomplish the task.