Rendering vs. Photography, Which to Choose When?

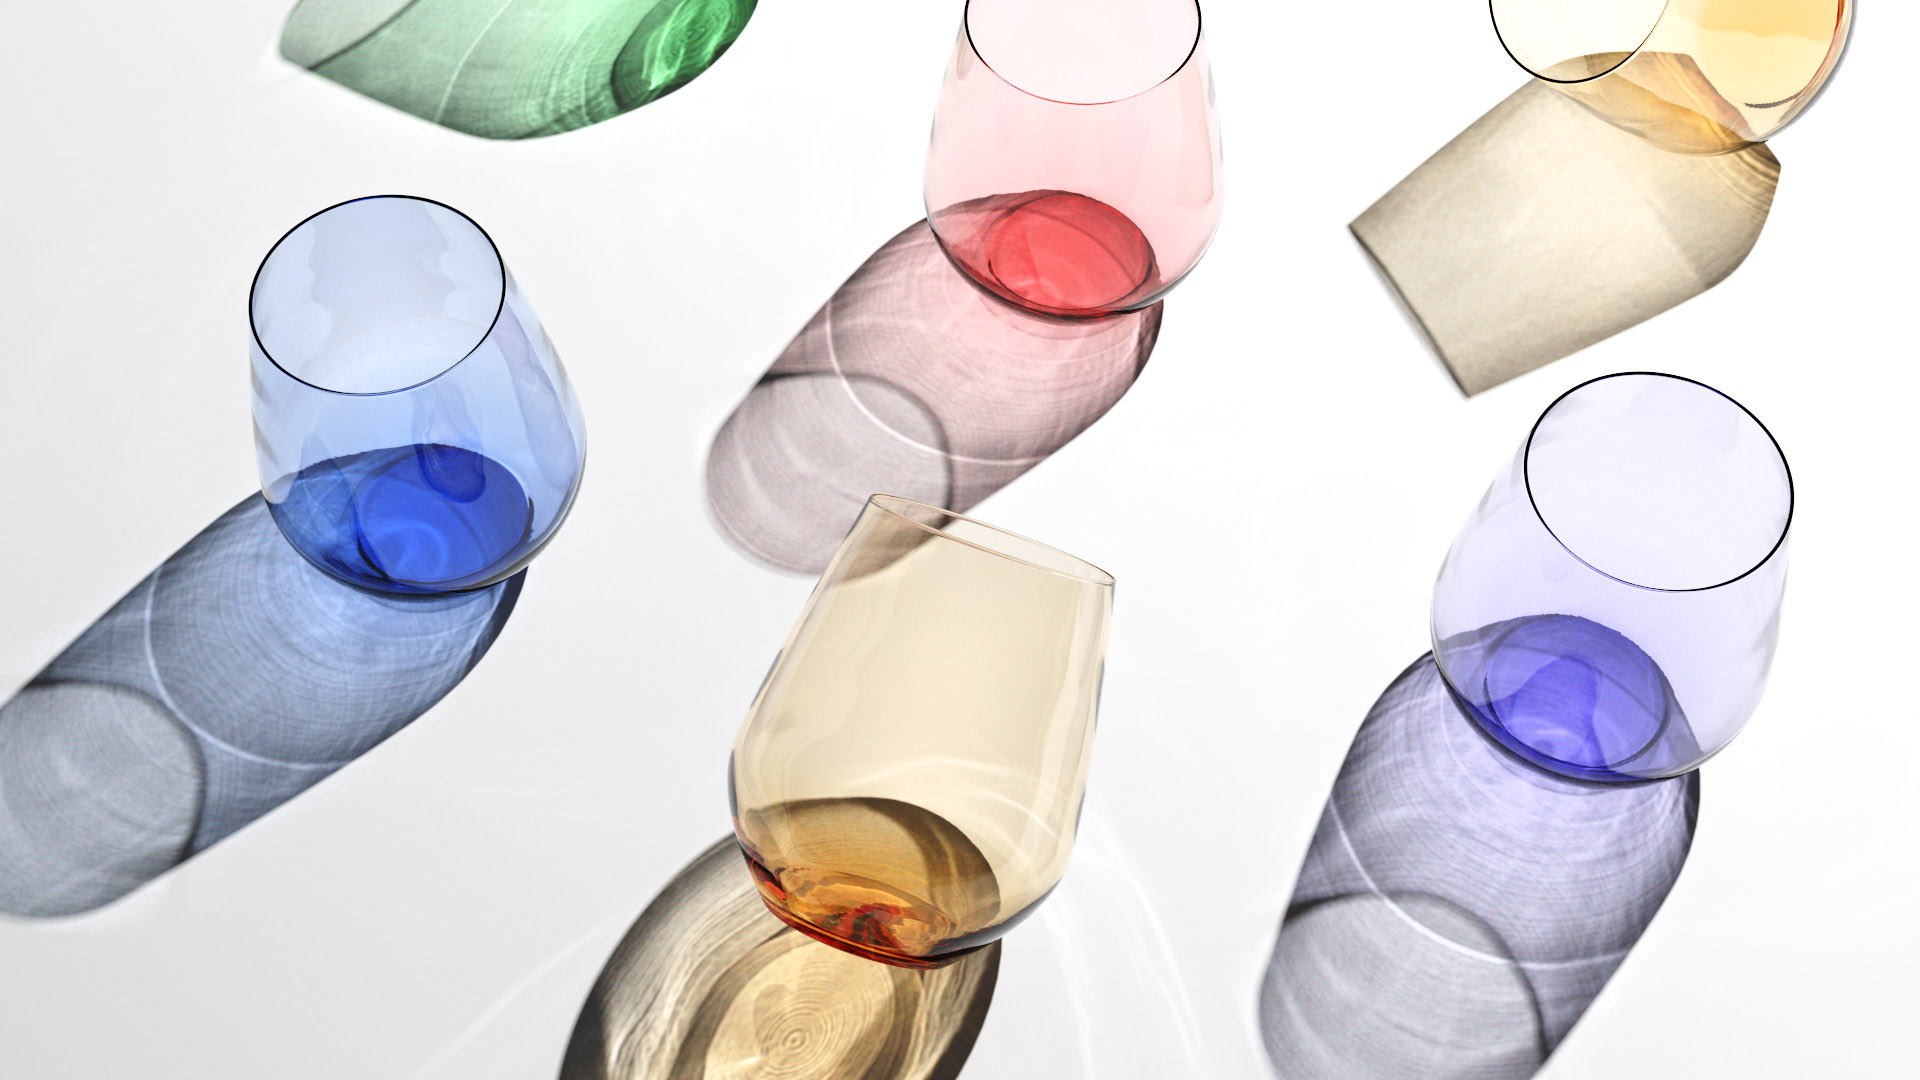
You’ve probably heard that many advertisements use CGI or computer-generated images. Through rendering, we create CGI. This means that rather than relying on a camera to capture an image of an existing object, a computer creates a photo-realistic image of an object that may or may not exist in real-life. Whether a still image or animation, we refer to this as rendering. So, which is a better option today, rendering or photography?

How is rendering done?
At a high level, the process of rendering is pretty straightforward.
3D Modeling
First, a 3D model of the object you wish to render must be made. This is usually done with a 3D modeling software. Typically, consumer products are created in a CAD program while characters, environments and more organic things are made with a polygonal modeling program.

Material Creation
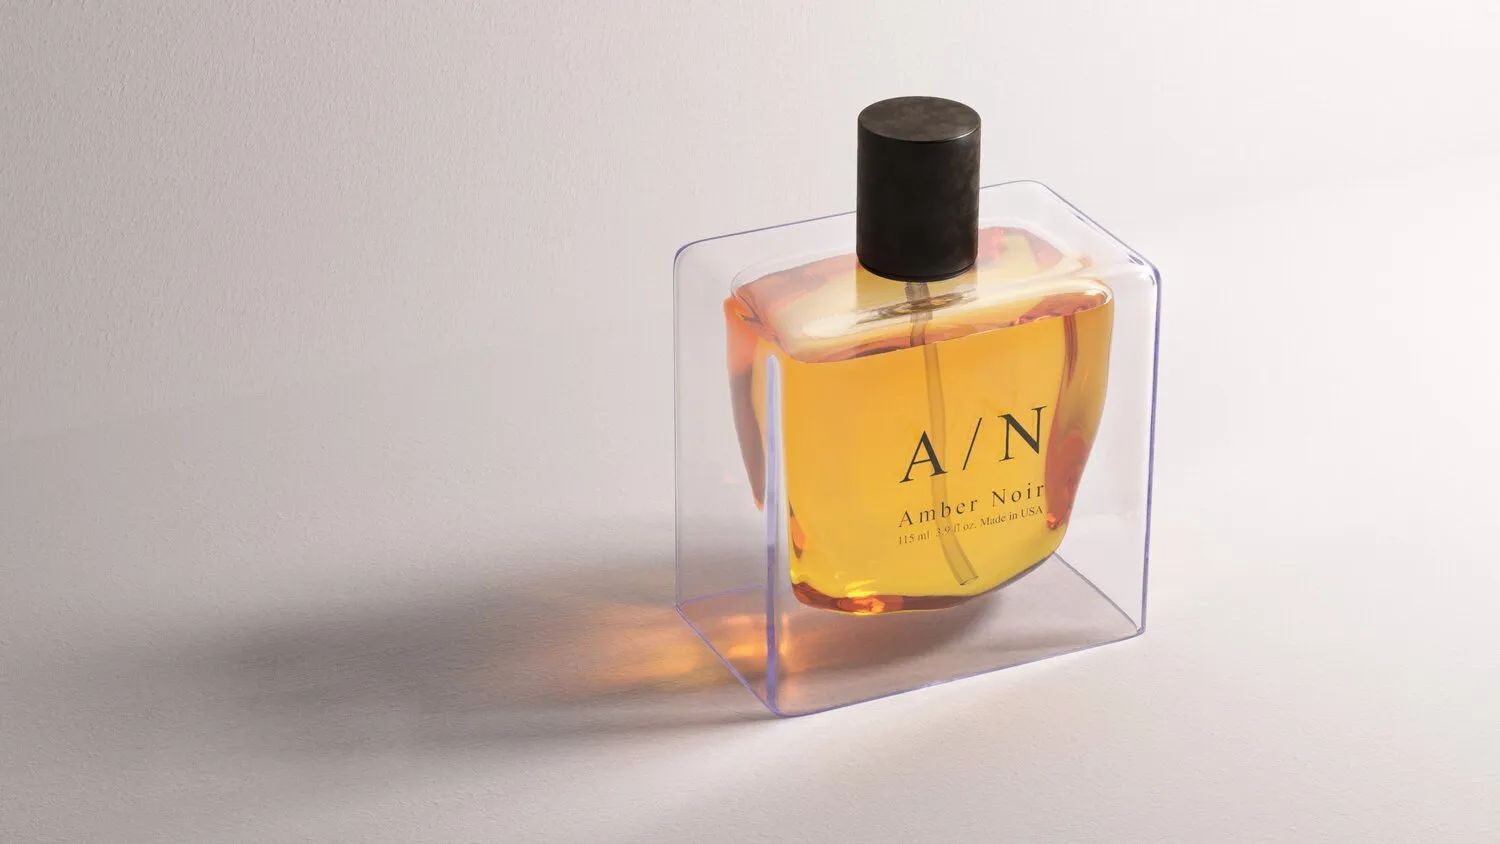
After creating a model, it’s ready for rendering. First, material appearances are added to the model. Material details include surface color, transparency, translucency, roughness, textures, patterns, decals and even wear and imperfections.
Set Dressing
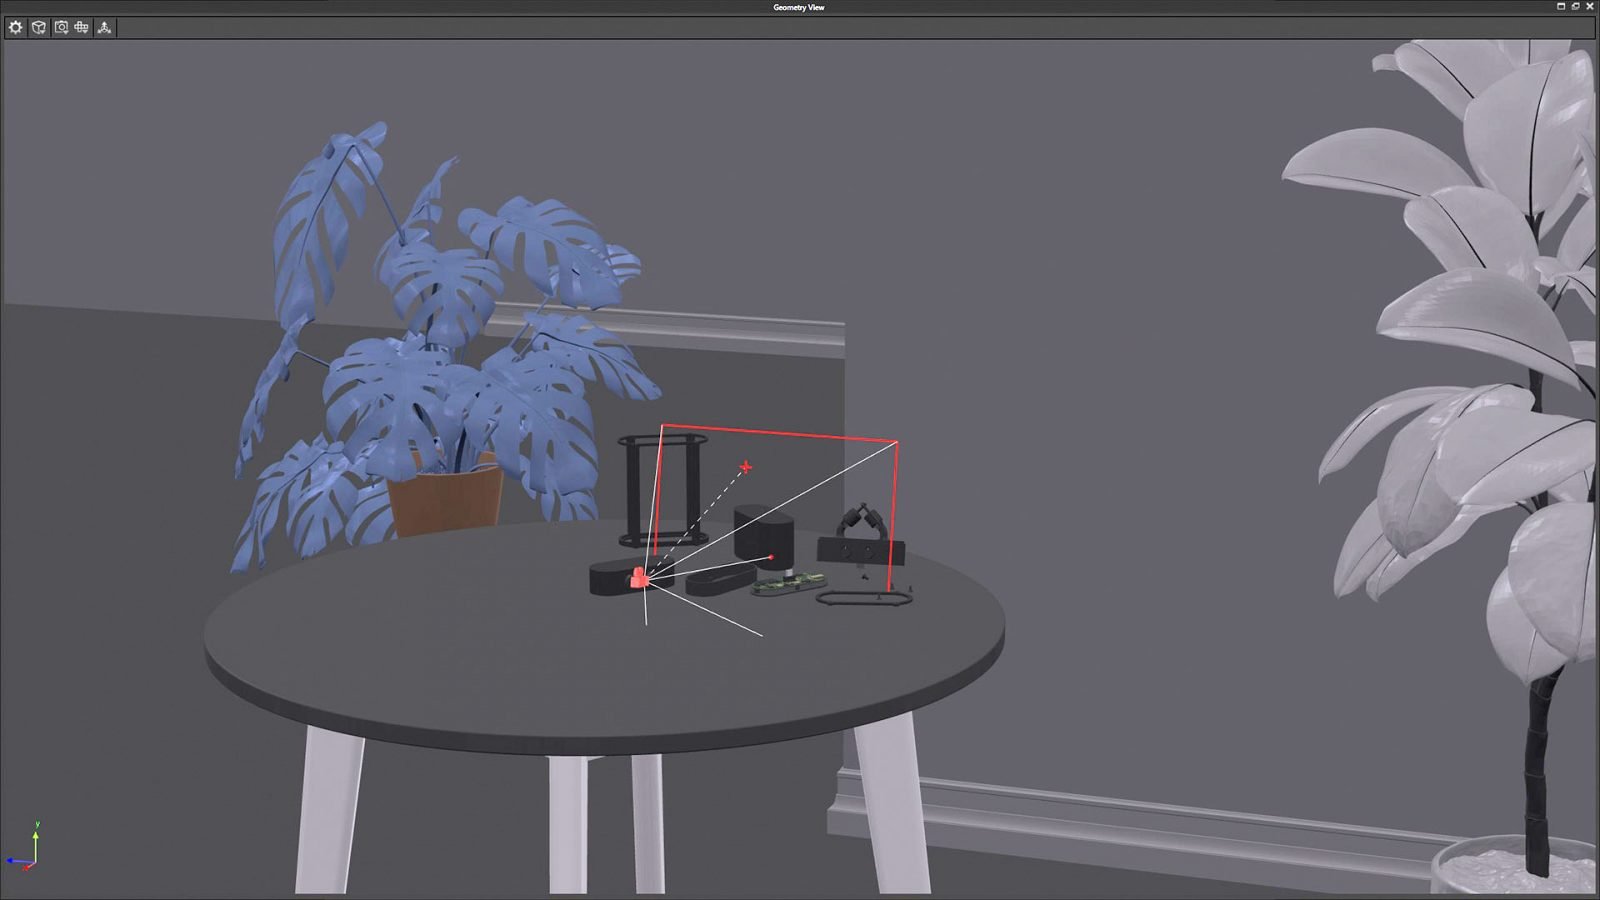
Next, if the job calls for it, the model is placed in an environment to add context. This can include set dressing such as supporting props to tell more about how the product is used. Context plays an important role in both realism and narrative, such as who the product is for.
Lighting
After that, it’s time for lighting, which is one of the most transformative steps in the rendering process. It sets the mood, can make or break the realism and of course, brings the narrative to life. Good lighting is often overlooked by beginners, but well-understood by the best render artists.
If you're interested in learning more about lighting in KeyShot, check out this article.
Level up your KeyShot Rendering skills
Rendering
Finally, after materials, context and lighting, it’s time to let the magic happen. Once all the render parameters are set, the render engine will get to work.
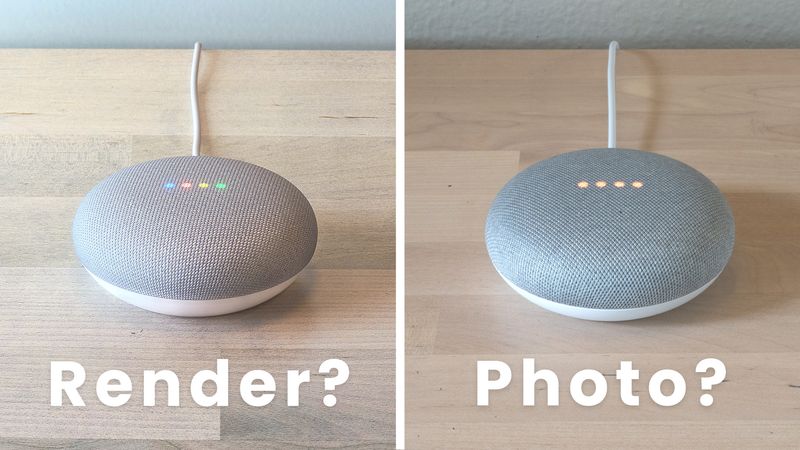
Rendering software creates photo-realistic images by executing millions of calculations by literally tracing simulated rays of light throughout the scene and back to the camera. As each ray of light contacts an object in the scene, how it behaves will depend on the properties of the materials applied to each object.
Today, most render engines use physically-based materials which are tailored to mimic real-life material attributes. Even with high-end computers, these calculations can take long to complete. This is especially true with animations which are often made of a sequence of images ranging from 24 to 30 frames per second. Learn more about why many designers use KeyShot for product rendering.

If rendering feels like a time-consuming and tedious process, then how could it possibly be a better option than photography?
Challenges of product photography
Since you’re probably familiar with how cameras work, let’s look at five common challenges and drawbacks that come with commercial photography.
Product availability
In order to take a photo of something, that something needs to exist and you must be able to get your hands on it. With tight production schedules, waiting until the final product has been delivered to begin photographing can hold up product launches.
Logistics
Sometimes a photoshoot calls for environments, props or scenarios that are impossible to create. Let’s say you want images of a car in the Swiss Alps during summertime, but it’s currently snowing there. Or maybe the lighting is only ideal for a few minutes a day in that location. Sometimes, the logistics of a photoshoot are not possible given the deadline or budget constraints of a project. This can still be the case, even with a simple studio photo shoot.
Budget
Speaking of budget, more money means more options. However, every product launch has a limited budget. The cost of a photoshoot can include equipment rental, location rental, talent, props, retouching, shipping of product, transportation and more. And if more images are needed after a photoshoot, you have to do it all over again. Many commercial photographers charge between $2,000 to $5,000 per day.
Space
Longer focal lengths are commonly used in product photography since they produce less distortion. Longer focal lengths require the photographer to be further away from the subject. The larger a product is, such as an appliance or furniture, the larger of a studio space is required. The same goes for light sources for larger objects.
Time
While snapping a photo may just take a fraction of a second, the entire process of a photo shoot and editing the final images can quickly add up. This is especially true when multiple variations of a product are involved.
Challenges of product rendering
Creating CGI isn’t without its own challenges. Here are some of the biggest hurdles that come up when choosing rendering over photography.
Accurate 3D models
Without a 3D model, there’s nothing to render. The better the CAD model is from an accuracy and detail standpoint, the better the final renderings will look. Most companies produce 3D CAD models of their products before production. Engineering models however, don’t often capture cosmetic details such as logos, fabrics, surface patterns and rounded edges. Other details like bolts, fasteners, cables, wires, PCBs, batteries are typically not modeled either since they’re time-consuming to produce.
Budget
The costs associated with rendering include specialized computers, software and digital assets such as materials, props and other models. Render artists are specialists that have a unique blend of technical and artistic skills and often spend many years refining their skillset. A good render artist doesn’t come cheap. And if you move beyond still renderings into animation, the cost and time to produce the video increases substantially.
Material accuracy
Physically-based rendering and recent advances in texture creation and material scanning has made it possible to create photo-realistic digital representations of physical materials. However, some materials are still difficult to recreate depending on the render engine being used. This is especially true when layering materials with varying levels of translucency, transparency and reflectivity.
Staging
To create a fully-detailed 3D scene with props and supporting visuals can be a challenge. To simulate scattered objects, water droplets, fabric, cables, fog, plants and powders often require specialized software that doesn’t always play well with CAD models. It can be difficult and expensive to source or create these 3D assets required to create a convincing in-situ rendering. Sign up for the File Vault to get links to my favorite 3D asset library websites!
Benefits of product rendering over photography
While both photography and rendering come with their own challenges, let’s look at the benefits of using CGI for product visualization.
Cost savings
There are lots of ways CGI can reduce the cost of bringing a product to market. Design decisions can be made faster and without producing as many physical samples. Ecommerce and advertising images can be produced before physical samples are available. Variations of a product such as size, color and configuration can also be rendered with little additional cost or effort. Finally, if a revision or additional images need to be created, the process is as simple as opening the project file, making some changes and rendering.
Parallelization
Because a physical product isn’t needed for rendering, as soon as a CAD model is available, the rendering process can begin. This allows render artists to work alongside, or just a few steps behind the CAD team. Even if the model is not in its final state, much of the preliminary art direction, exploration and scene setup can be done with placeholder models. This helps shorten the product launch timeline.
Revisions
If additional images need to be created for a new product launch or campaign, it’s easy to pick up where the last render artist left off by reusing old project files. Maybe the product changes over the years, but you wish to recreate the same successful launch campaign. Simply update the 3D model and re-render the final imagery. This is far more efficient and cost-effective than trying to recreate past photoshoots.
Creativity
The last and most important benefit of CGI I’d like to mention is creativity. Rendering products in a digital space gives artists the freedom to create the visuals they want without the constraints of physics or photography. Exploded views are a great example of this. It’s difficult to try to create a photo of a product suspended in air, with each part evenly spaced and disassembled. Yet, that’s easy enough to do with CGI. From odd camera placements and difficult animations to controlling how light interacts with each surface in the scene, CGI offers the ultimate flexibility.
So, which is better rendering or photography?
While arguments can be made in favor of both CGI and photography, it’s ultimately going to be case-specific.
If budget is the primary concern and the product is quite small and a physical example is available, then in many cases, it’s easier, faster and cheaper to do a small photoshoot.
If creative freedom is the primary concern and the product is quite large or a physical example is not available yet, then CGI will almost certainly be the way to go.
Other considerations include whether the product is part of a family of similar products of varying size, colors, configurations and more. And how often will additional images need to be created? Often, in this case, CGI wins.
What about custom-made products? Furniture and jewelry come to mind. Maybe the products in question are very expensive to produce or are made-to-order. Once again, in this case, it’s almost always more cost-effective to use CGI.
Finally, it’s worth thinking systematically about the entire product catalog. Ikea is a famous example of being early adopters of using CGI for a product catalog. They invested heavily in moving to a CGI-first workflow. It’s expensive in the beginning, but over time, creating each digital asset is more and more cost-effective.
Now, when they wish to create visuals, they have a vast library of everything they make and sell available as digital twins. What might have before been a slow, expensive process to create imagery is essentially drag-and-drop and with far less environmental waste too. In their case, rendering is better than photography.
While each project is unique, in my experience, about 75-80% of the time, CGI is the way to go. I hope to have given you enough information to confidently decide which is the right fit for your next project.