Bump vs. Normal vs. Displacement
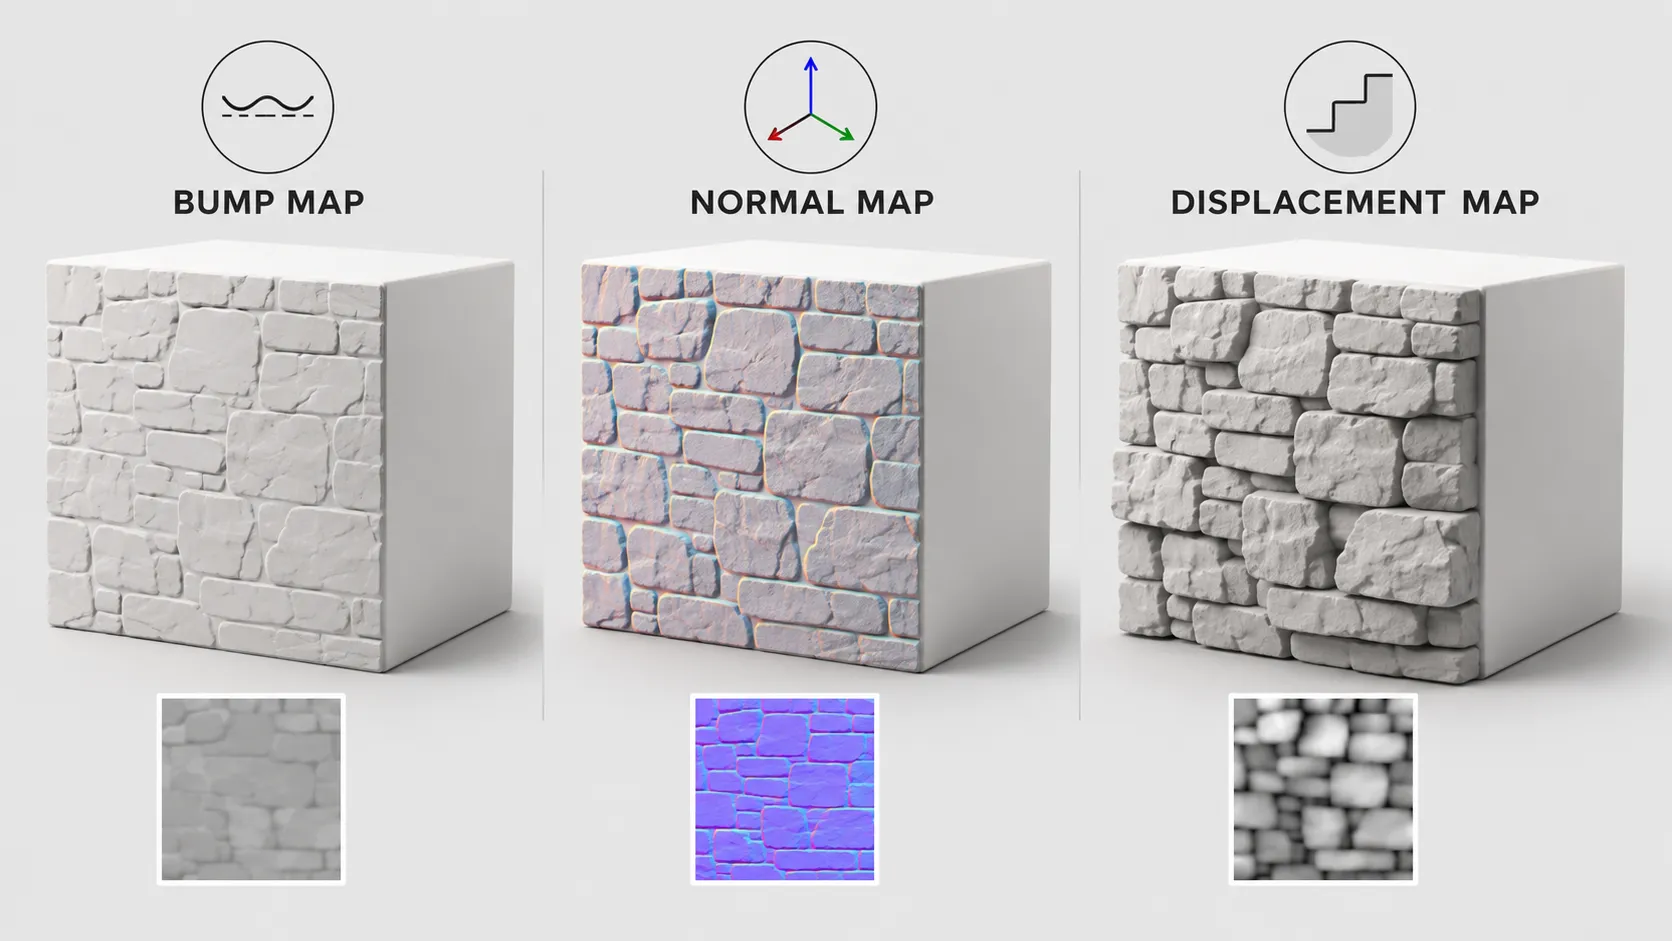
Maps and textures get used interchangeably, but when it comes to adding surface detail in KeyShot, you've really got three distinct tools: bump, normal, and displacement. They look similar on the surface (see what I did there?), but they work differently, and knowing which one to reach for, and why, will save you time and unnecessary rendering cost.
Bump maps: the simplest trick
A bump map is a black-and-white image that tells KeyShot where a surface should look high and where it should look low. Black represents the lowest points, white represents the highest, and any gray value in between represents something in the middle. Think of your material as flat terrain: black areas become valleys, white areas become mountain peaks.
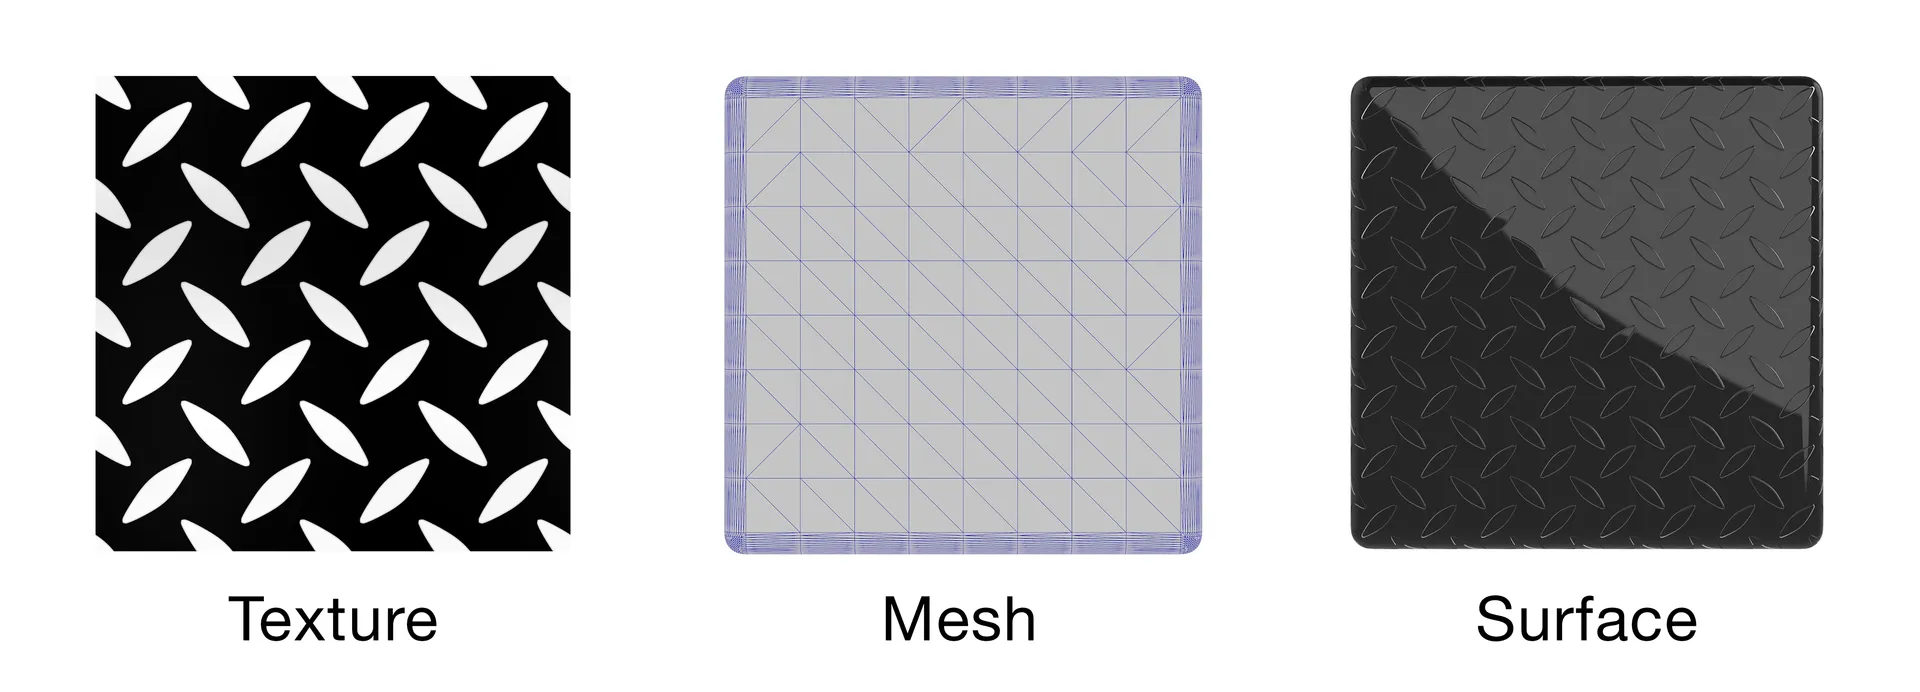
Here's the part that matters: none of this is real. A bump map doesn't actually change the shape of your surface. It's a camera trick. KeyShot uses the grayscale values to decide where to place highlights and where to place shadows, essentially faking the appearance of texture by adjusting pixel color, not geometry. That's exactly why it's so useful: you get a large amount of apparent detail for almost no computational cost.
One handy shortcut: you can plug a full color image directly into a bump channel, and KeyShot will automatically convert it to grayscale and use it correctly. No manual conversion needed.
Normal maps: bump maps with direction
A normal map does the same basic job as a bump map (simulating surface detail without touching geometry) but with more intelligence. Instead of just encoding height with black-to-white values, a normal map uses all three color channels (red, green, blue) to encode direction, corresponding to X, Y, and Z in 3D space.
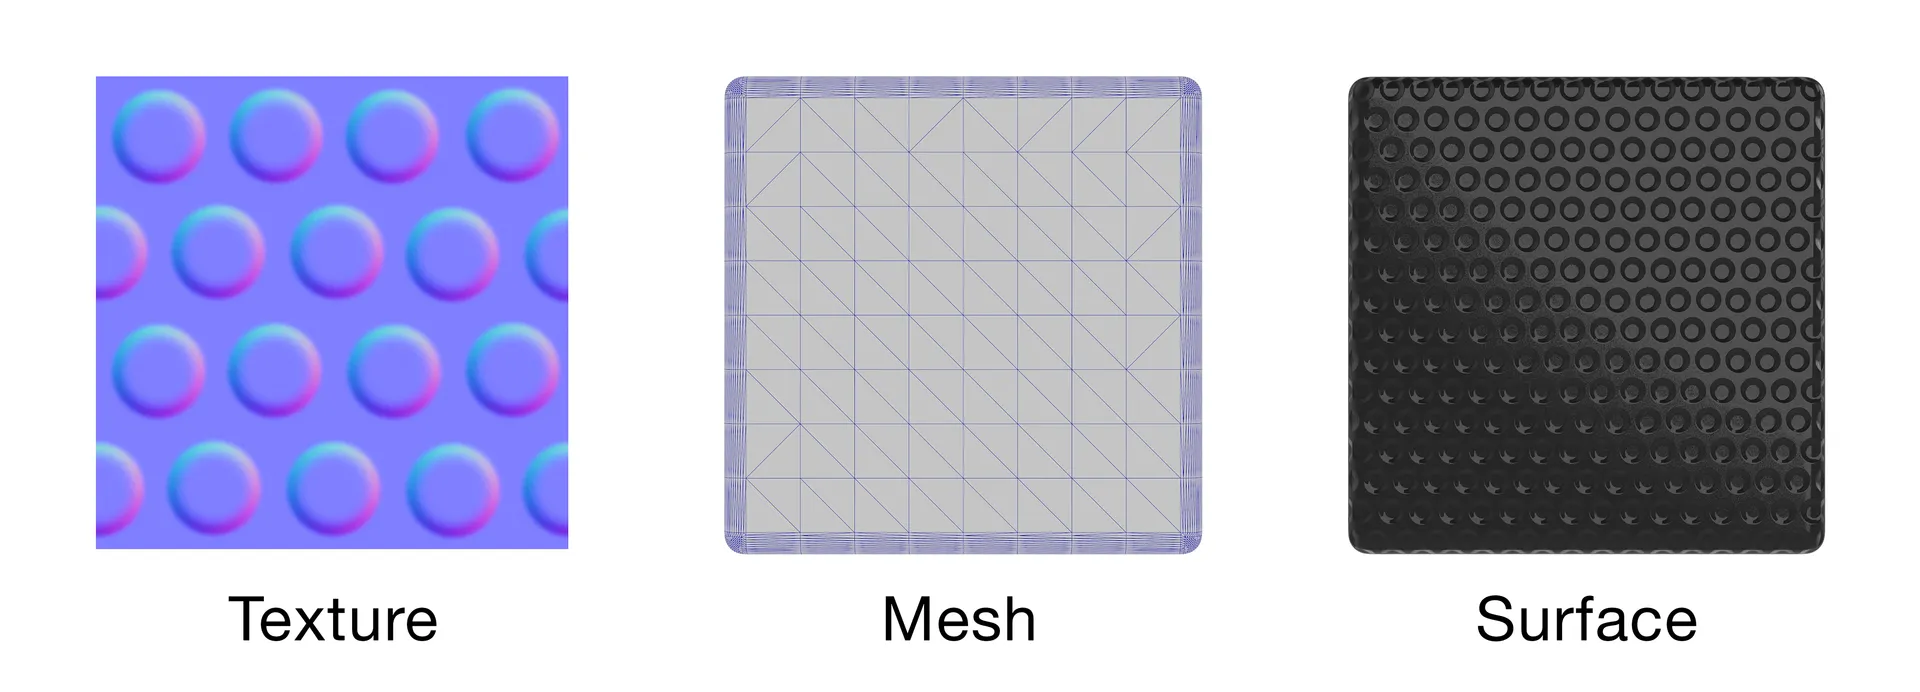
That extra information means light can be simulated bouncing off the surface in any direction, not just "up" or "down" the way a bump map handles it. The result: more realistic-looking surface detail (especially apparent during animations).
The tradeoff is that normal maps are more complex to generate. You can't just take any photo and drop it in the way you can with a bump map, it needs to be created through a proper normal-mapping process. In KeyShot, you apply a normal map the same way you'd apply a bump map, but you'll check an additional box to tell KeyShot to interpret the colors as directional data rather than height data.
Level up your KeyShot Rendering skills
Displacement: the only one that's actually real
Displacement is a different category entirely. Where bump and normal maps are visual tricks, displacement actually changes the geometry of your surface. It does this by pushing the triangles that make up your model in or out, along what's called the surface normal (imagine a line pointing straight out, perpendicular to a triangle's face; that's the direction displacement pushes along).
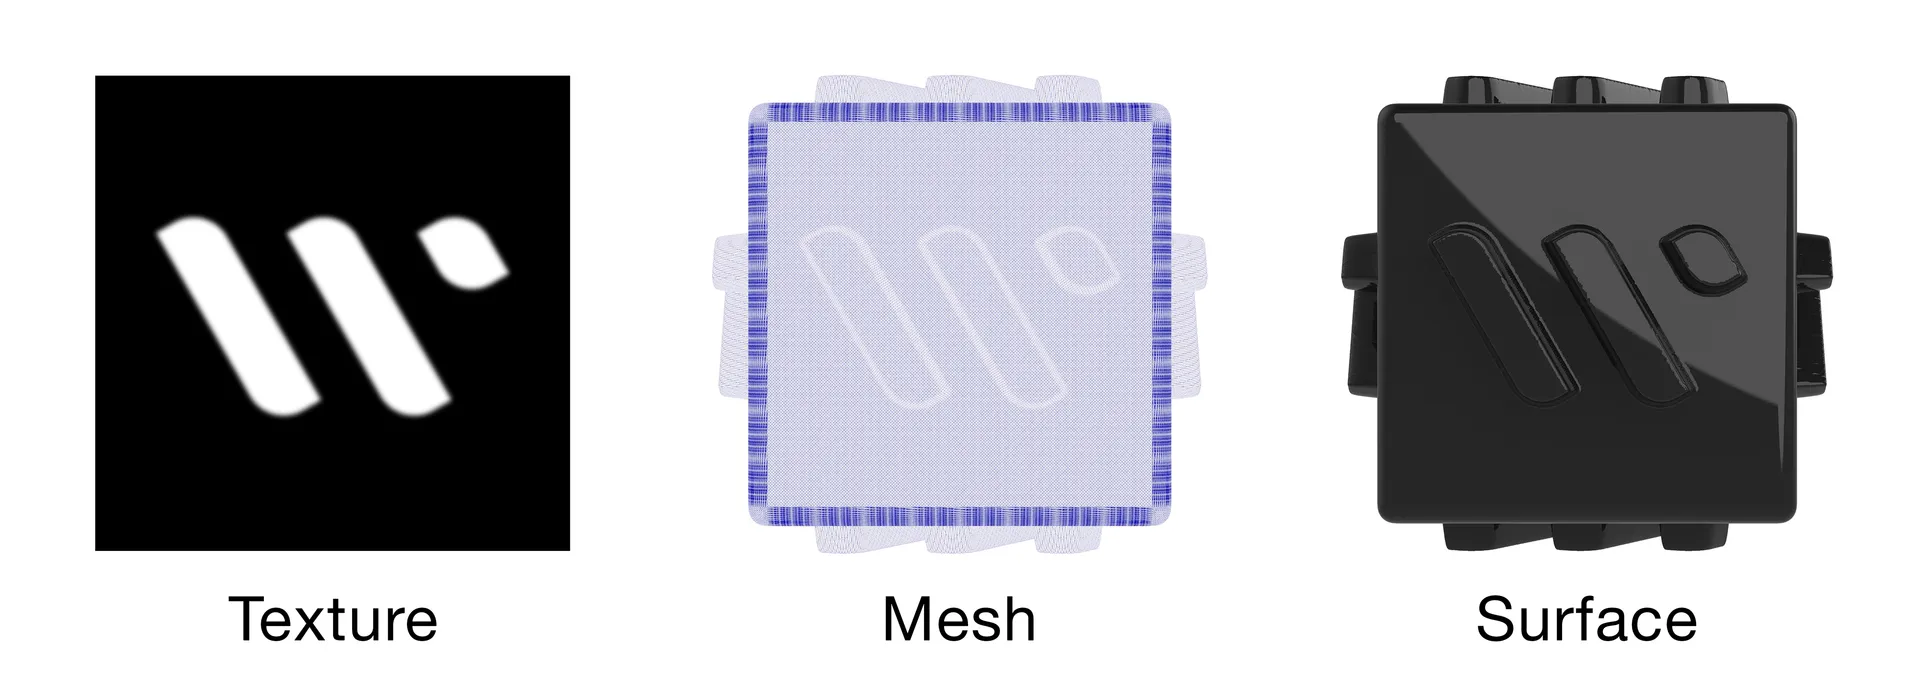
This matters because bump and normal maps never affect an object's silhouette. Crank the intensity as high as you want, the outline stays exactly the same. Displacement is the only one of the three that will actually change how your object's edge reads against a background, because it's genuinely reshaping the surface.
In KeyShot, applying displacement means entering the material graph and adding a geometry node. Every time you tweak your displacement settings, that node has to regenerate before you'll see the change reflected in the real-time view.
The catch, as always, is cost. Displacement is computationally expensive, and it gets more expensive the finer your detail. To avoid a jagged, stair-stepped look, your surface needs enough triangle density that individual triangles are smaller than the details you're trying to capture. That means more triangles, which means more strain on your computer. For a single still render, that's usually manageable.
Getting the technical settings right (this applies across all three)
A few settings matter regardless of which map type you're using, and getting them wrong is a common source of disappointing results:
Image format: A standard bump texture works fine as an 8-bit JPEG, but you'll technically get better results from an 8-bit PNG, since JPEG compression throws away information PNG keeps. Normal maps should be PNG as well.
Bit depth: This measures how much data (and precision) your image actually holds. For basic bump work, 8-bit is fine. Normal maps benefit from 16-bit PNG. Displacement is where bit depth matters most, you'll want at least 16-bit, and in some cases 32-bit (typically an EXR file, since a true 32-bit PNG doesn't exist). Without enough bit depth, gradients in your displacement map will show visible stair-stepping/banding instead of a smooth transition.
Resolution: Higher resolution textures (4K, 8K) hold up better under two conditions: close-up macro shots, and any time you're scaling a texture up large (like tiling it across a big surface). Low-res textures will pixelate in either scenario; higher resolution buys you room to get closer or scale bigger without it showing.
Cost: Keep in mind, if you are rendering on the GPU (read about CPU vs. GPU rendering here) your entire scene plus any textures you're using has to fit on your graphics card's VRAM. With higher resolution and bit depth, your textures will consume significantly more VRAM.
The short version
- Bump is the cheapest and most primitive way to fake surface detail.
- Normal maps look more realistic because they carry directional information, at the cost of being harder to source.
- Displacement is the only one that's real, capable of changing an object's actual silhouette, but it's also the most expensive, both in setup and in render time.
Which one you reach for comes down to how close the camera gets, whether the silhouette needs to change, and how much render budget you've got to spend.
Level up your KeyShot Rendering skills