CPU Vs. GPU Rendering
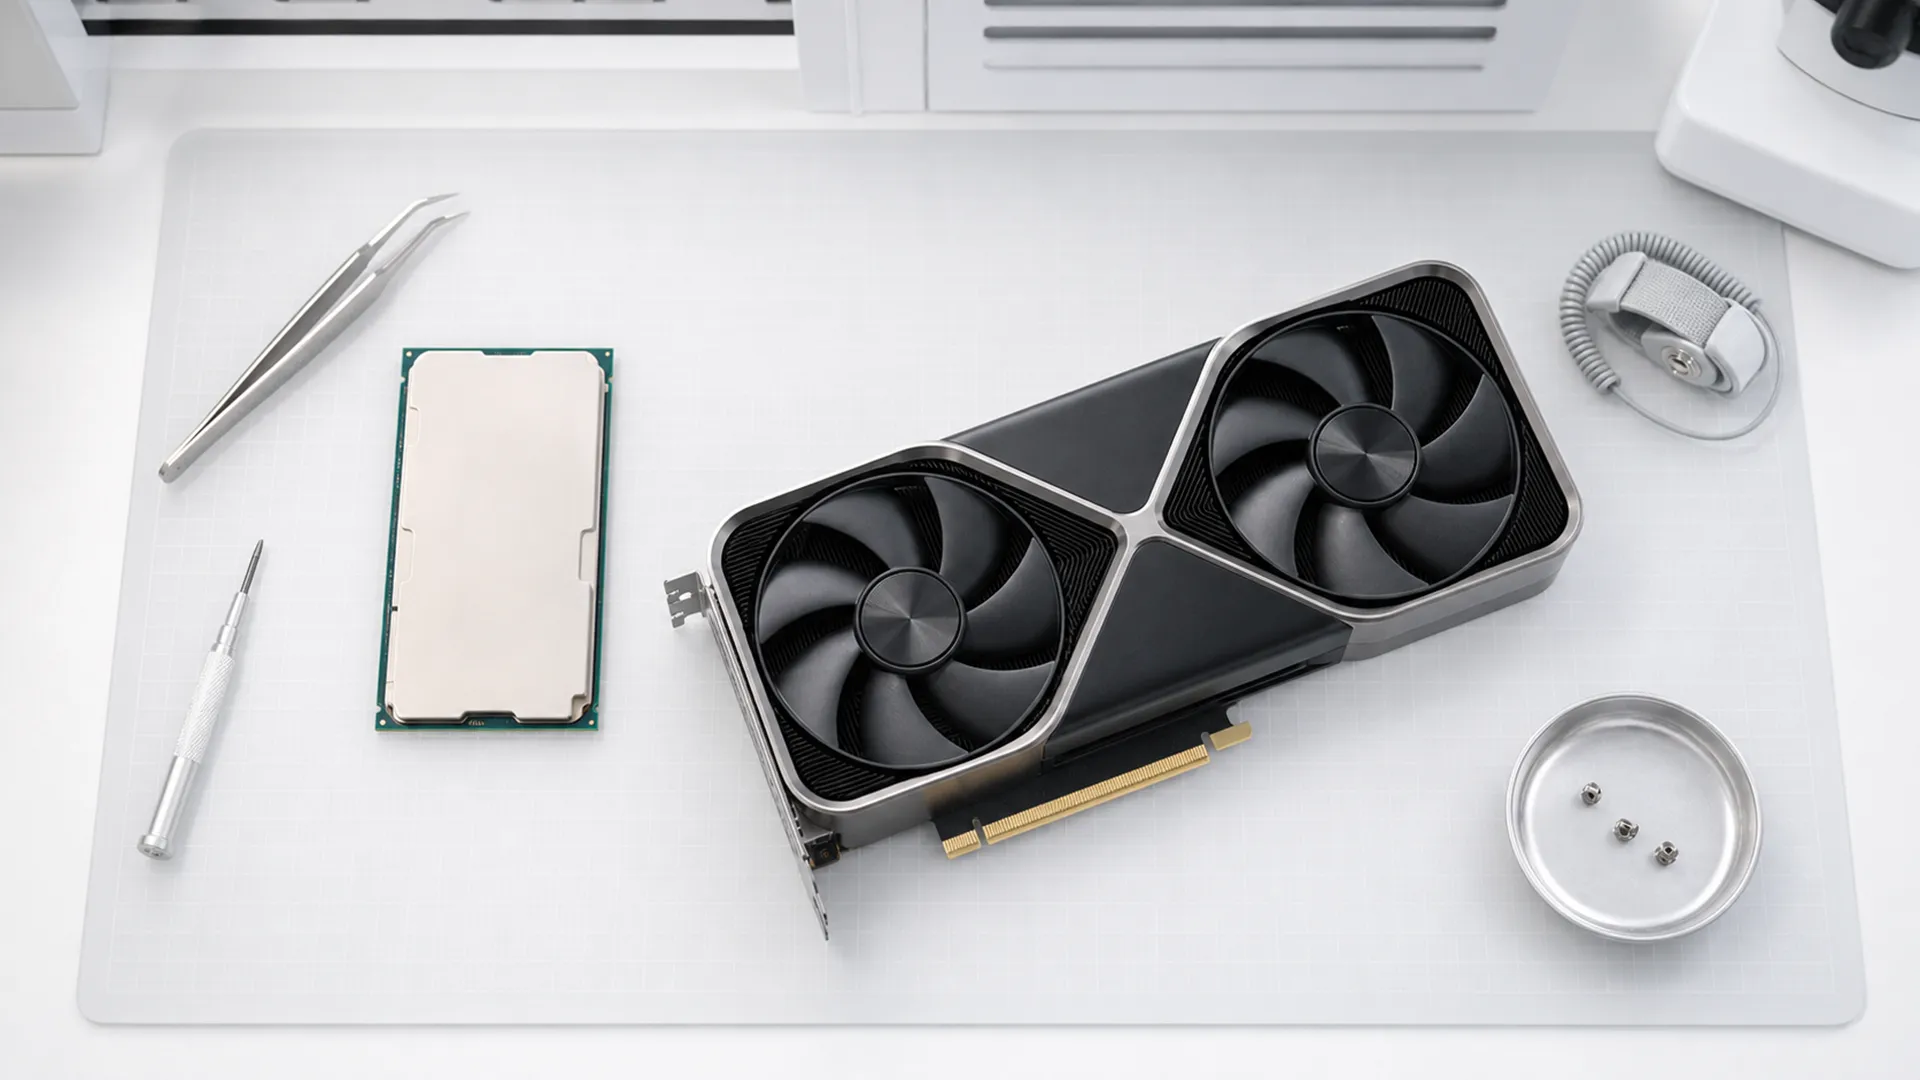
Should you be rendering your scenes in CPU or GPU mode? Here's what's actually different between the two, how they work and what to buy if you're building a machine around this software.
A quick bit of history
For most of KeyShot's life, this wasn't even a choice you had to make. It ran entirely on your CPU, the same processor already running everything else on your computer, on purpose. Part of the original pitch was that you didn't need special hardware. If your computer could run programs, it could run KeyShot.
That changed once GPUs became genuinely competitive at rendering. KeyShot added NVIDIA GPU support with KeyShot 9 in late 2019, later extended that to AMD GPUs, and as of a recent 2026 update, Apple Silicon GPUs too. Now you actually get to choose, and that choice affects speed, cost, and even whether your scene can render at all.
The analogy that explains both modes
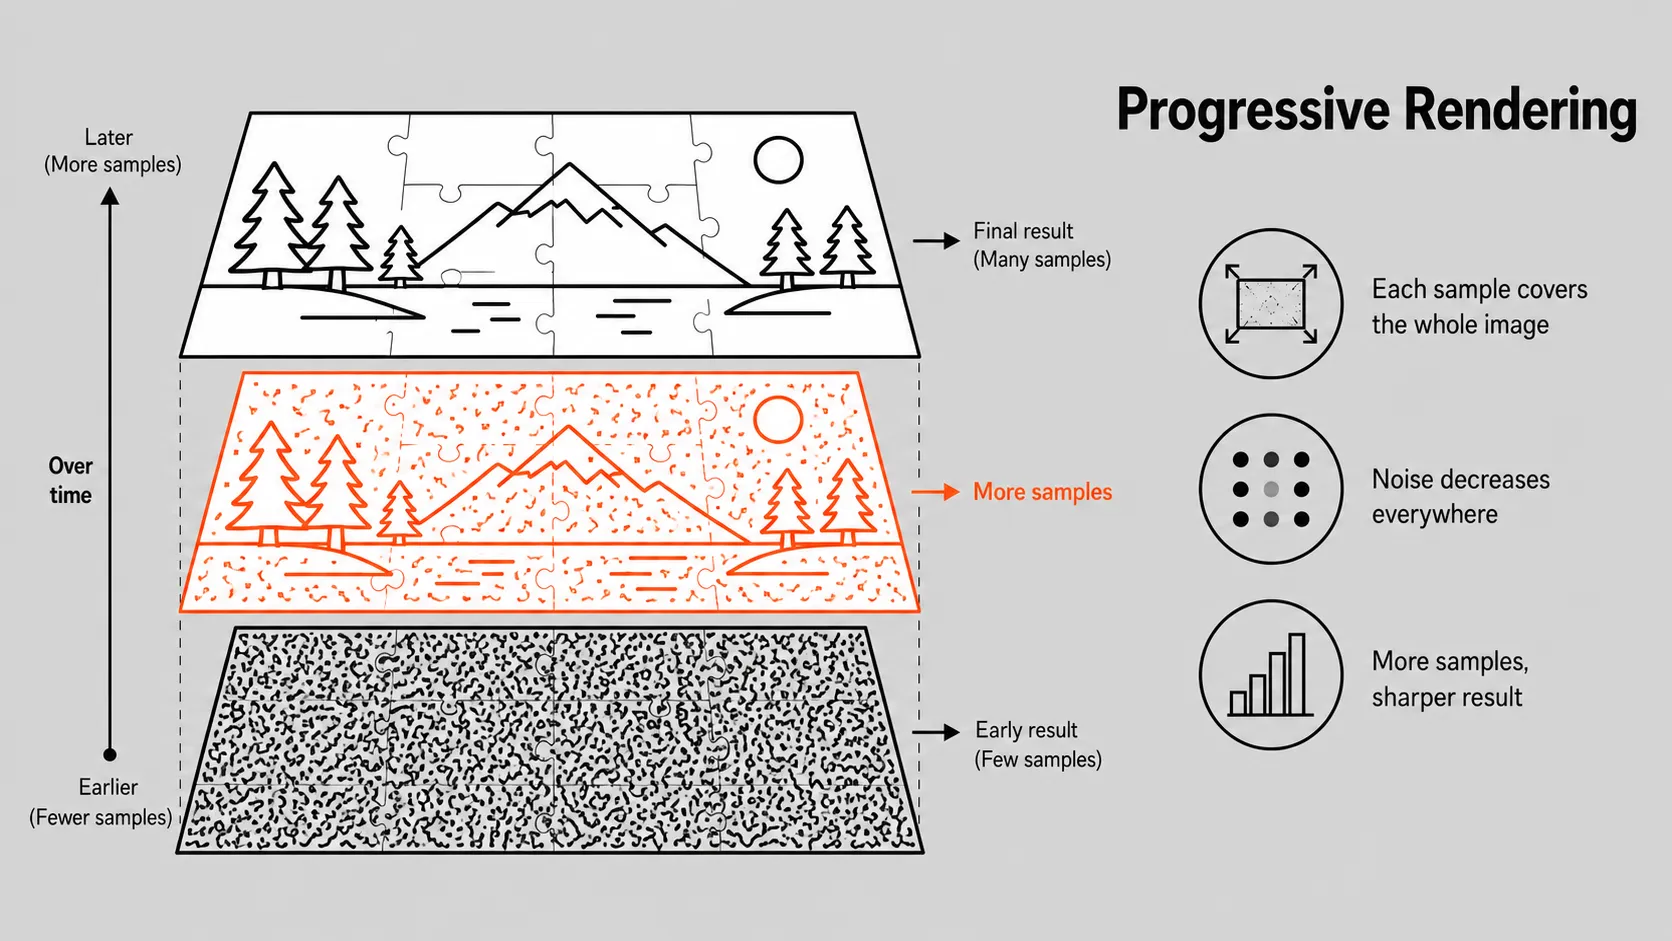
Picture your finished render as a 1,024 piece puzzle. Instead of a delivery truck bringing one finished puzzle piece at a time (which would mean parts of the image show up complete while others stay totally blank), picture each truck delivering a thin, see-through layer that gets laid on top of the entire picture at once. The first layer looks grainy and rough, since there's only one thin layer so far, but every additional layer sharpens the whole image together, not just one corner of it.
That's actually how KeyShot's progressive rendering behaves: the entire image gets less noisy over time, together, rather than finishing section by section. Each of those layers is roughly what's called a sample, one rough lighting estimate across the whole image that gets blended with all the others to build your final result.
Under the hood, what's actually happening is that KeyShot traces the path light takes, in reverse, from a point in your scene back to the camera, and it has to repeat that calculation many thousands of times to build one complete image. Whether you're on CPU or GPU, you're really just deciding who's driving those trucks.
CPU rendering: fewer, smarter trucks
Two things determine how fast your CPU can deliver those layers:
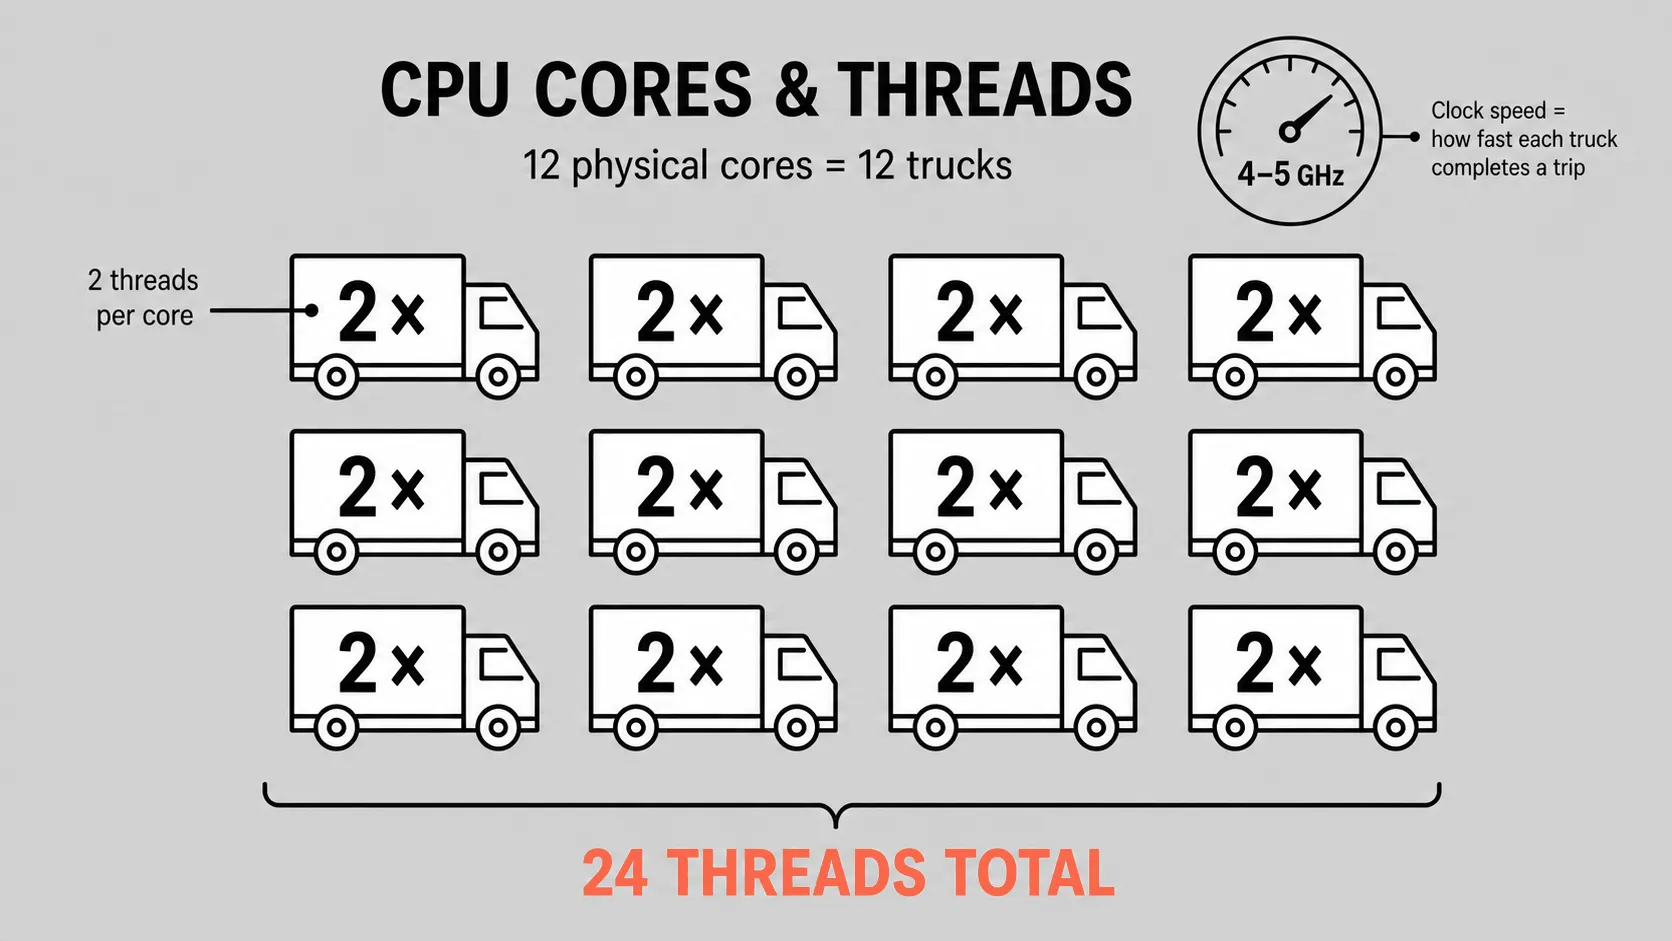
Clock speed: Measured in gigahertz, roughly how fast a single truck can make one trip. Most modern CPUs run around 4 to 5 GHz.
Core count: How many trucks you have running at once instead of one after another. Many CPUs also support hyperthreading, which splits each physical core into two virtual ones, so a 12-core CPU with hyperthreading gives you the equivalent of 24 trucks working simultaneously.
In KeyShot, you can control exactly how many CPU cores get used, both for your real-time preview and your final render. Give it 100% of your cores while other software is running, and expect freezing or sluggish behavior, there's simply not enough left over for anything else. A good habit: keep real-time rendering below full capacity while you're actively working, then close everything else and give KeyShot full access when you're ready for a final render.
One more CPU-only advantage: KeyShot can render NURBS surfaces (read more about NURBs vs. Mesh Data here) directly on the CPU, which isn't possible on GPU. If you do glasswork or other high-curvature transparent materials, that alone is a reason to keep CPU rendering in your back pocket even if you mostly render on GPU.
Level up your KeyShot Rendering skills
GPU rendering: thousands of tiny trucks
Switching to GPU mode is just a toggle, nothing else to configure. Materials, lighting, and shading look the same whether you're on CPU or GPU, with two exceptions: NURBS rendering (CPU-only, as above), and material samples, a setting you can raise on CPU but that does nothing on GPU.
Same delivery analogy, different fleet. Instead of a dozen or two capable trucks, imagine 20,000 much smaller trucks, each one able to carry only a tiny scrap of a layer at a time. Individually, each truck is far less capable than a CPU truck. But there are so many of them working at once that the total delivery speed wins anyway.
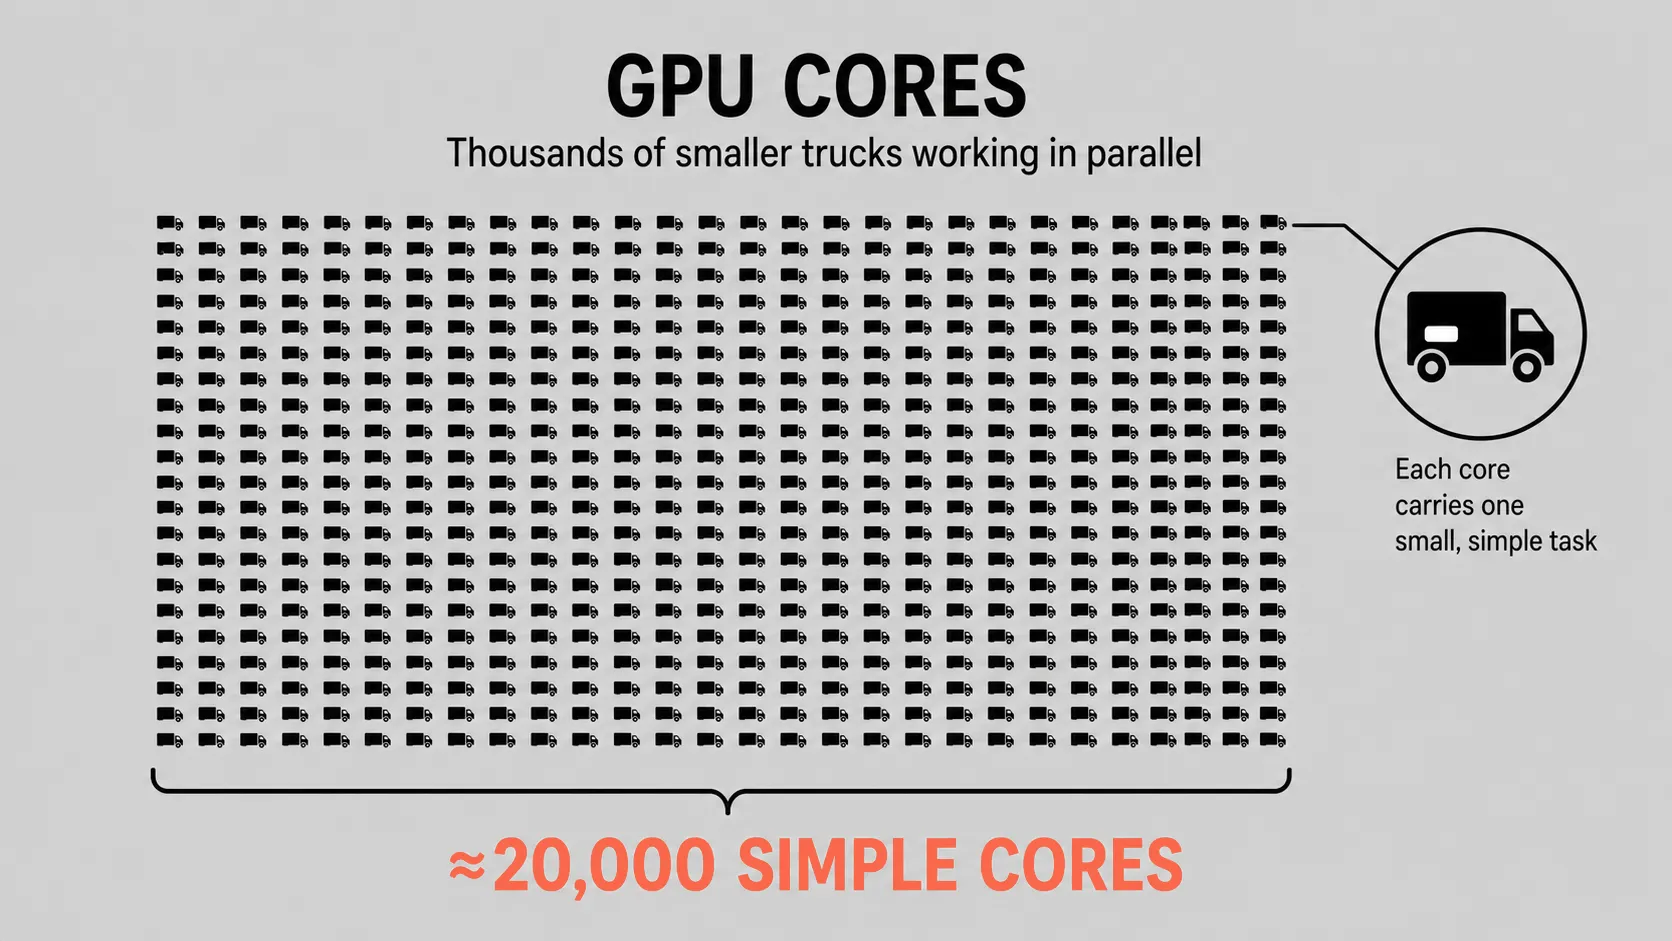
That's the real tradeoff: GPU cores are simpler and can't handle as complex a calculation as a CPU core can, but sheer numbers make up for it. It's also why NURBS rendering stays CPU-only for now, those calculations are too complex for the smaller GPU trucks to carry.
VRAM: the setting that can make your render just refuse to run
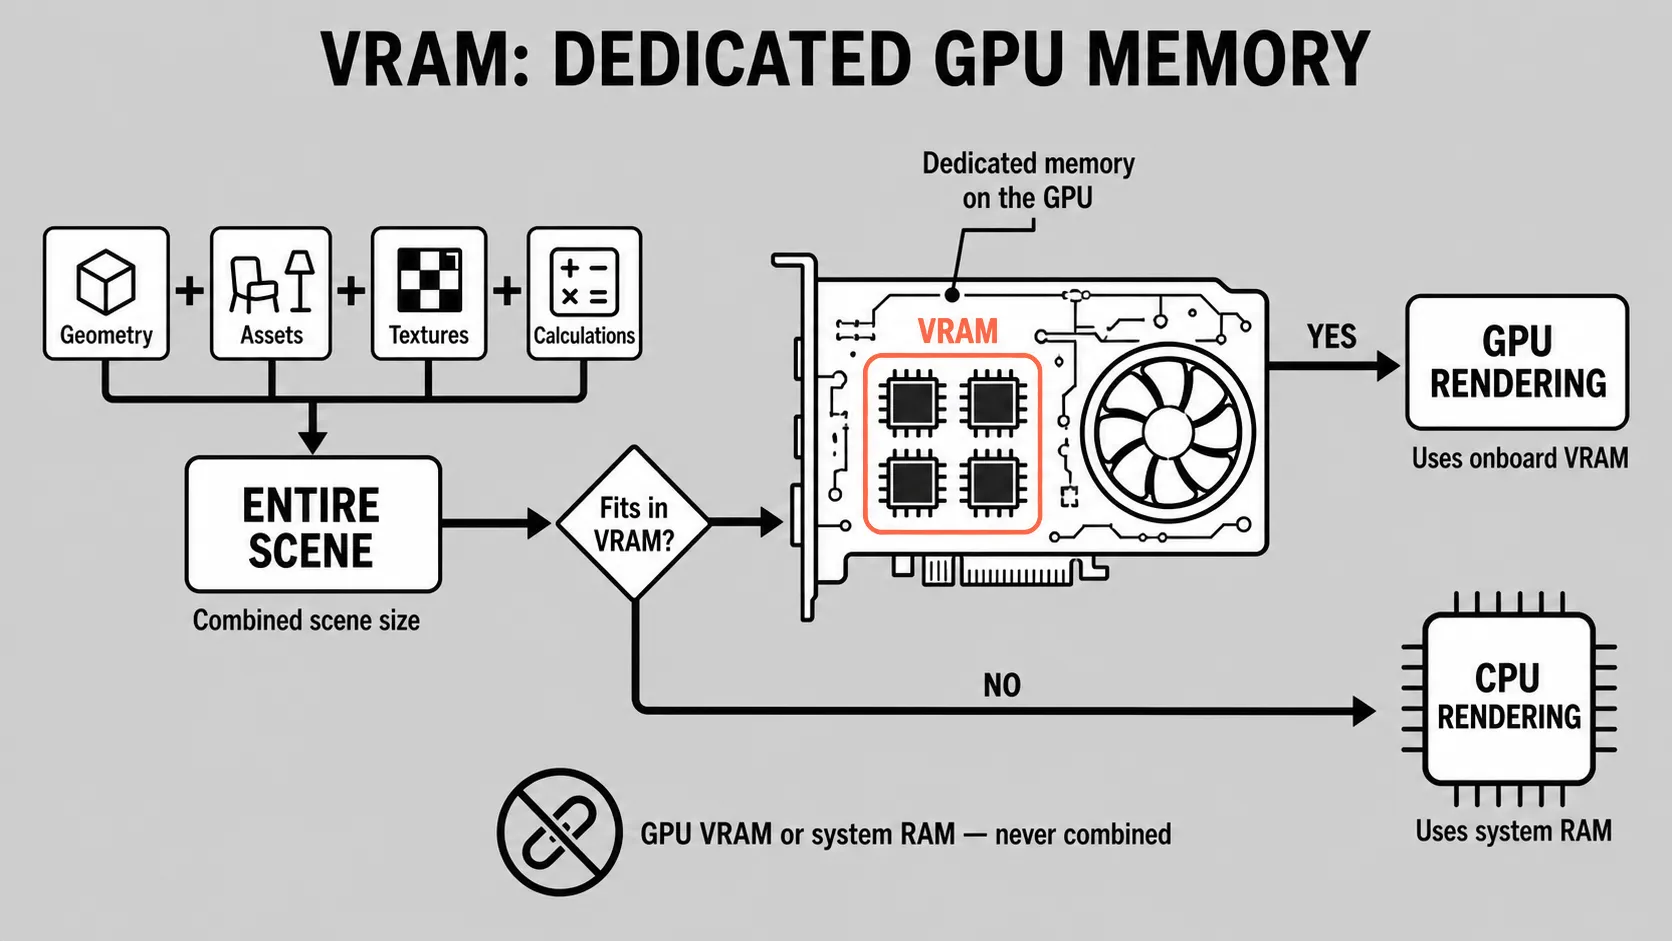
Here's the part that trips up more people than anything else in this article. GPUs don't share your computer's regular memory. Every GPU has its own dedicated onboard memory, called VRAM, and when you render on GPU, your entire scene, every asset, texture, and calculation, has to fit inside that VRAM. Go over the limit, and KeyShot won't slow down, it'll kick you out of GPU mode entirely and fall back to the CPU.
So if you're using something like an NVIDIA RTX 5090, which ships with 32GB of VRAM, your scene needs to stay under that ceiling. There's no combining GPU VRAM with your computer's regular system RAM in KeyShot, unlike some other rendering software, it's strictly one or the other. When you do fall back to CPU, you're leaning on your much larger pool of system RAM instead (most professional workstations run 64GB or more, plenty for even heavy KeyShot scenes).
One interesting wrinkle: newer computer architectures, including Apple Silicon, use something called unified memory, where the CPU and GPU share the same pool of RAM instead of the GPU being stuck with its own smaller, separate allocation. That removes the traditional VRAM ceiling that's historically limited GPU rendering. How much KeyShot's brand-new Apple Silicon beta actually takes advantage of that today is still something I'd treat as evolving rather than settled.
A couple of other practical differences: on CPU, you choose exactly how many cores get used. On GPU, it's all or nothing, 100% or not at all. And modern GPUs run hotter and pull more power than CPUs, so depending on your cooling setup, a GPU-heavy machine can also end up being a louder one.
If you only remember one thing
GPU rendering is faster for almost everything now, but it lives inside a hard VRAM ceiling that CPU rendering doesn't have. Buy the fastest GPU you can afford with enough VRAM for your actual scenes, and keep CPU rendering available as your fallback for anything that won't fit, or for NURBS-heavy glasswork.
What to actually buy
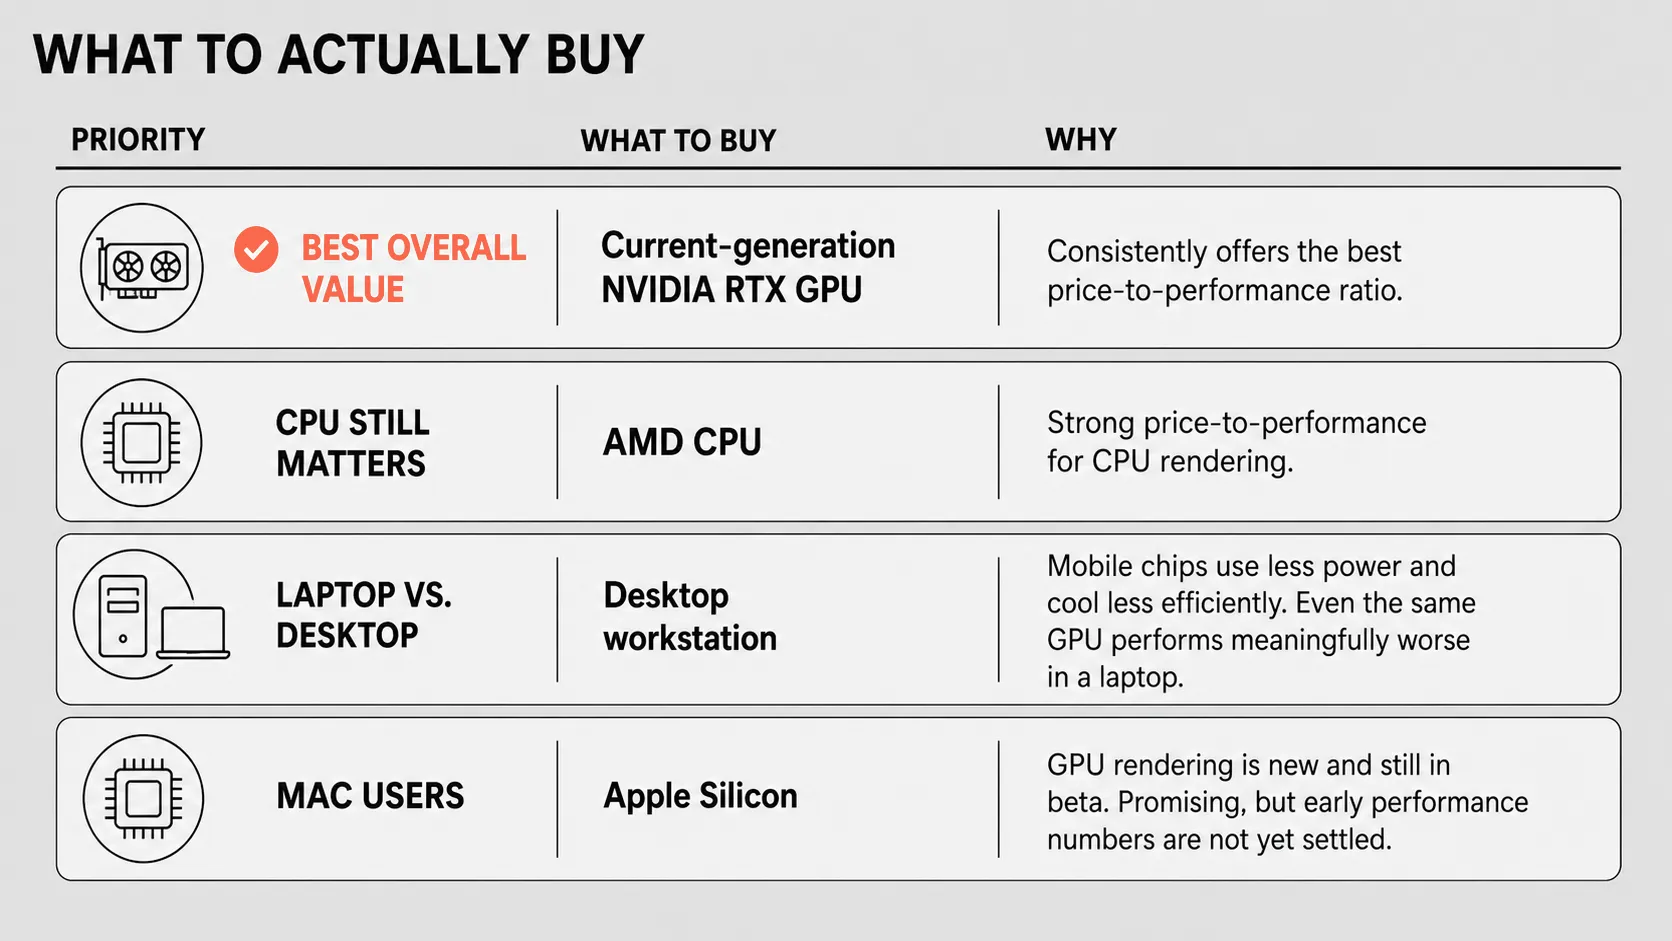
For overall value, a current-generation NVIDIA RTX GPU is the way to go — they've consistently delivered the best price-to-performance ratio. On the CPU side, AMD still holds the edge, generally offering the best price-to-performance ratio in recent years.
When it comes to laptop versus desktop, desktop wins every time if rendering speed matters to you. Mobile chips draw less power and cool less efficiently, so even a laptop GPU with the "same" model name will perform meaningfully worse than its desktop counterpart.
For Mac users, Apple Silicon GPU rendering is brand new this year and still in beta. It's a promising development if you've been stuck on CPU-only rendering, but it's worth holding off on treating early performance numbers as fully settled.
Where to actually buy
If you're in the market for a new workstation and you're in the US, I can't recommend Puget Systems enough. I've partnered with them for years, and my own workstation came from them. What sets them apart isn't just the hardware, it's that they'll actually help you configure a machine around how you use KeyShot specifically, rather than just selling you generic gaming parts. Read more about how to buy the best machine for your needs and what I'm currently running here.
If reliability and support matter most to you, that's who I'd go with. If budget is your primary constraint, a DIY build using parts you pick yourself is a reasonable path, there are plenty of good guides online. And if you're committed to staying in the Apple ecosystem, GPU rendering is finally an option for you too, just know it's early days for that feature.
Cut to the chase and become a KeyShot master!