Ultimate Guide to Rendering Caustics in KeyShot
What are Caustics?
Have you ever wanted to render caustics in KeyShot? Good news, it’s easy. This article will make sure you know everything you need to about rendering crispy caustics in KeyShot.
Light can be reflected diffusely or specularly. Diffuse light is scattered or ‘soft’ and specular light is focused or ‘sharp’. For example, mirrors reflect light specularly, resulting in a perfect reflection. If you sand blast the mirror so it has a rough surface, light will reflect diffusely off it and you won’t be able to see your image reflected in it.
When light is reflected or refracted specularly, onto a diffuse surface, that surface is made visibly brighter in some areas. These bright areas are called caustics.
How to render Caustics in KeyShot
Caustics are easy to render in KeyShot. In the video tutorial below, I’ll walk you through how to set up a caustics-filled scene within KeyShot in just a couple of minutes.
Step-by-Step Instructions
- Import your 3D model. To follow along, just download the file from the File Vault on this website. Once you’ve downloaded the file, unzip it and drag the STEP file into KeyShot’s real-time view.
- Ctrl+g to add a ground plane in KeyShot and change its material to diffuse.
- Ctrl+5 to add a plane and move it up and to the side to use as a light. Change it to a spot light.
- Change the glass to a dielectric material (or similar) and choose a light transmission color.
- In the lighting tab, choose product mode and enable caustics.
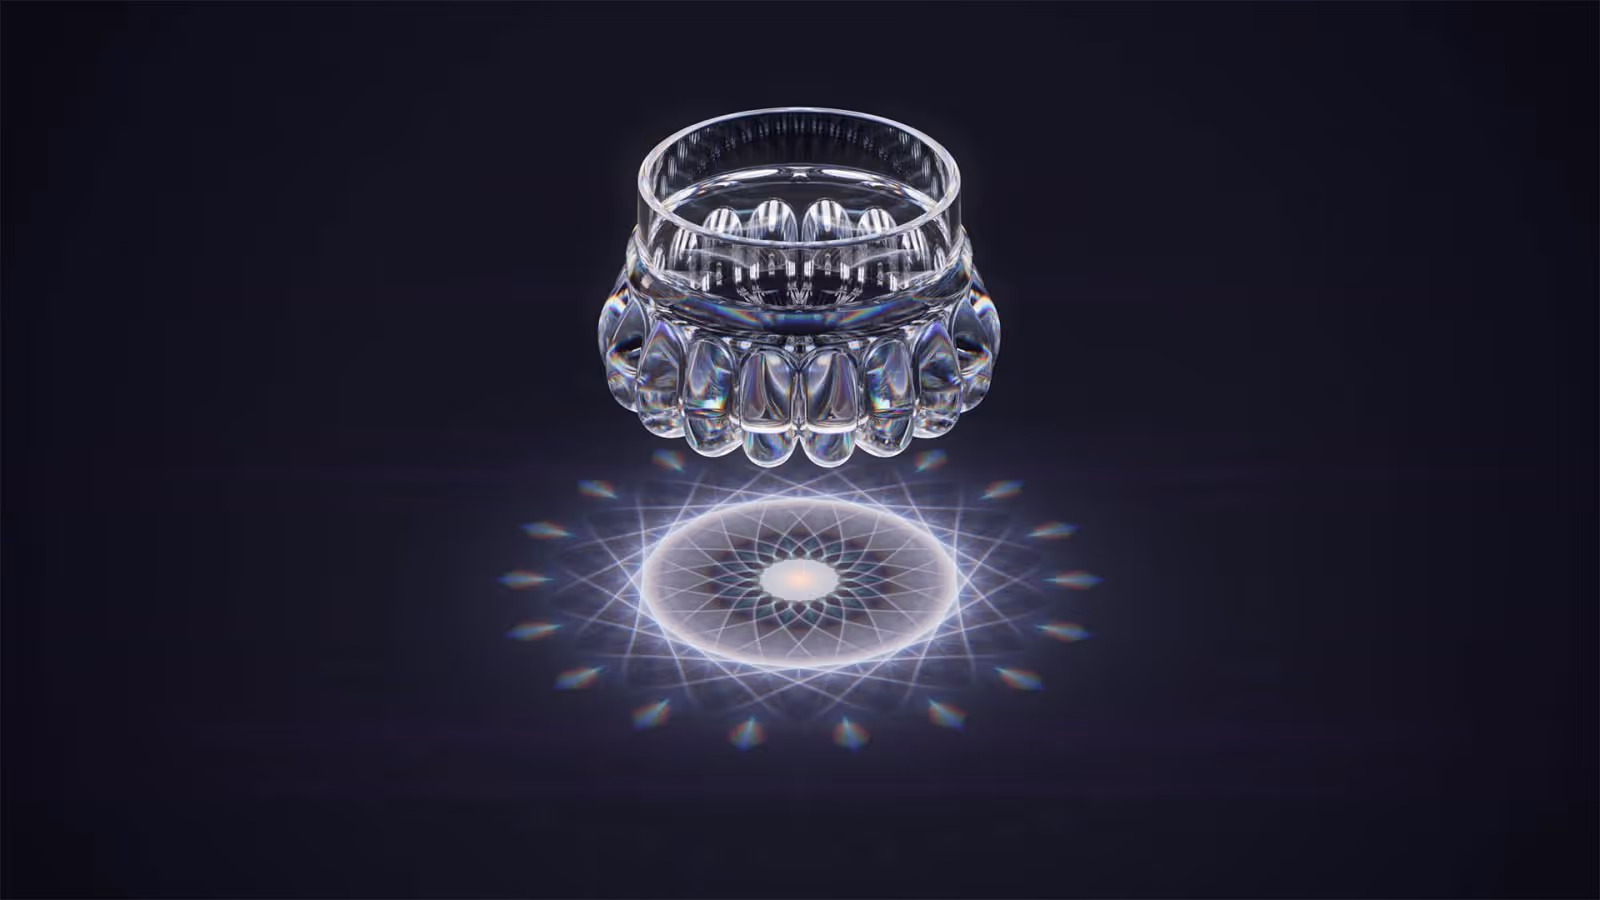
- Adjust the rest of your scene settings to create the image you want. Adding bump textures to the glass will create variation and detail to the caustics.
What Shapes Caustics Appearance?
Caustics typically form a distinct pattern or shape. This form is determined by the surface the light is reflected off of. In the case of transparent materials such as water and glass, the characteristics of the material they are refracted through will determine the appearance of the caustics. These characteristics include index of refraction, surface shape or texture, color and the thickness and shape of the object itself.
What Causes Caustics?
To create caustics, you need:
- A bright, small light source
- A highly specular material such as a glass or polished metal
- A diffuse surface underneath the specular object
A very common and readily-available small, bright light source is the sun at mid-day (assuming a clear sky). Fill a glass with some water and take it outside and place it on a rough surface. You should see caustics appearing within the shadow cast by the glass.
You could also recreate this indoors if you don’t have access to a bright, cloudless sky. Dim the lights if you can and place your glass of water on a table (as long as it’s not glass or too reflective). Use the LED on your smartphone and point it at the glass. Move the light source around to affect the shape and placement of caustics on the table.
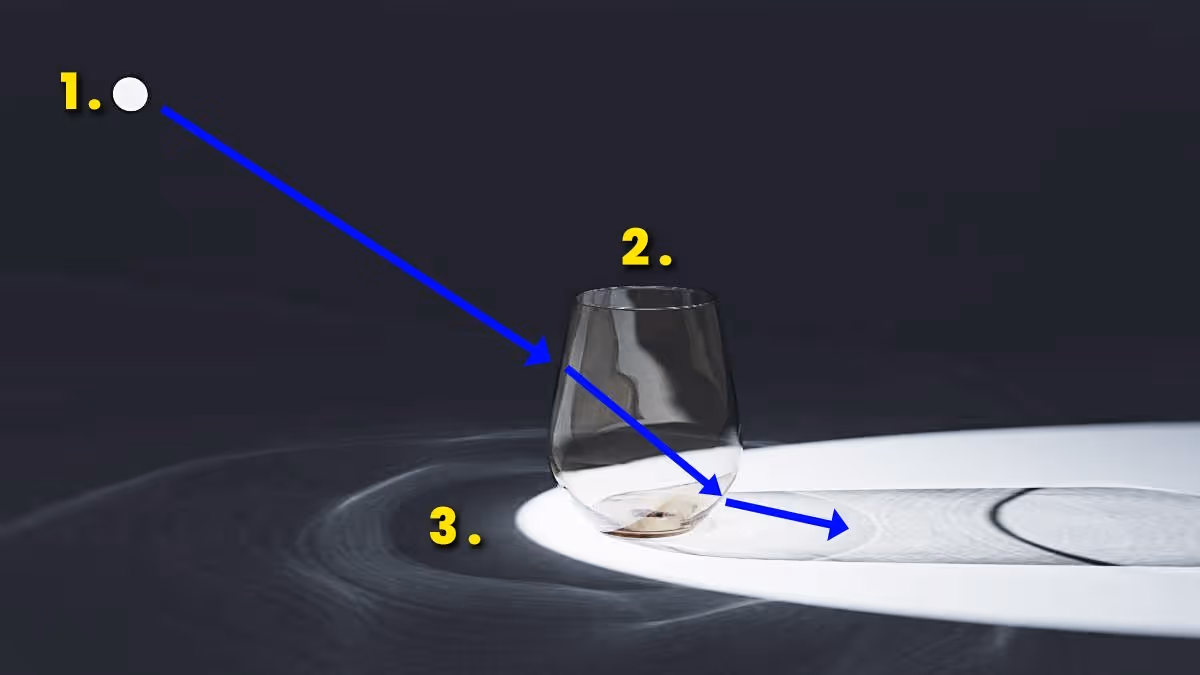
The material (being highly specular) reflects most of the light hitting it. The shape of the glass (especially if it’s somewhat cylindrical in shape) will reflect the light rays to a singular or small area on the table. The light scatters across the table diffusely, illuminating the surface in some areas more than others. The same phenomenon happens with refraction as well.
Level up your KeyShot Rendering skills
Examples of Caustics
Caustics occur both in nature as well as in our manufactured world. Here are some common examples of caustics you’ve probably witnessed yourself.
Rainbows – Due to the shape of water droplets in the sky, the light is refracted, making the different wavelengths of light visible to our eyes.
Water Ripples – When sun rays pass through a wavy surface of a pool, caustics are cast onto the bottom of the pool surface or onto nearby above-water surfaces, like the underside of a bridge.
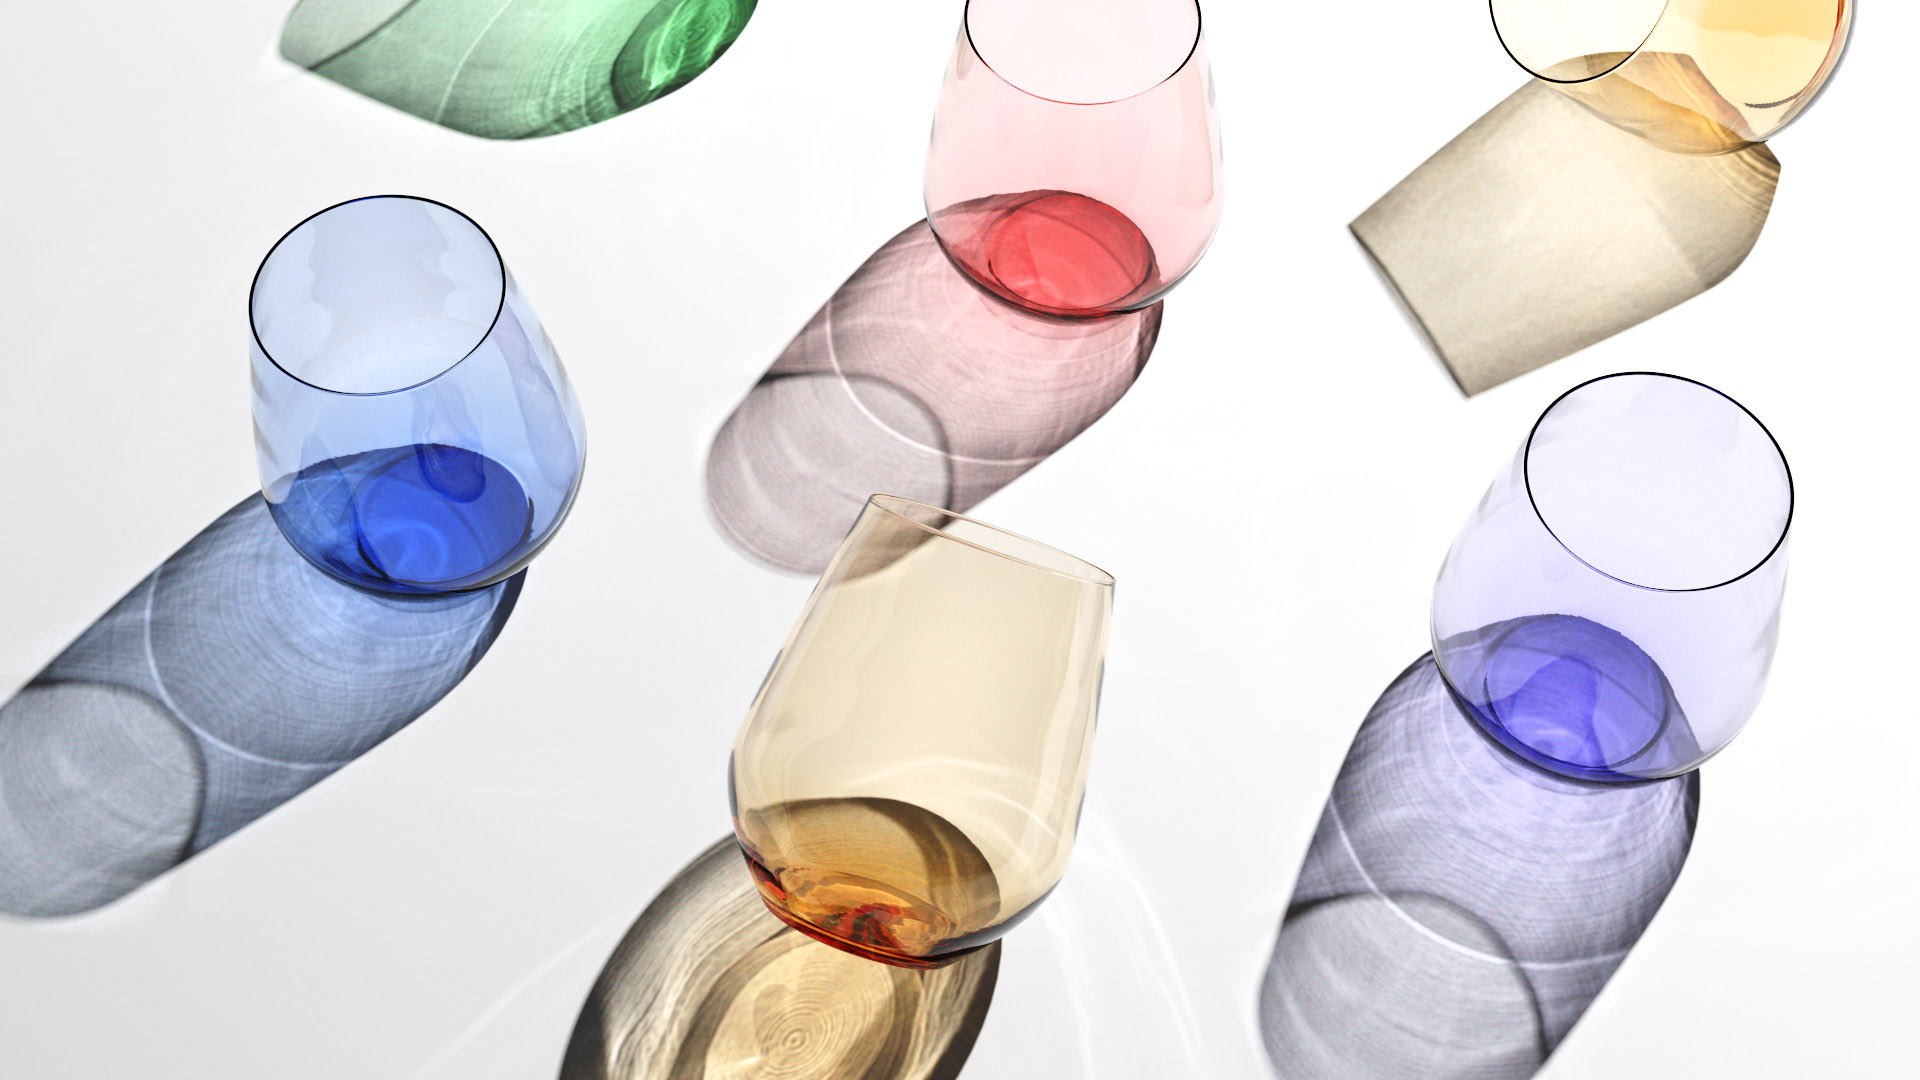
Beverage Glasses – When enjoying a cool, refreshing beverage outside on a hot, sunny day, you’re likely to see caustics the sun casts onto a nearby surface as it’s refracted through your drink.
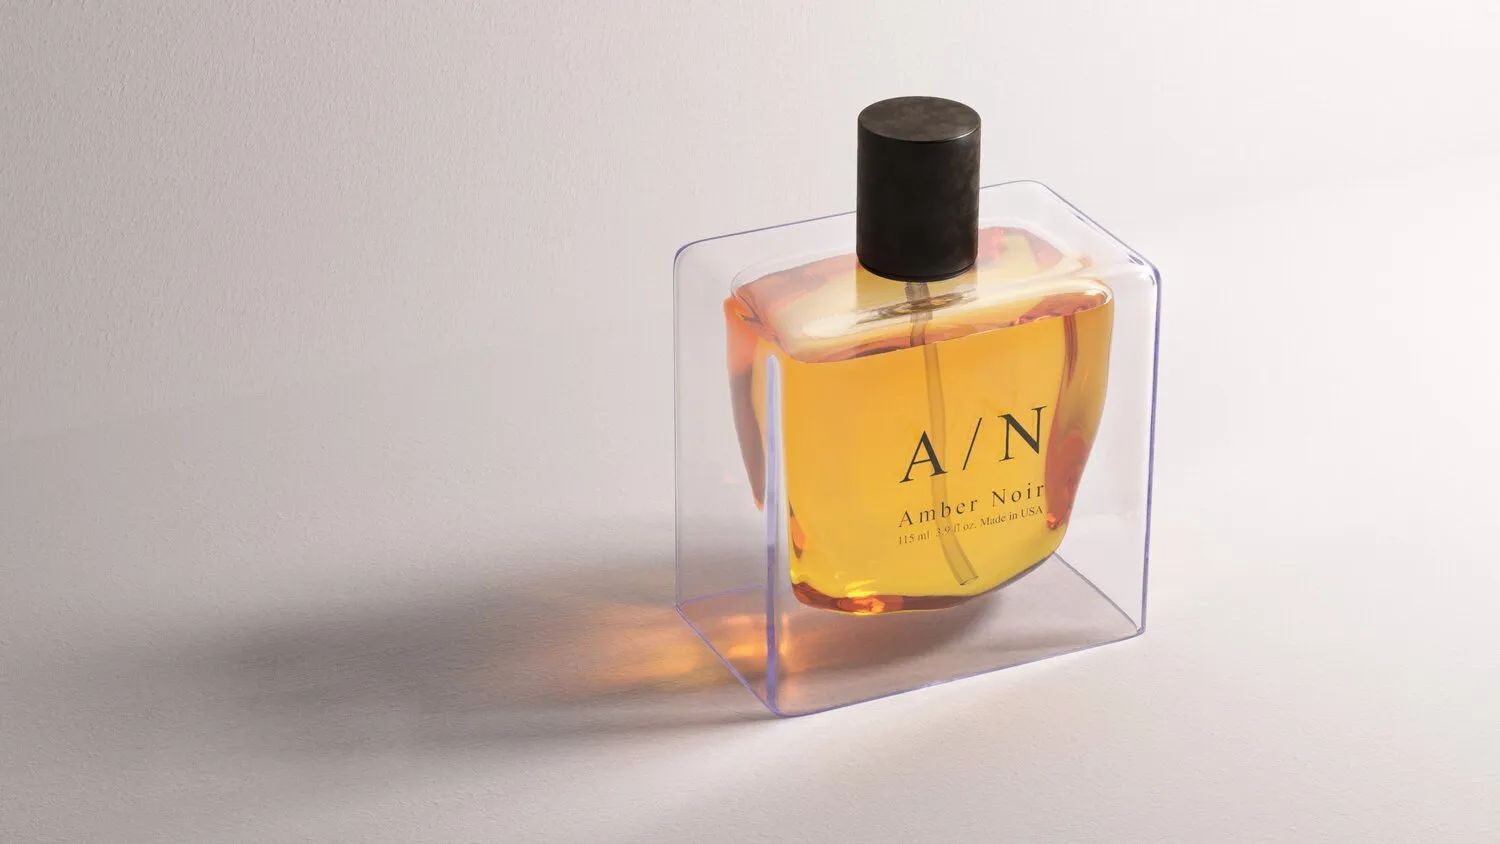
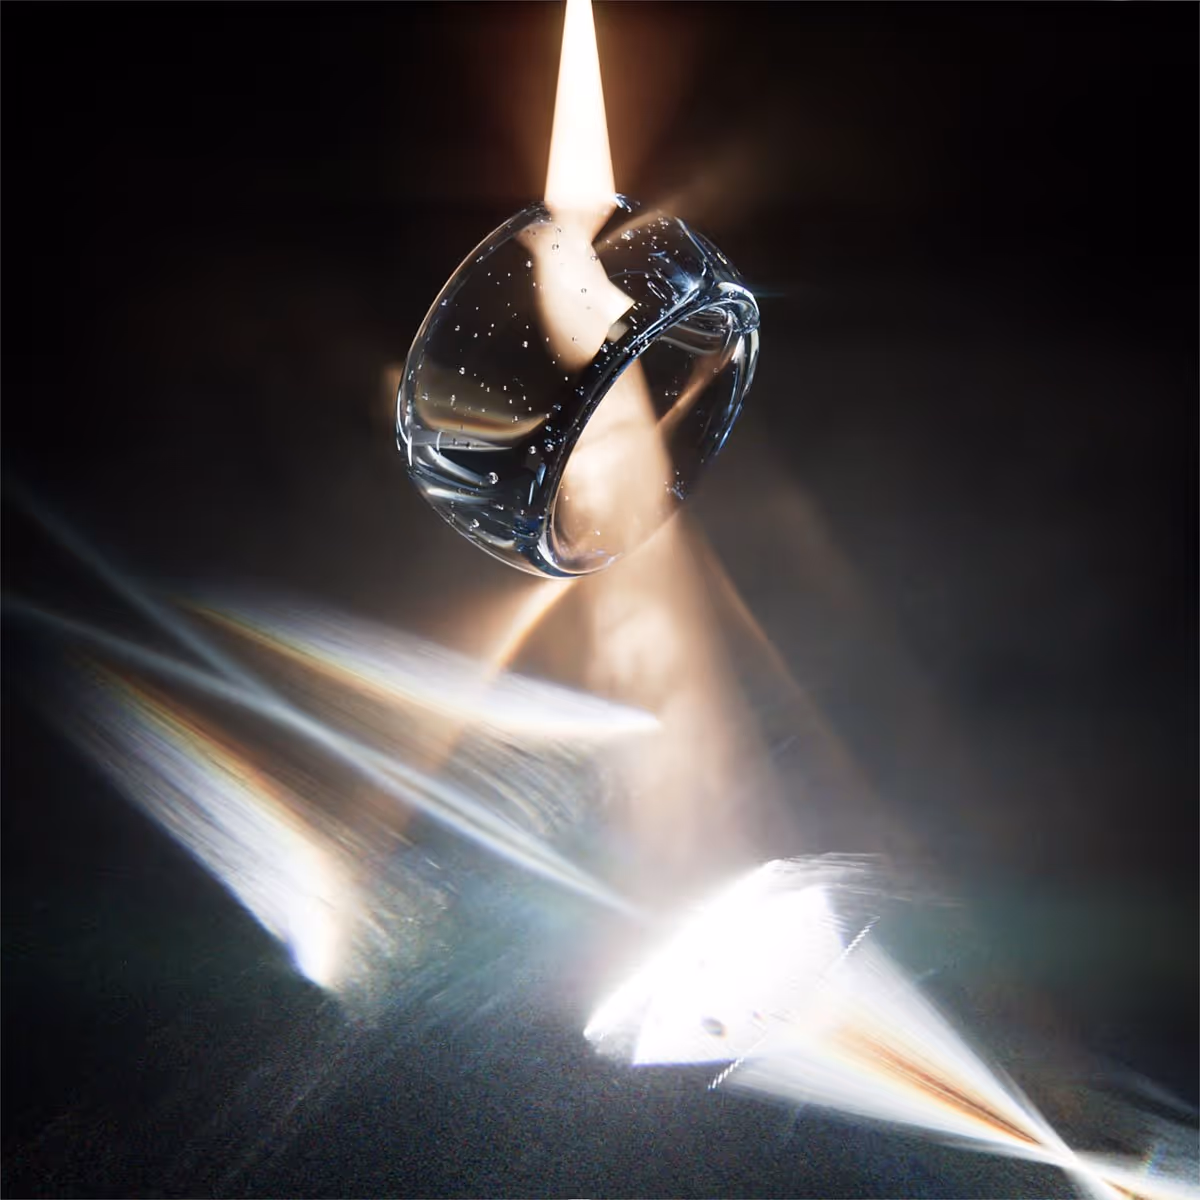
Jewelry – With highly polished metals such as rings, if a small light hits it correctly, you’ll see both dispersion taking place (rainbow-colored reflections from diamonds) and caustics from the polished metals. This is why jewelry stores use small, bright LEDs to illuminate the jewelry!

3D Rendering and Caustics in KeyShot
3D rendering and computer graphics have come a long way. It’s now pretty common for most render engines to support caustics rendering. KeyShot has supported caustics rendering for many years and continues to do a great job at it with minimal effort from you, the user.
It’s worth mentioning that scenes with caustics enabled take significantly longer to render than scenes without caustics. It’s worth making sure you actually need them before enabling the feature.
Caustic Noise
Rendering caustics in KeyShot in Product Mode will also result in blotches of light throughout the scene that can be hard to remove. While rendering in Interior Mode seems to help reduce this effect, it’s still worth mentioning. While KeyShot renders caustics quickly, cleaning up noisy artifacts from the caustics can take very long, so it’s something to keep in mind.
The Importance of Caustics
If enabling caustics in your scene, then why would you bother? Two reasons.
First, they look cool. It’s as simple as that. They’re beautiful and can really spice up an image. You’ll see them used most frequently when advertising luxury goods like watches, jewelry, perfume and spirits.
Second, it’s more realistic. Caustics occur in the real world. If you want to produce imagery that looks realistic, it’s got to be physically-accurate. And to exclude caustics would be to take away from an image’s realism.
So, while you pay for caustics in render time, in many cases it’s worth having them enabled. Whether you’re chasing realism or want to add some bling to your image, caustics are one way to get there!
Volumetric Caustics in KeyShot
In addition to the basic caustics already mentioned, volumetric caustics also occur naturally. Rather than caustics appearing on a diffuse surface, caustics can appear throughout a sparse medium or volume. An easy example is fog or dust.
Because the use-cases are quite few and far between, it’s not as common for all render engines to support volumetric caustics. However, this is something KeyShot is also capable of.
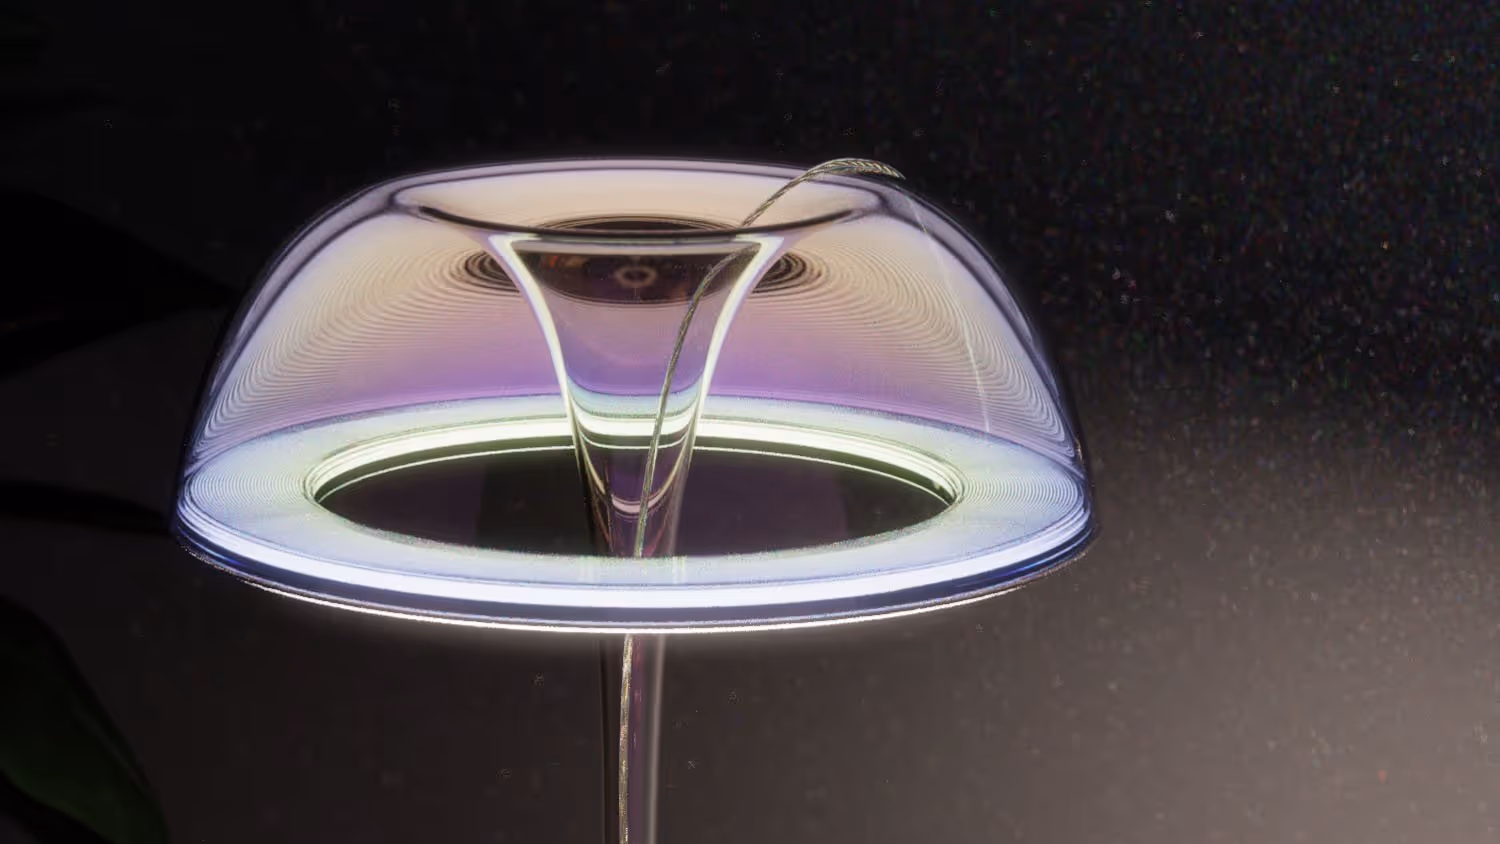
My friend David, owner of Vyzdom has created a fun, ongoing series of images showing off creative use of caustics. Check out the beautiful example below, where he demonstrates caustics being rendered in a volume of scattering medium inside of KeyShot.
In order to create this volumetric effect inside of KeyShot, you follow the same process outlined in the tutorial and article above with the addition of a scattering medium.
The simplest way to do this in KeyShot is to add a cube primitive to your scene (ctrl+1) and resize it so that the light source, object and ground are all encompassed within. Next, change the cube material to a scattering medium and adjust the material settings so you’re left with a very sparse scattering medium (i.e. low density).
Finally, to create a smoky, steamy effect, you can use a texture to control the density of the scattering medium. Be prepared to let this render for a very long time. It will start out very noisy/grainy with lots of fireflies. In time, this should resolve.
In the example above, David combined two images. One where the volume had a uniform density, and another where he used a VDB (smoke simulation volume) to create the ‘puffs’ of smoke that are more dense.
Dispersive Caustics in KeyShot
Another phenomenon that can occur in caustics is dispersion. This occurs when light refracts through a specific shape (like a water droplet) and the various wave lengths spread out. This leads to a rainbow effect where different colors of light are seen. When this occurs in caustics, the result is called dispersive caustics. Read more about dispersion here.
Can KeyShot Render Caustics?
Yes, KeyShot can render caustics and volumetric caustics quite well. As long as all the elements required to produce caustics are present and caustics is enabled in the lighting tab within KeyShot, you should see caustics in your real-time view.
If you choose to render caustics in KeyShot it’s worth playing with the denoising settings and different light sources. You’ll likely get the best results with a point or spotlight in KeyShot.
Frequently Asked Questions
How do you add color gradient to glass in KeyShot
A color gradient is a texture. You can use an image-based or procedural texture. If you’re using the Glass Solid material in KeyShot, you may have noticed there is not a texture input for color. Instead, change your material type to Dielectric. This is also a glass, but has some more options to customize it. You will see a checkerboard to the left of the Transmission (color) value. Either drag your texture onto that checkerboard or right-click it and choose color gradient.
How do you make frosted glass in KeyShot
To make frosted glass in KeyShot you must add lots of roughness. However, with a recent update in KeyShot 10, we’ve gotten multiple surface scattering. So, you’ll want to enable that checkbox to help ensure the glass is bright and frosted. I’ve made a blog post and tutorial on how to create frosted glass in KeyShot here.